Welcome to Board.Vision Tutorials. In this tutorial, we will walk you through the steps to cancel a schedule.
Important Note: The Board.Vision web app is optimized and supported for desktop use on Google Chrome (version 65.0 and later) and Microsoft Edge (version 87.0 and later). Please note that this support is intended for desktop environments and is not applicable to mobile devices.
To cancel a schedule:
1) Log in to your Board.Vision account using your registered email address and password.
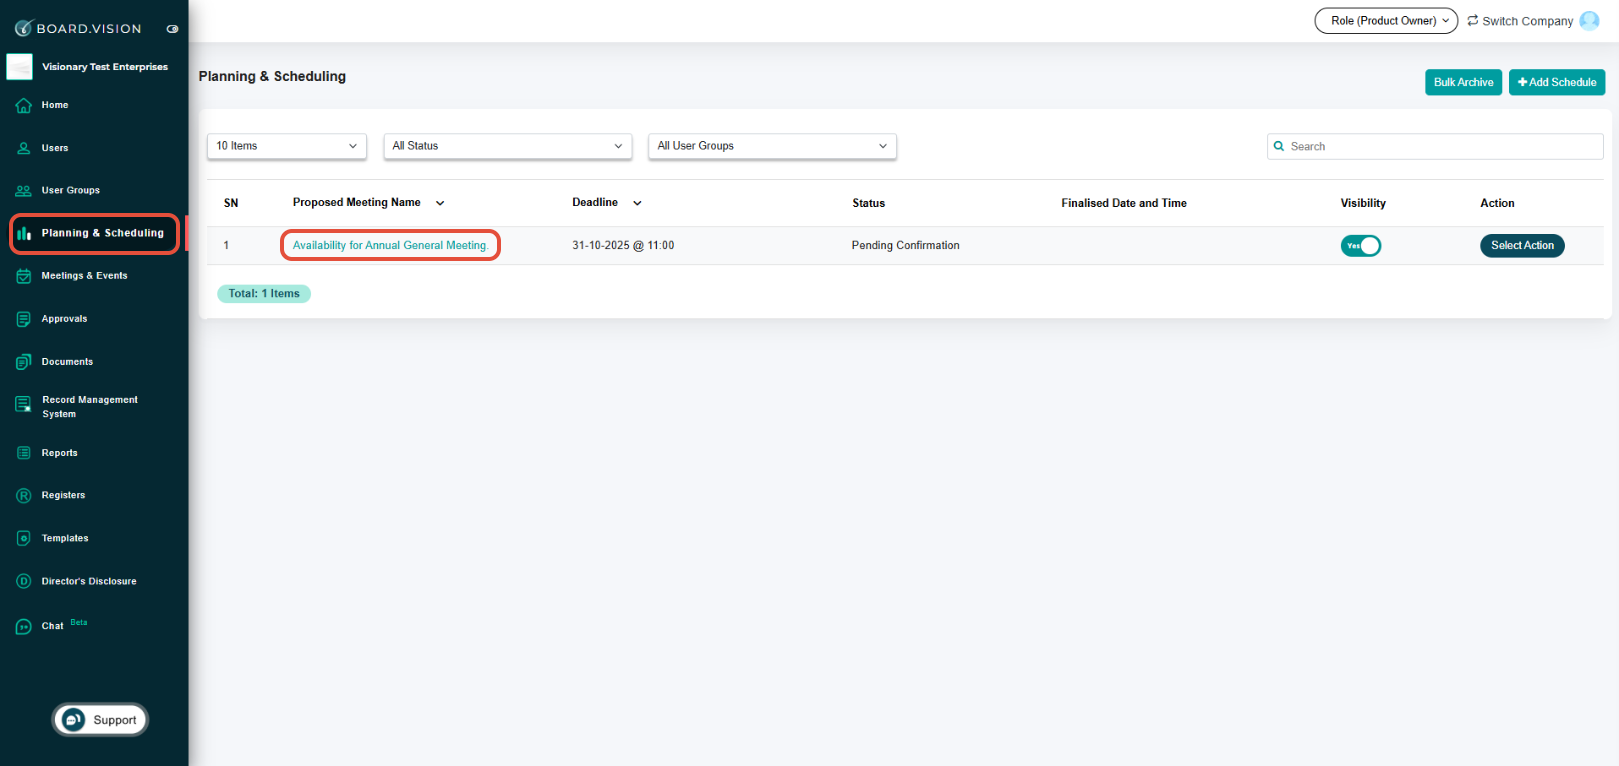
2) From the left navigation menu, go to Planning and Scheduling, and click on the Proposed Meeting Name with a Pending Confirmation status.
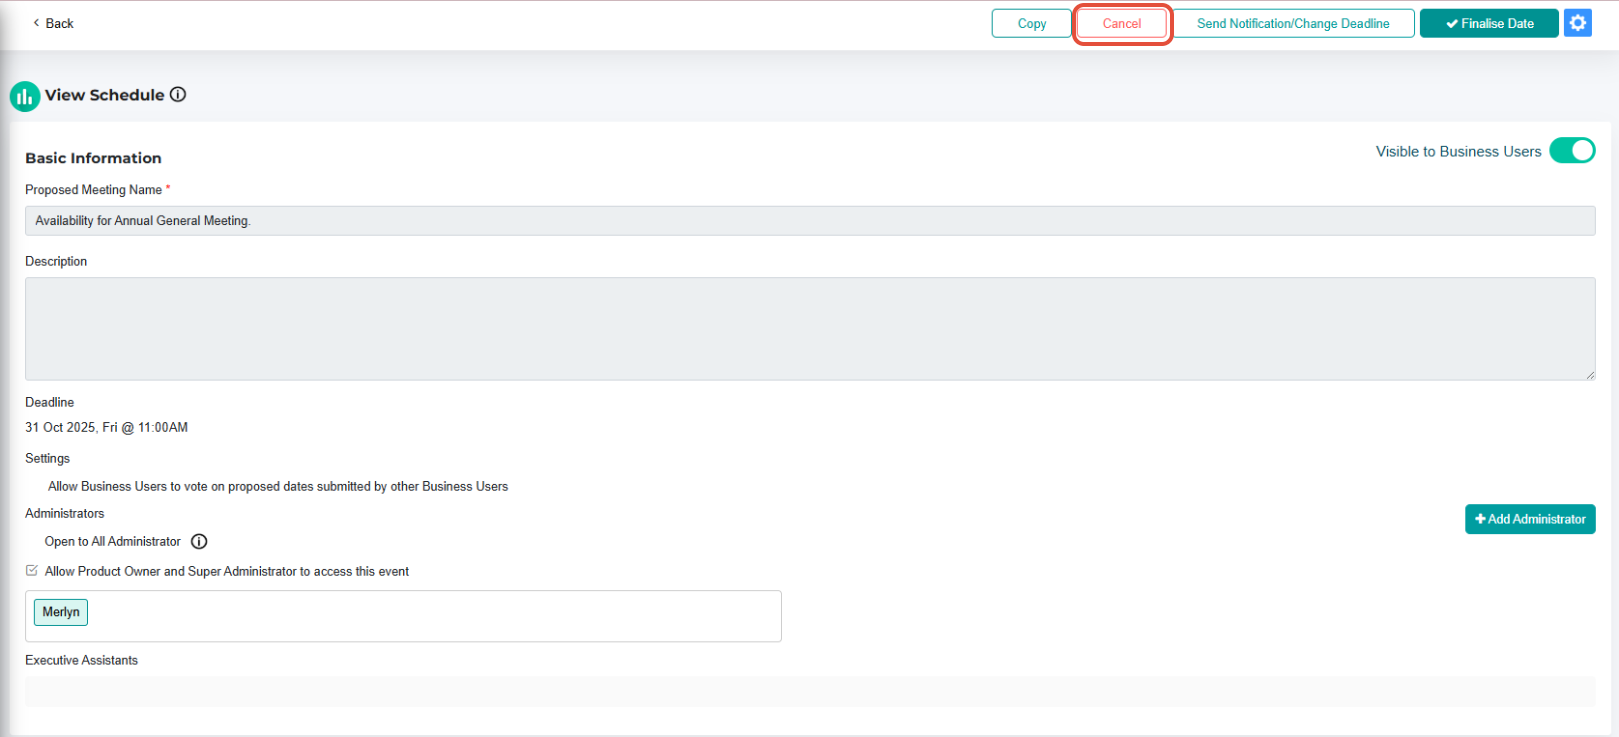
3) On the View Schedules page, click on Cancel.
4) On the Cancel Schedule pop-up window, enter the Cancellation Reason.

5) Select the following options:
a) Notify via Email and/or Push Notification.
b) Under the Notify Participants & Executive Assistants section, select both Business User and his/her PA if you wish to notify them.
Then, click on Confirm.
Important Note: To expand the list of Participants & EA, click the arrow down icon next to the Notify Participants & Executive Assistants header.

You have completed the tutorial on how to cancel a schedule.
If you face any issues, please reach out to our Board.Vision Customer Success Team at support@board.vision or +65 6909 7100 and we will be happy to help.
Our hotline operating hours are from Mondays to Fridays 9:00 AM to 6:00 PM SGT (excluding public holidays).
Was this article helpful?
That’s Great!
Thank you for your feedback
Sorry! We couldn't be helpful
Thank you for your feedback
Feedback sent
We appreciate your effort and will try to fix the article