Welcome to Board.Vision Tutorials. In this tutorial, we will walk you through the steps to deactivate a user. You can deactivate a user with an Invitation Sent, Invitation Expired, and Active status.
When deactivating a user, the user's account will be both deactivated and archived.
Important Note: The Board.Vision web app is optimised and supported for desktop use on Google Chrome (version 65.0 and later) and Microsoft Edge (version 87.0 and later).
To deactivate a User:
1) Log in to your Board.Vision account using your registered email address and password.
2) From the left navigation menu, go to Users, and click on the User's Name with Invitation Sent, Invitation Expired, or Active status.

3) On the View User page, click on the Deactivate button.

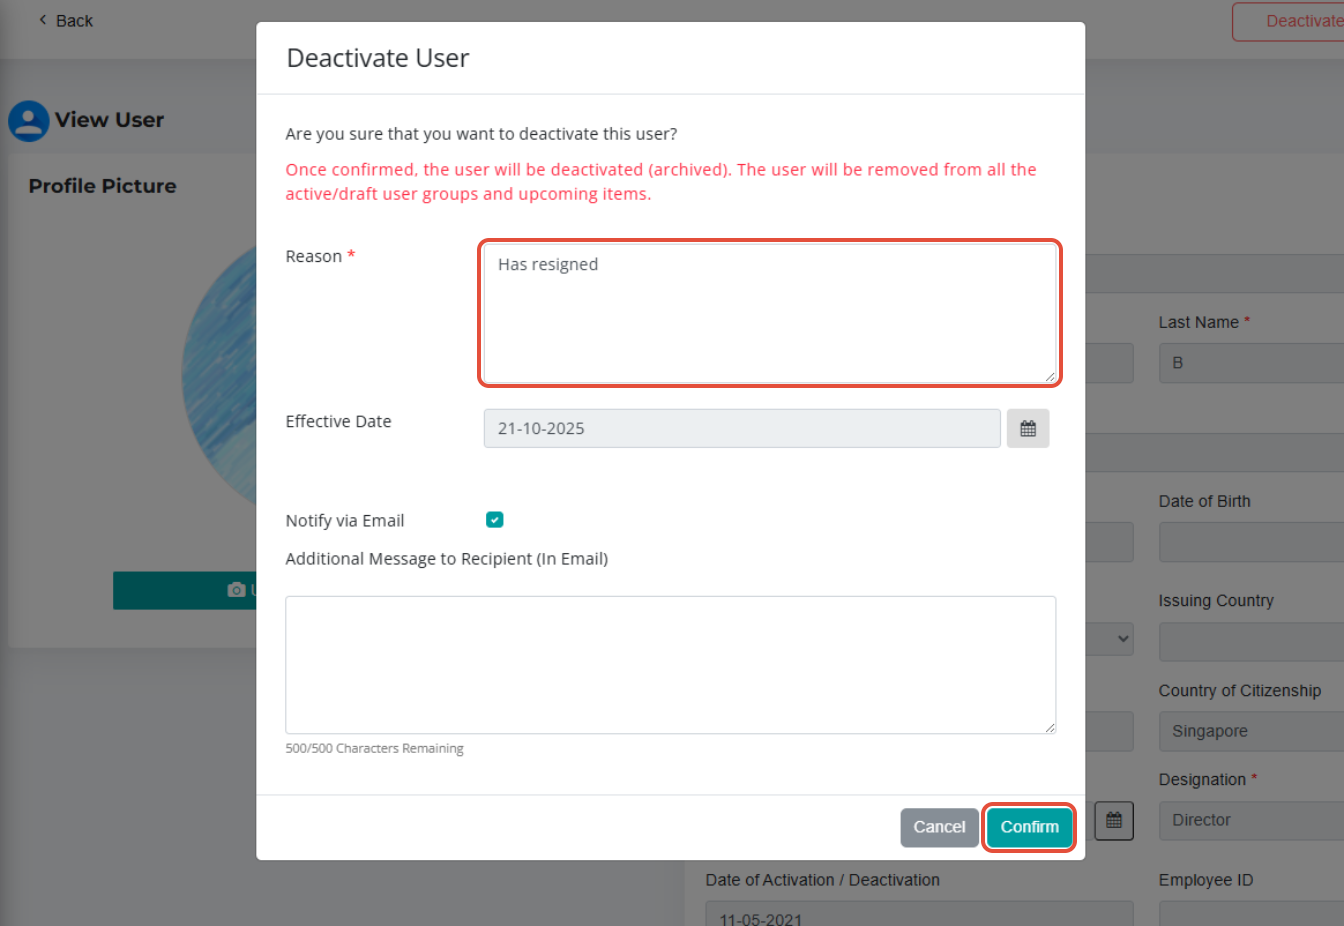
4) On the Deactivate User pop-up window, enter the mandatory Reason, then click Confirm.
Important Note: The Effective Date is automatically set to the date the Administrator deactivates the user, and this field cannot be edited.
5) Once the user has been deactivated successfully, the reason you have entered will be reflected under the Deactivated / Reactivated Reason section on the View User page.

6) You can find the deactivated user under the Archived User page. Click on View Archived User to view.
Important Note:
This action includes the removal of the user’s record from all active/draft user groups and upcoming events.
This feature is available depending on your Administrator role. Please refer to the Administrator Access Rights Matrix for more information.
You have completed the tutorial on how to deactivate an existing User.
If you face any issues, please reach out to our Board.Vision Customer Success Team at support@board.vision or +65 6909 7100 and we will be happy to help.
Our hotline operating hours are from Mondays to Fridays 9:00 AM to 6:00 PM SGT (excluding public holidays).
Was this article helpful?
That’s Great!
Thank you for your feedback
Sorry! We couldn't be helpful
Thank you for your feedback
Feedback sent
We appreciate your effort and will try to fix the article