Welcome to Board.Vision Tutorials!
In this tutorial, we will walk you through the steps to create a meeting manually within the Board.Vision platform.
Important Note: The Board.Vision web app is optimised and supported for desktop use on Google Chrome (version 65.0 and later) and Microsoft Edge (version 87.0 and later).
To create a meeting manually:
1) Log in to your Board.Vision account using your registered email address and password.
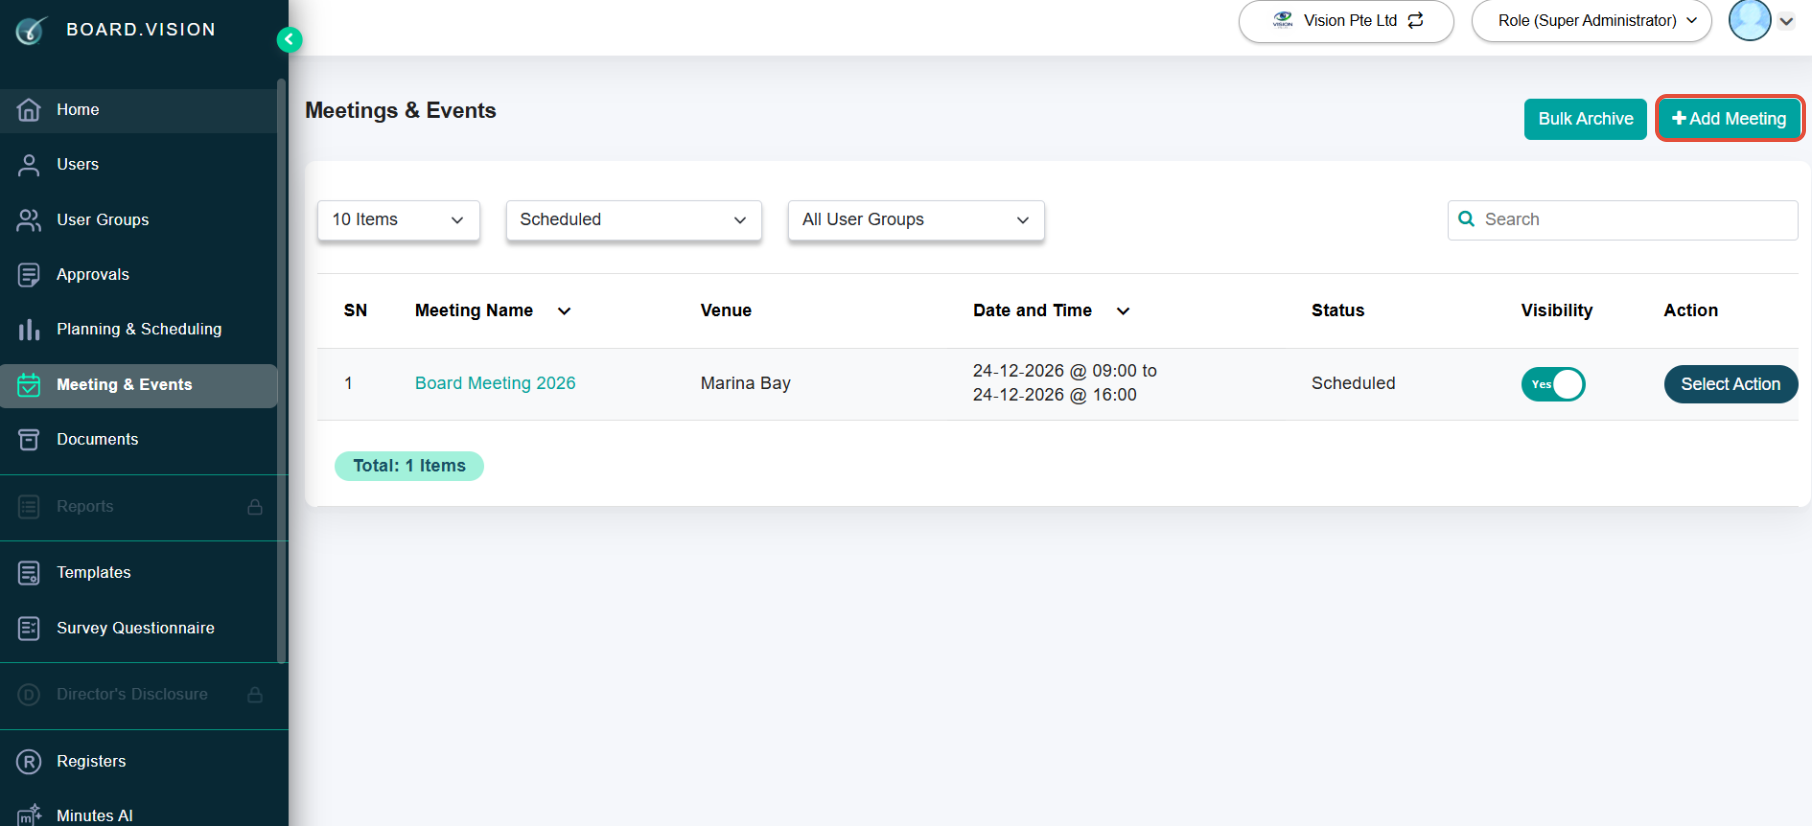
2) From the left navigation menu, go to Meetings & Events and click +Add Meeting.
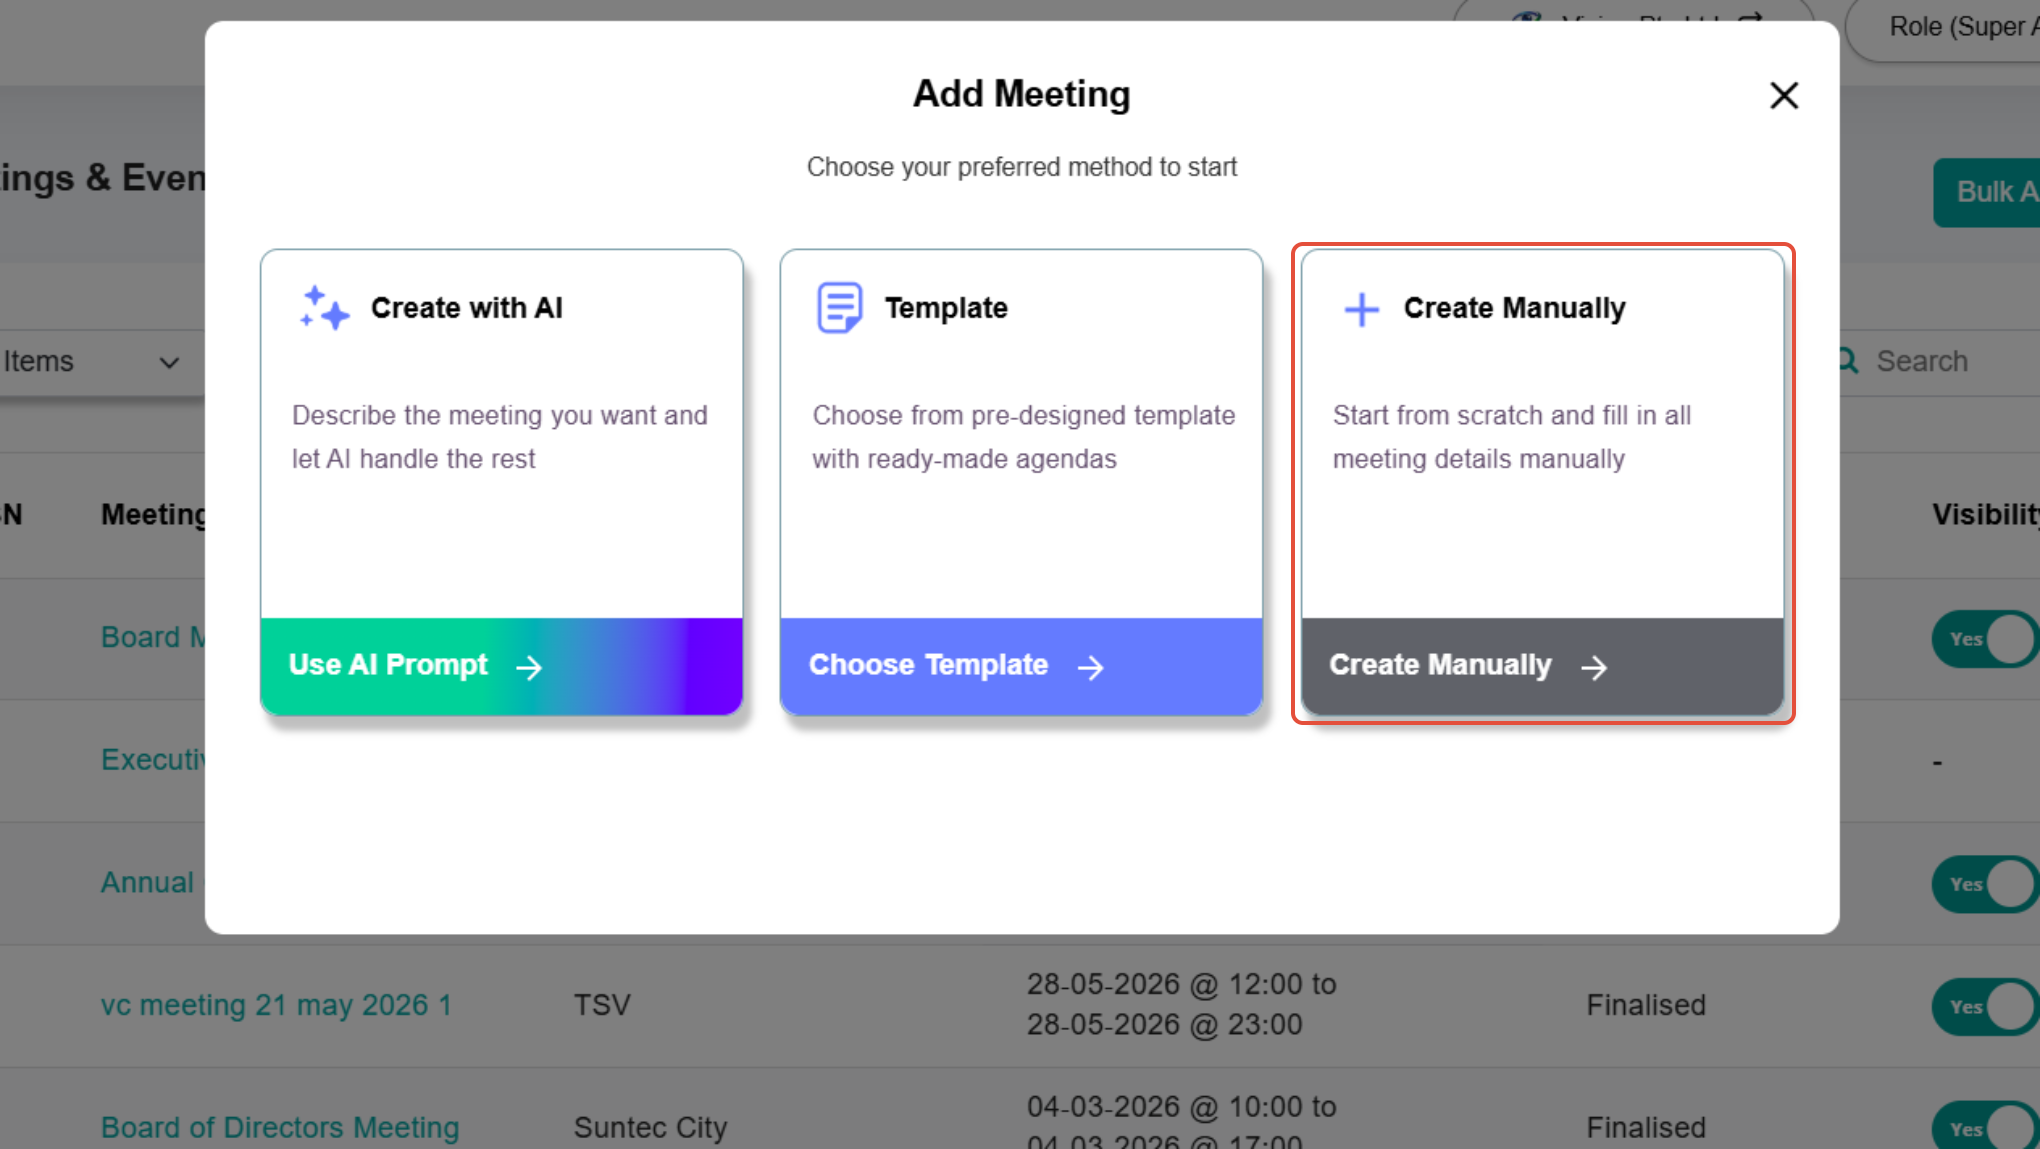
3) Click Create Manually to start from scratch and enter all meeting details manually.
4) Enter the required fields, including Meeting Name, Description, Start Date & Time, and End Date & Time.
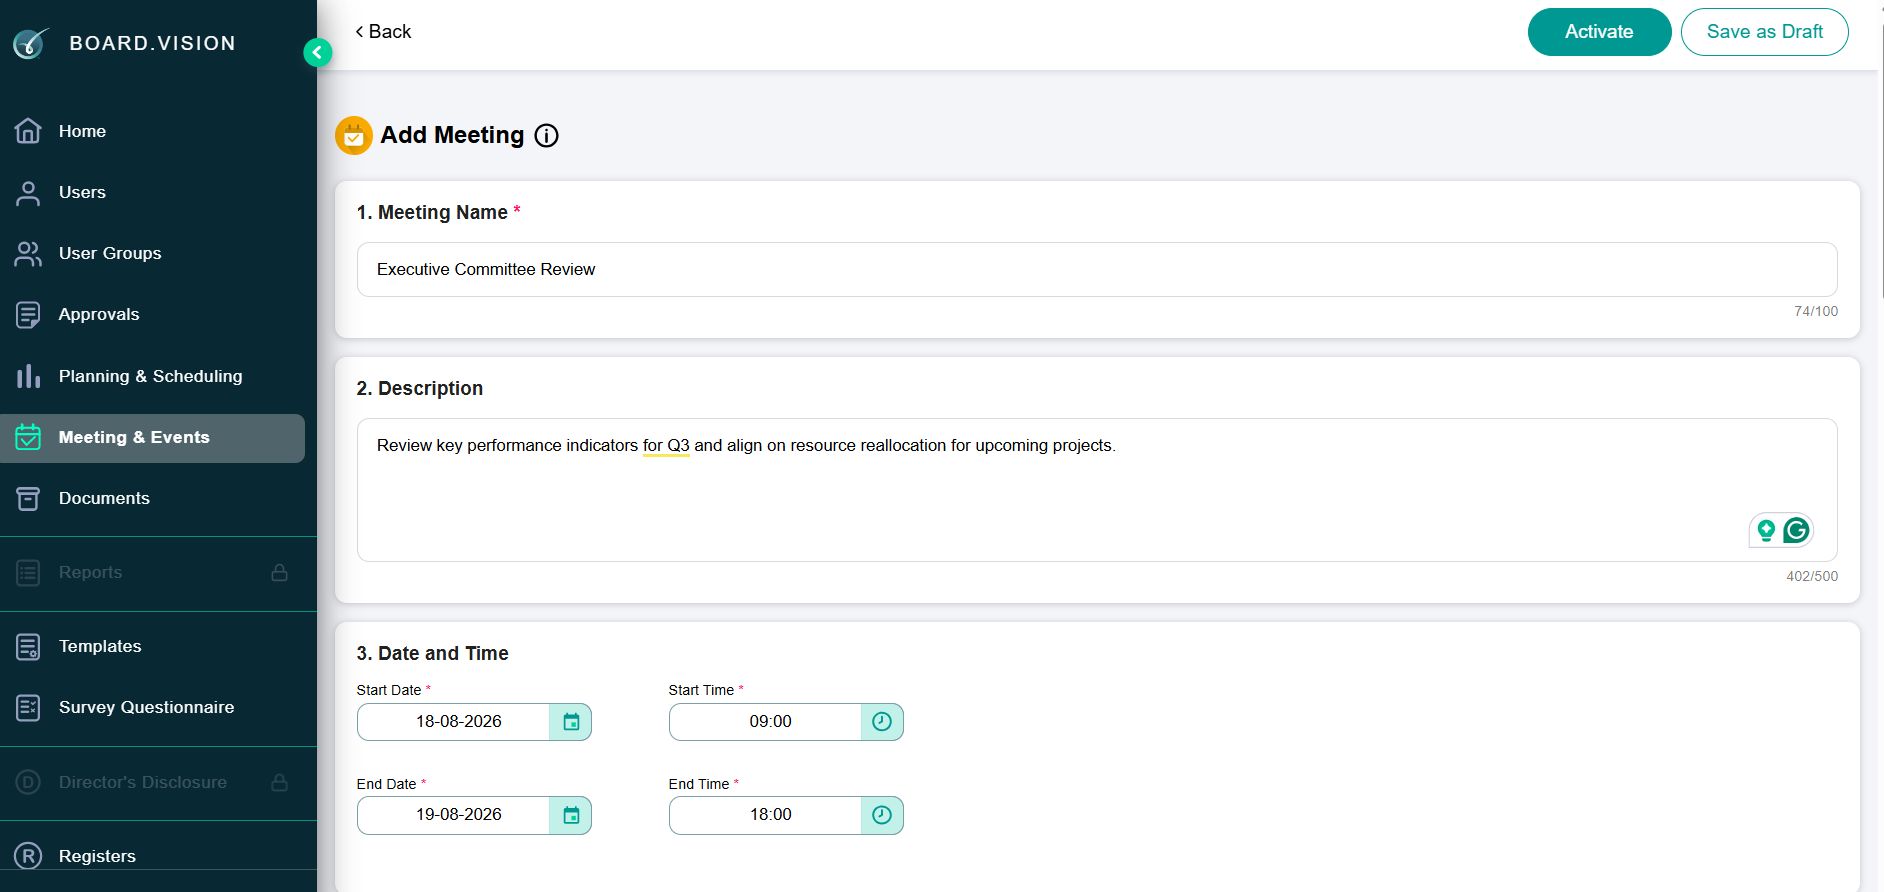
Update the Meeting Details
5) Enter the meeting location details:
Venue: Specify the physical meeting location (e.g., Main Conference Room, 80 Bendemeer Road).
Online Meeting Link: Enter the link for virtual or hybrid meetings (e.g., Microsoft Teams, Zoom)
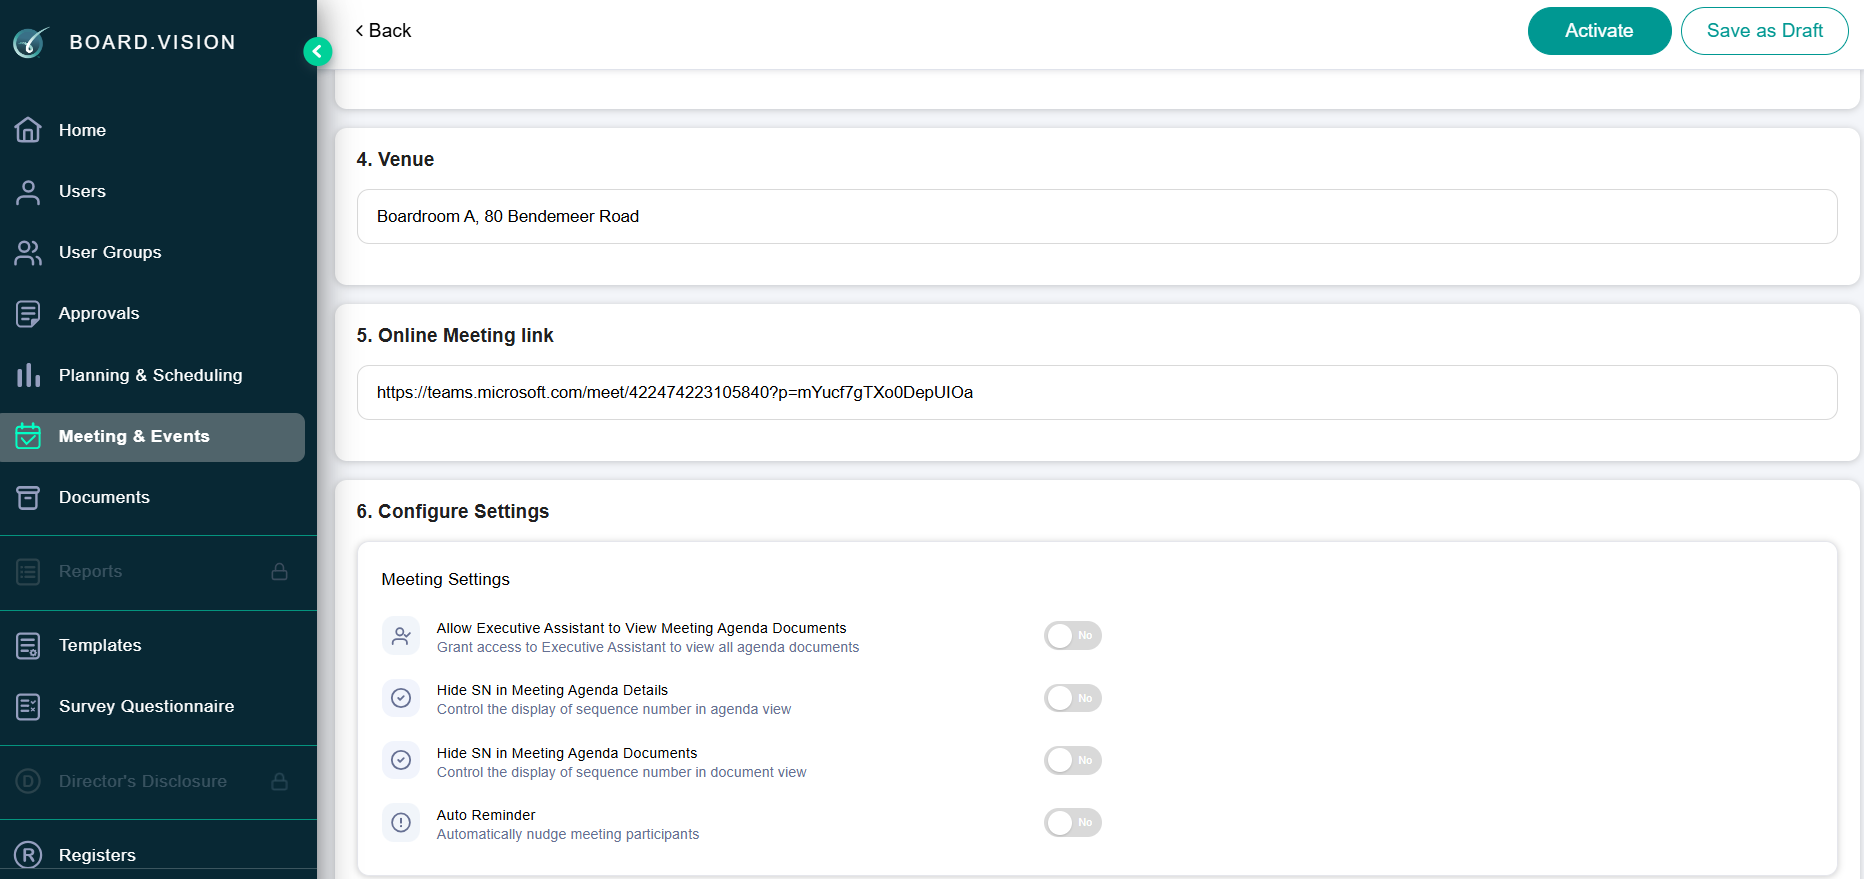
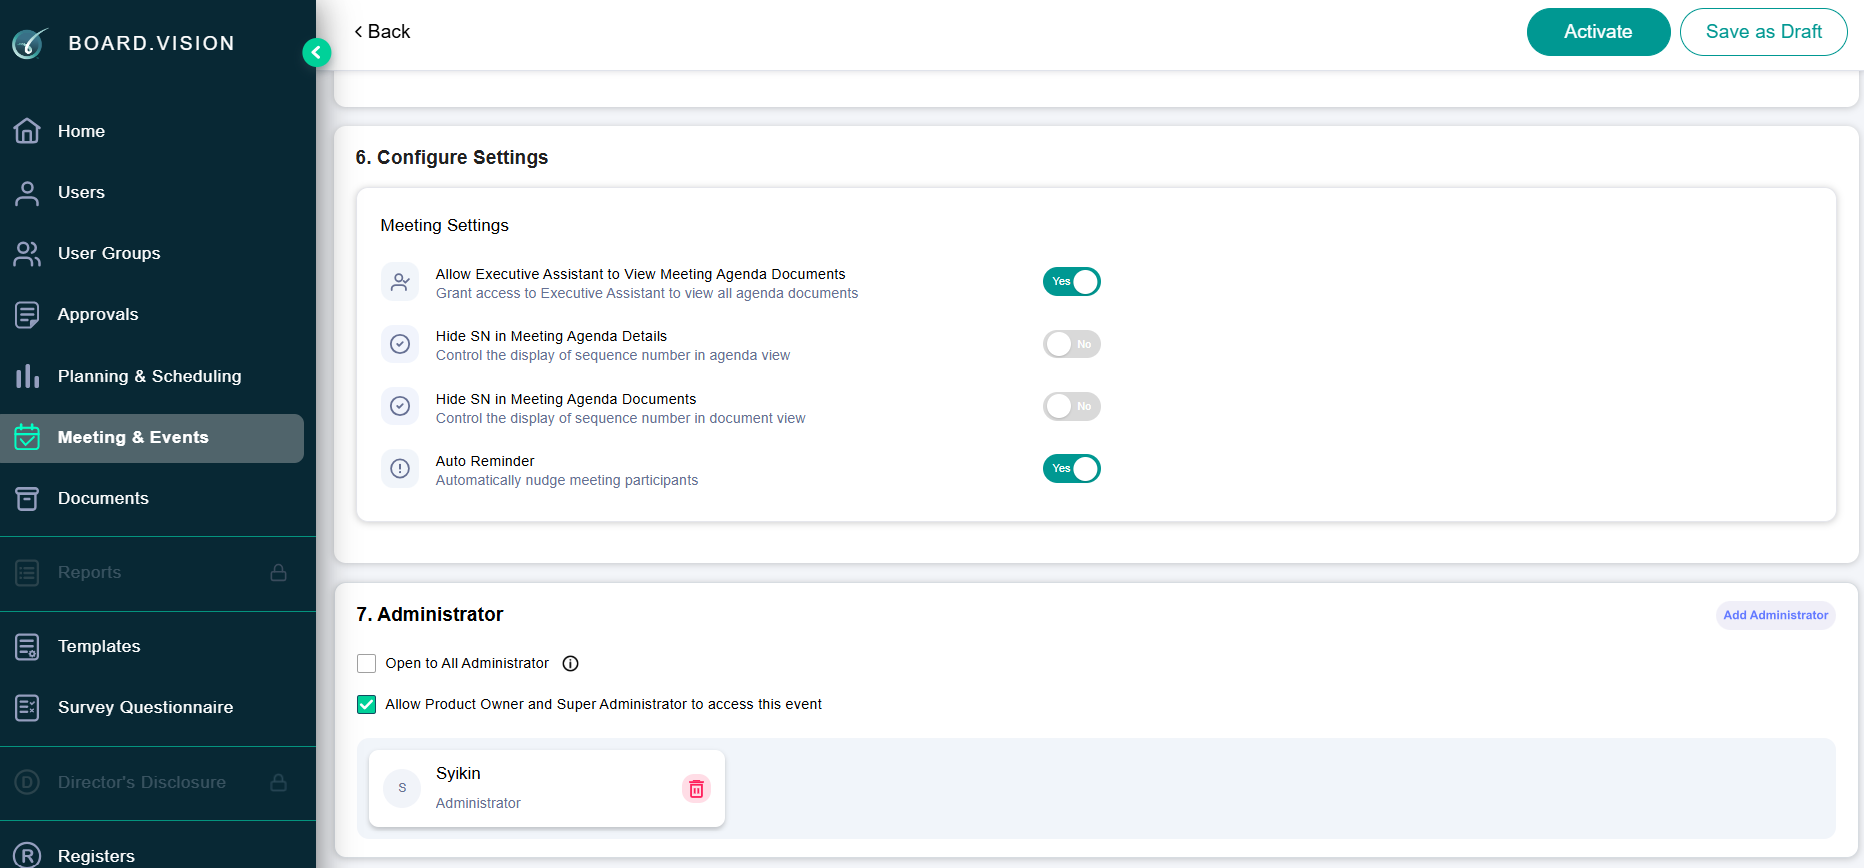
6) To configure meeting settings:
EA Document Access: Toggle to permit Executive Assistants to view agenda files.
Sequence Numbers (SN): Choose whether to display or hide serial numbers in the agenda details and document views.
Auto Reminder: Enable automatic reminders for attendees.
Manage Administrators and Participants
7) To add Administrators:
a) Under the 'People' tab, click Add Administrator.
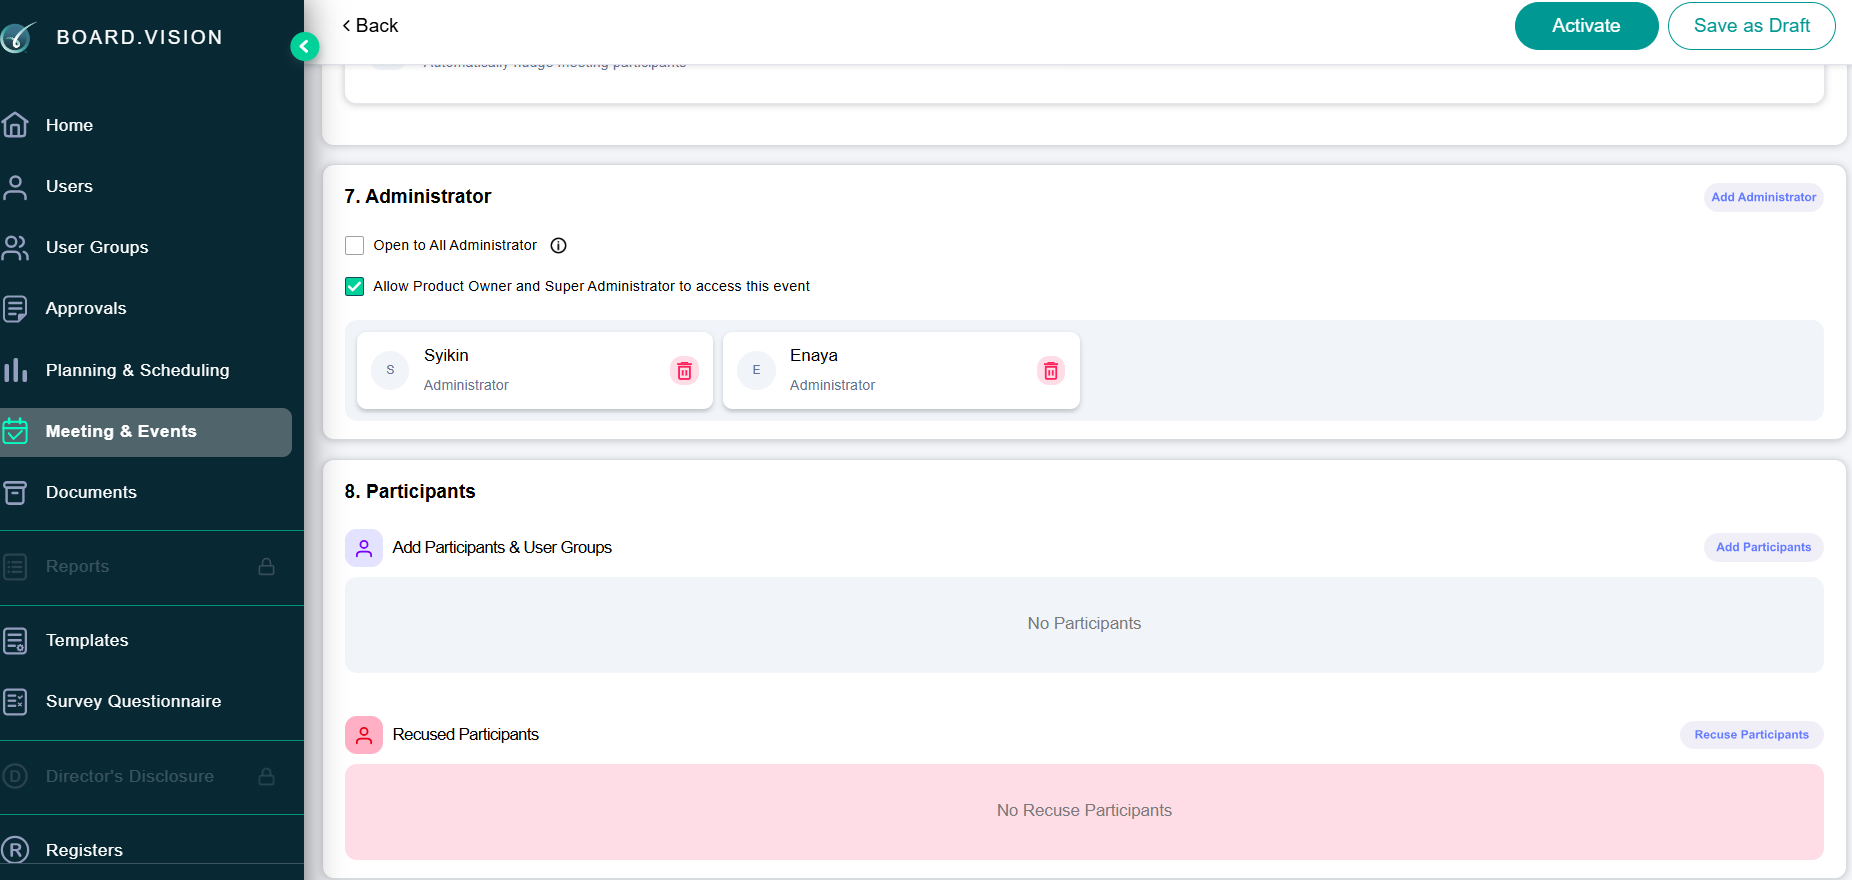
b) Select the appropriate admin access options:
- Open to All Administrators
- Allow all Product Owners and Super Administrators to access this event - You may add other Elevated or Normal Administrators to manage the meeting.
- To allow only certain Administrators to manage the meeting, uncheck both options and add the required administrators.
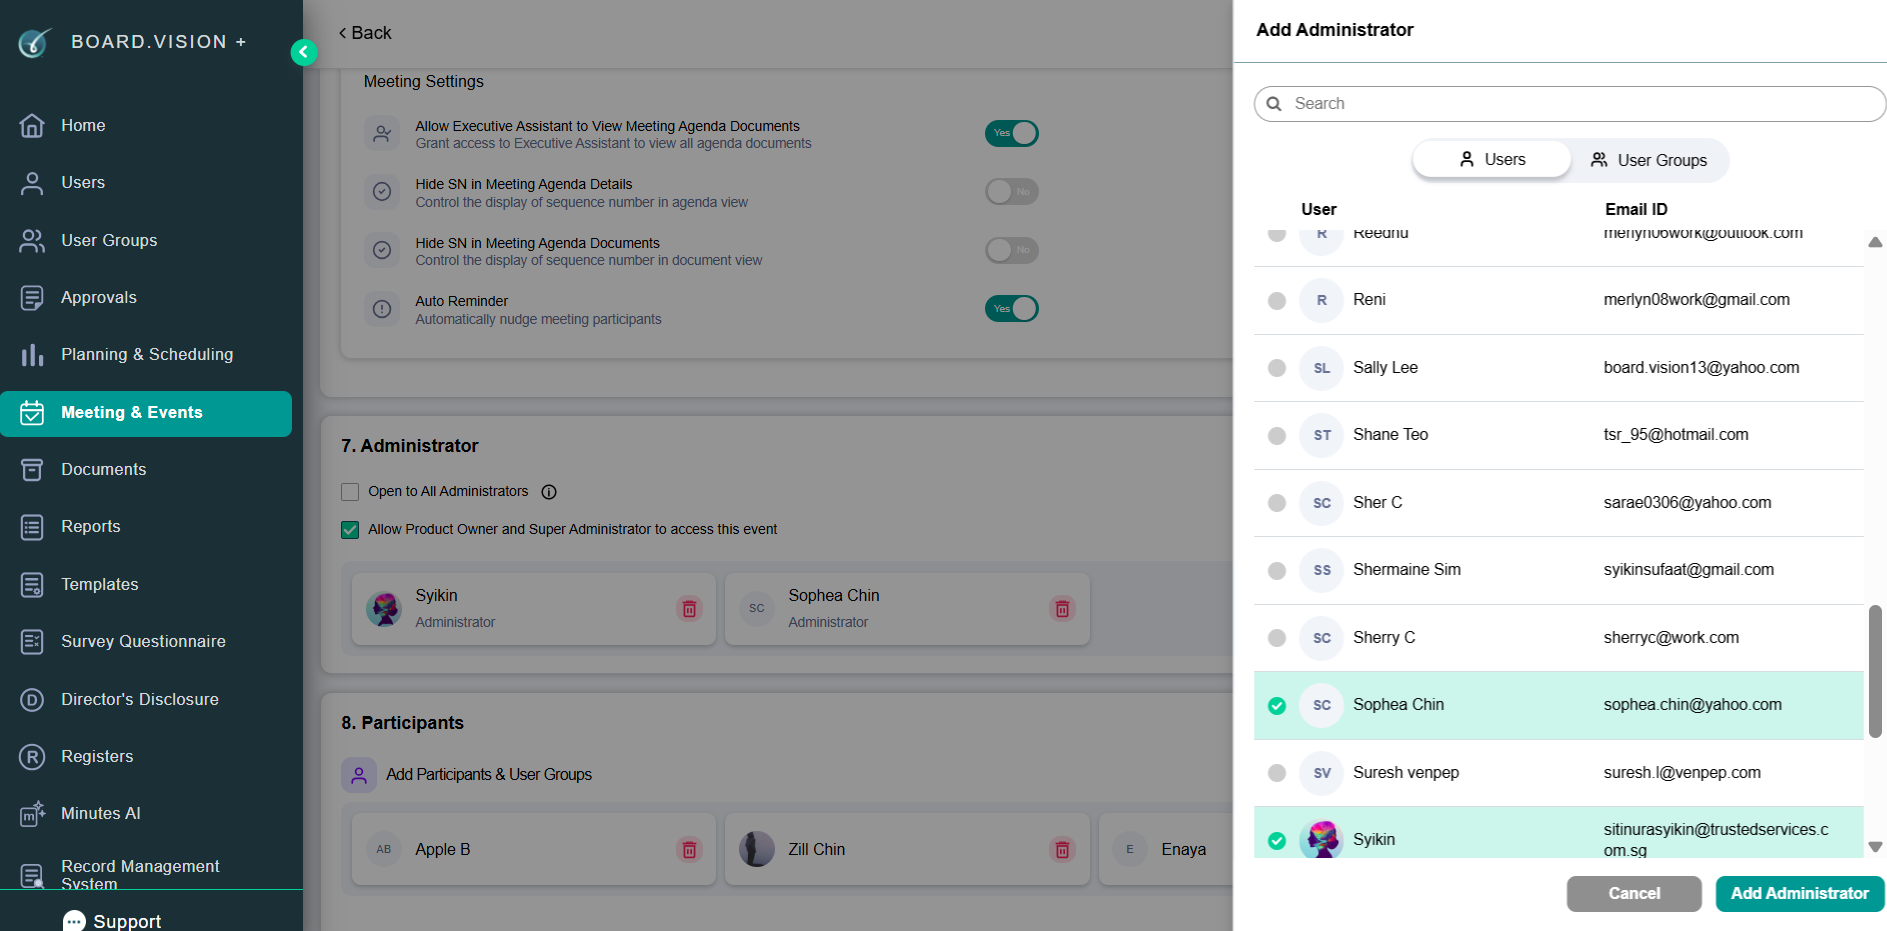
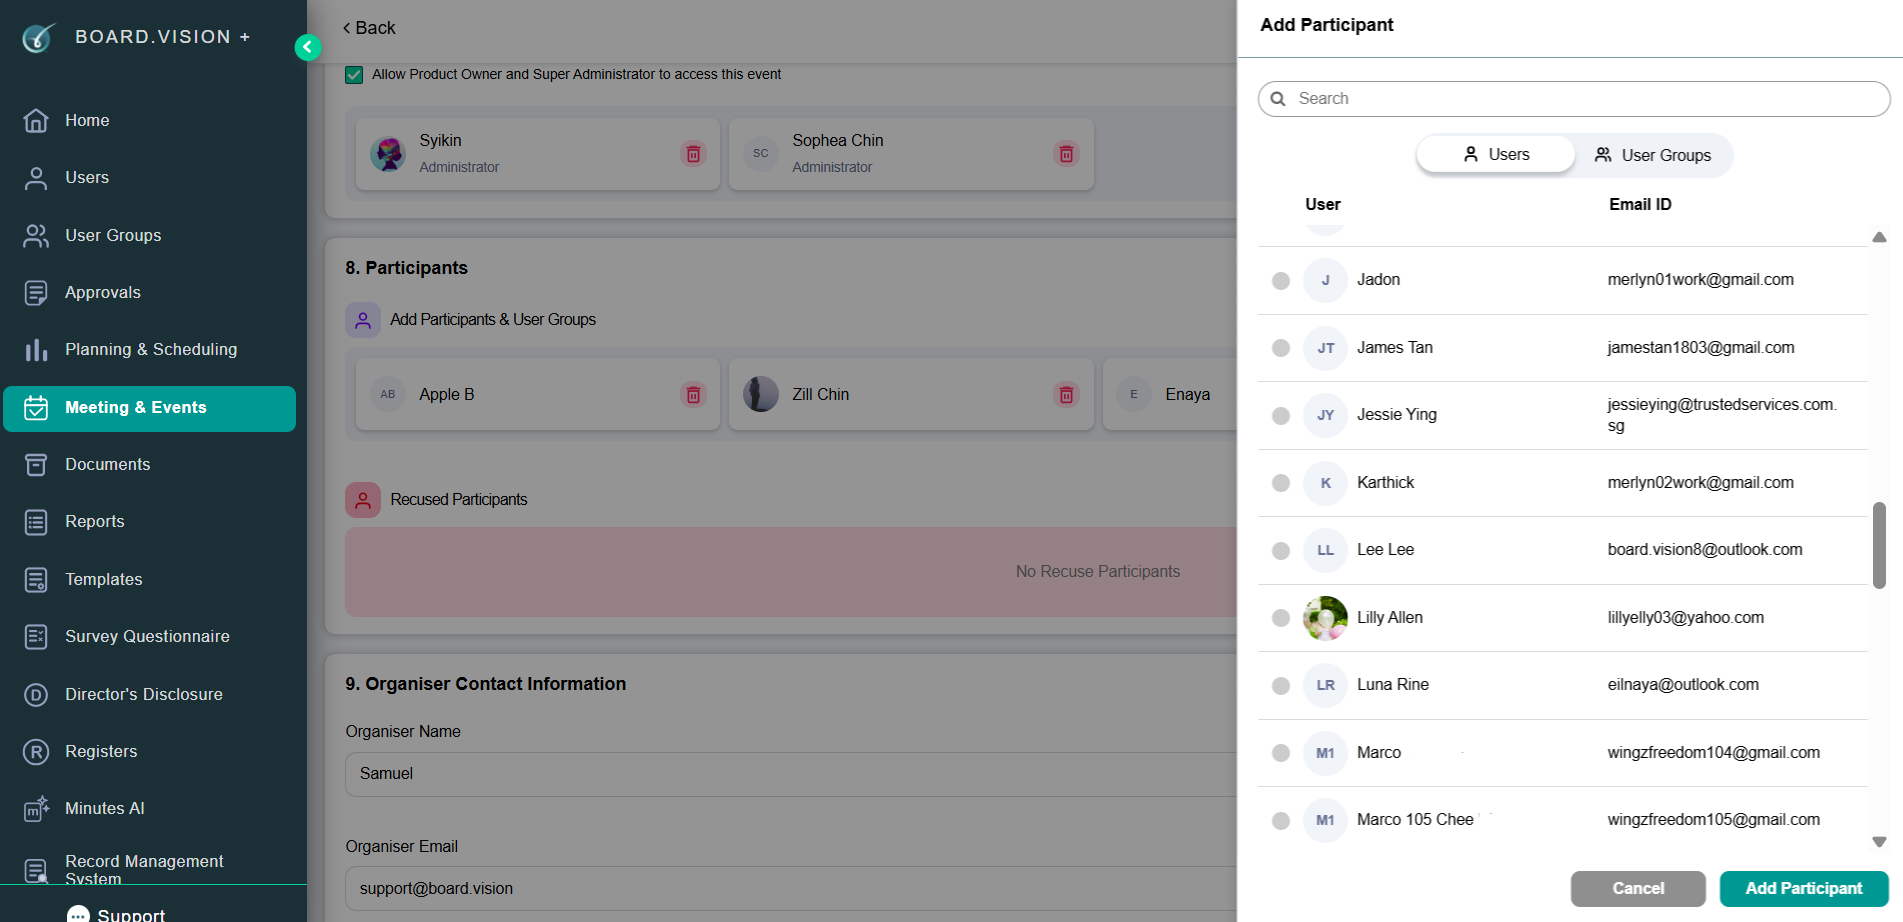
8) To add participants or user groups:
a) Click Add participants.
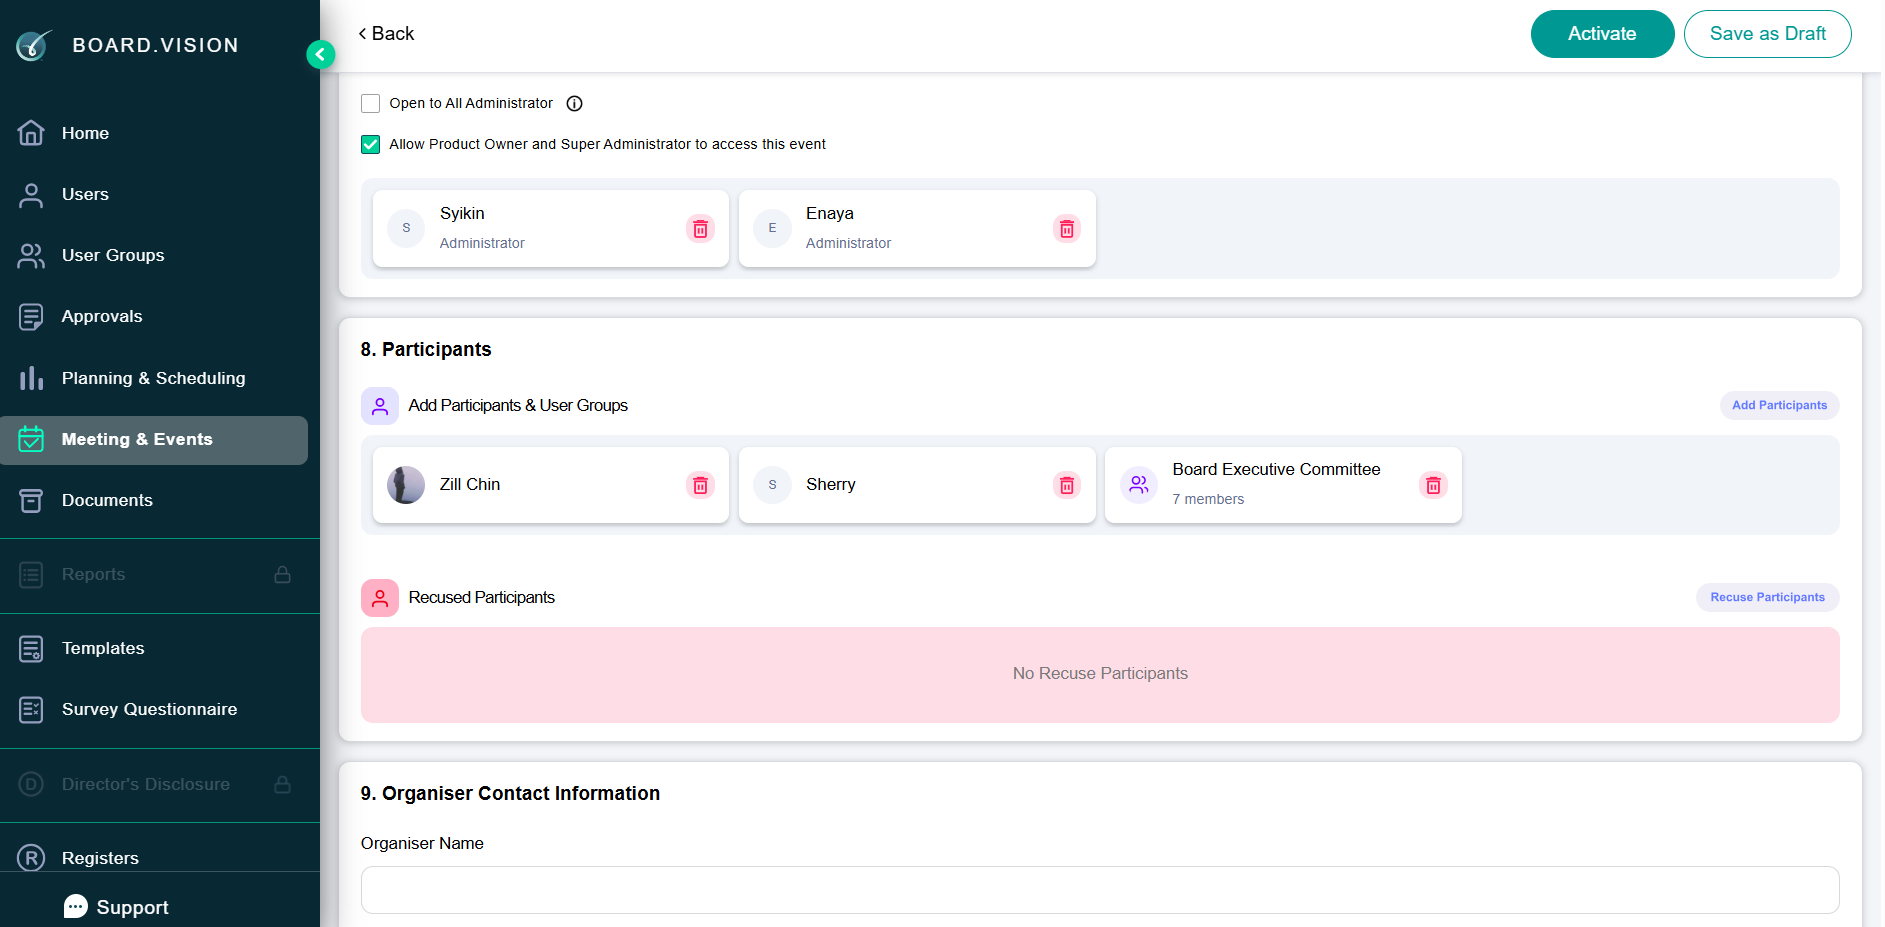
b) Select from the list of Users and User Groups from the 'Edit Participant' pop-up screen.
Note: To recuse a user from the User Group, add into the 'Recused Participants' section.
Manage the Agenda
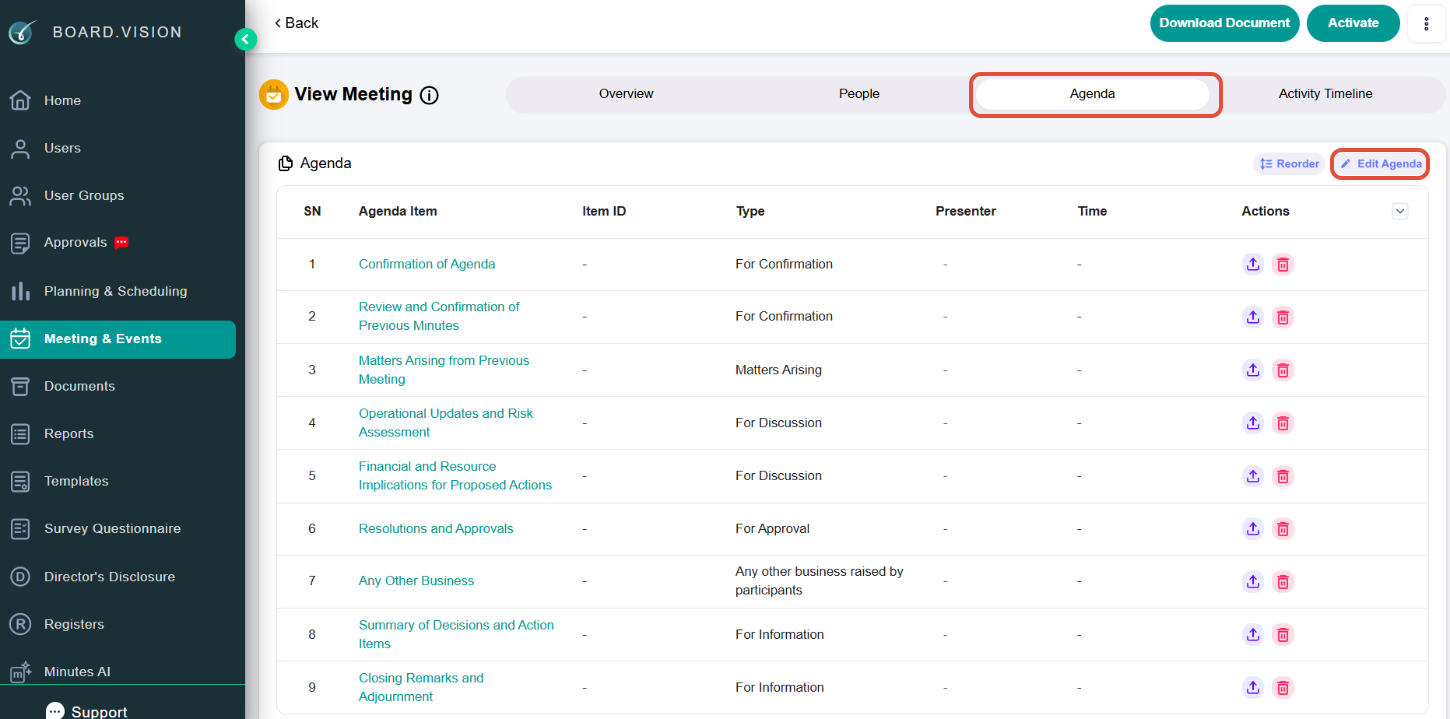
9) To edit the Agenda items:
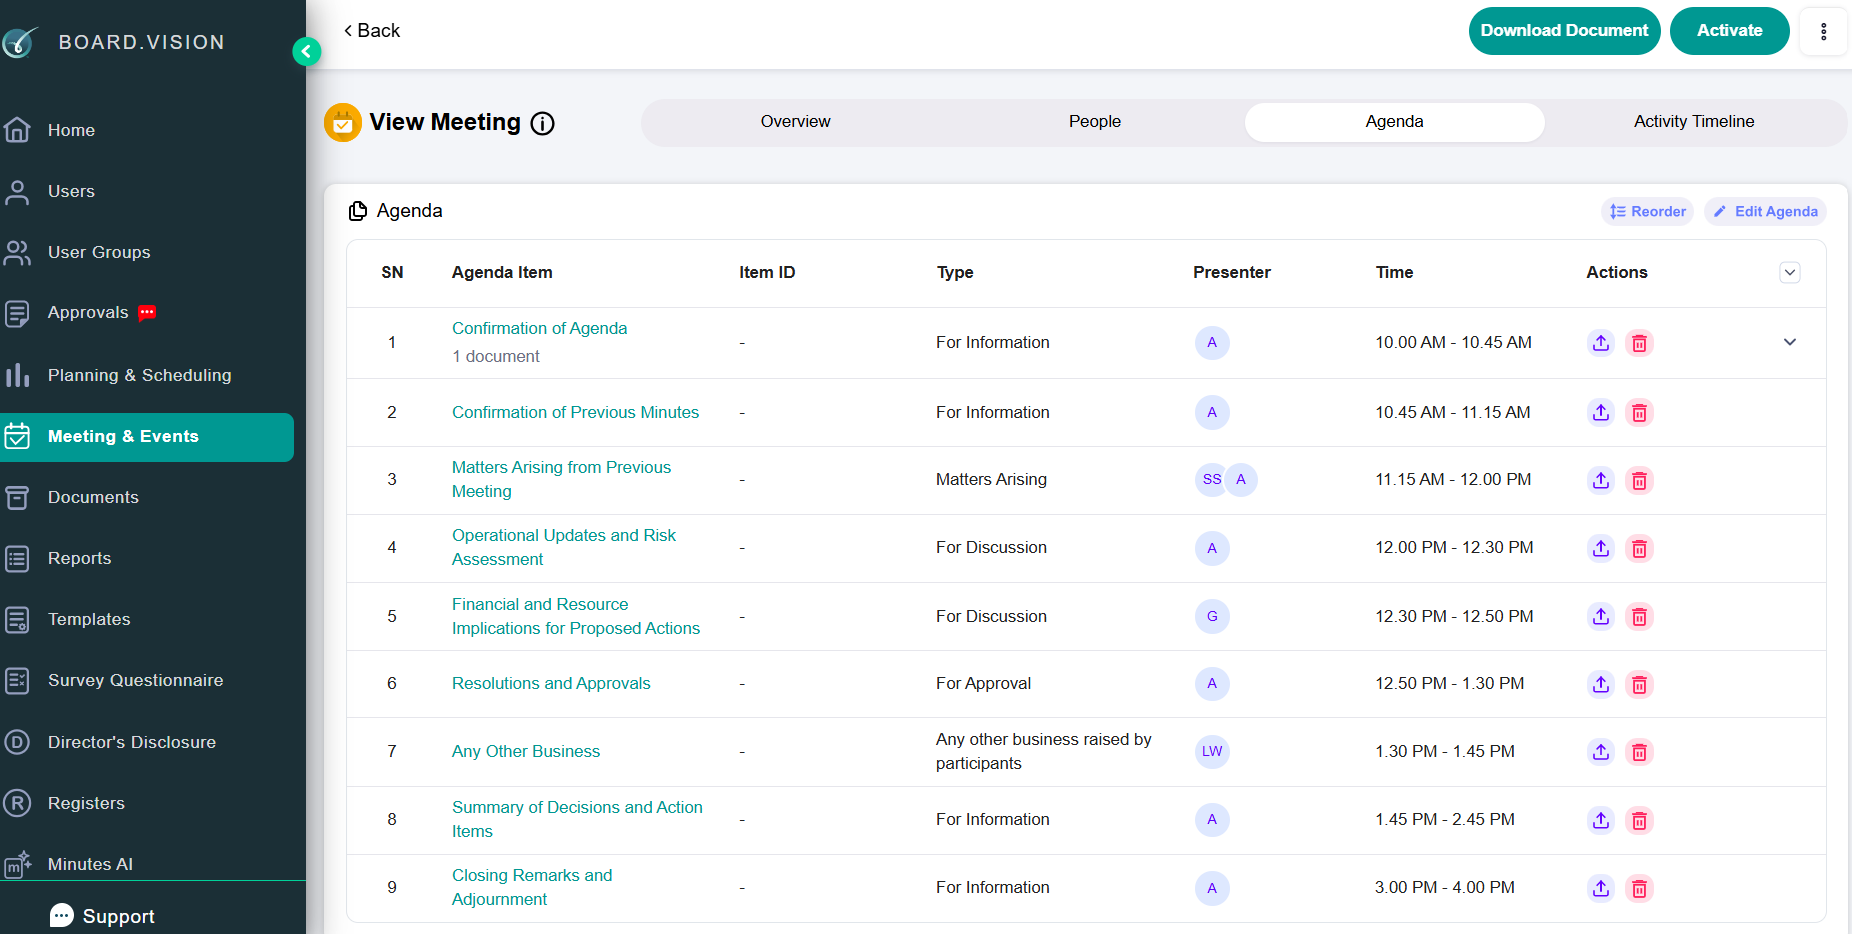
a) Under the 'Agenda' tab, click Edit Agenda.
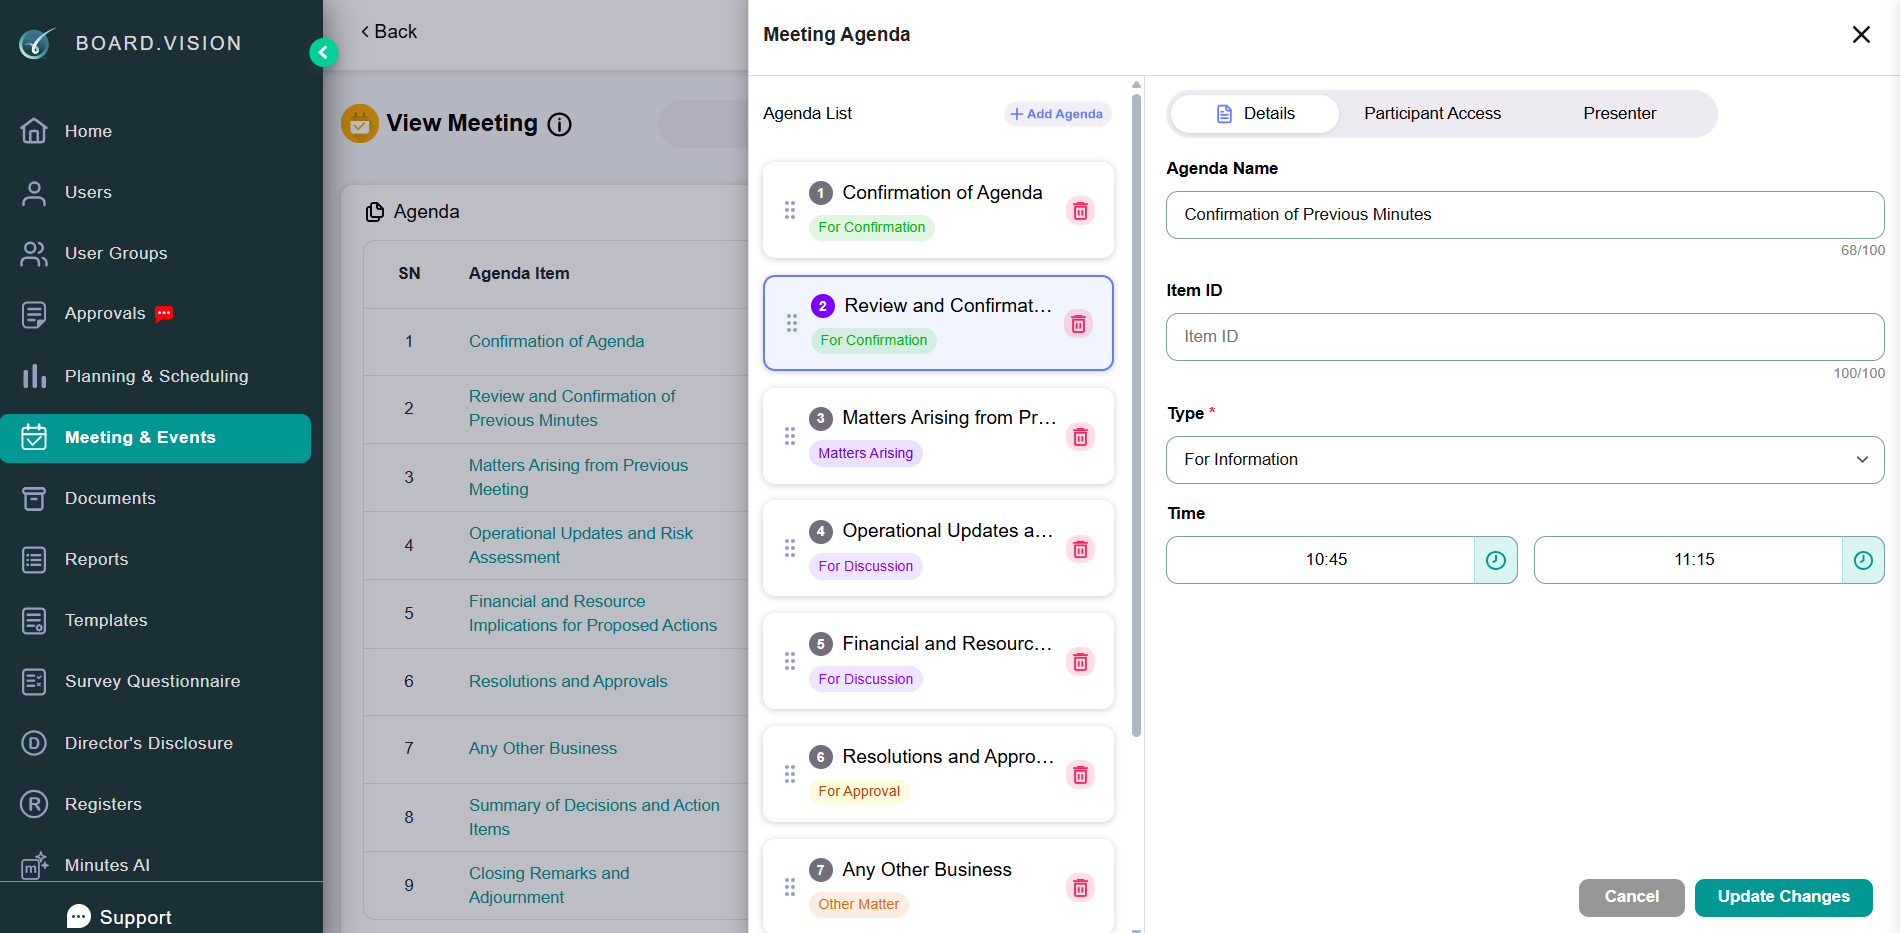
b) Under 'Details', edit the agenda name, item ID, and type as required. You can also specify the item time to indicate when the agenda item will be discussed.
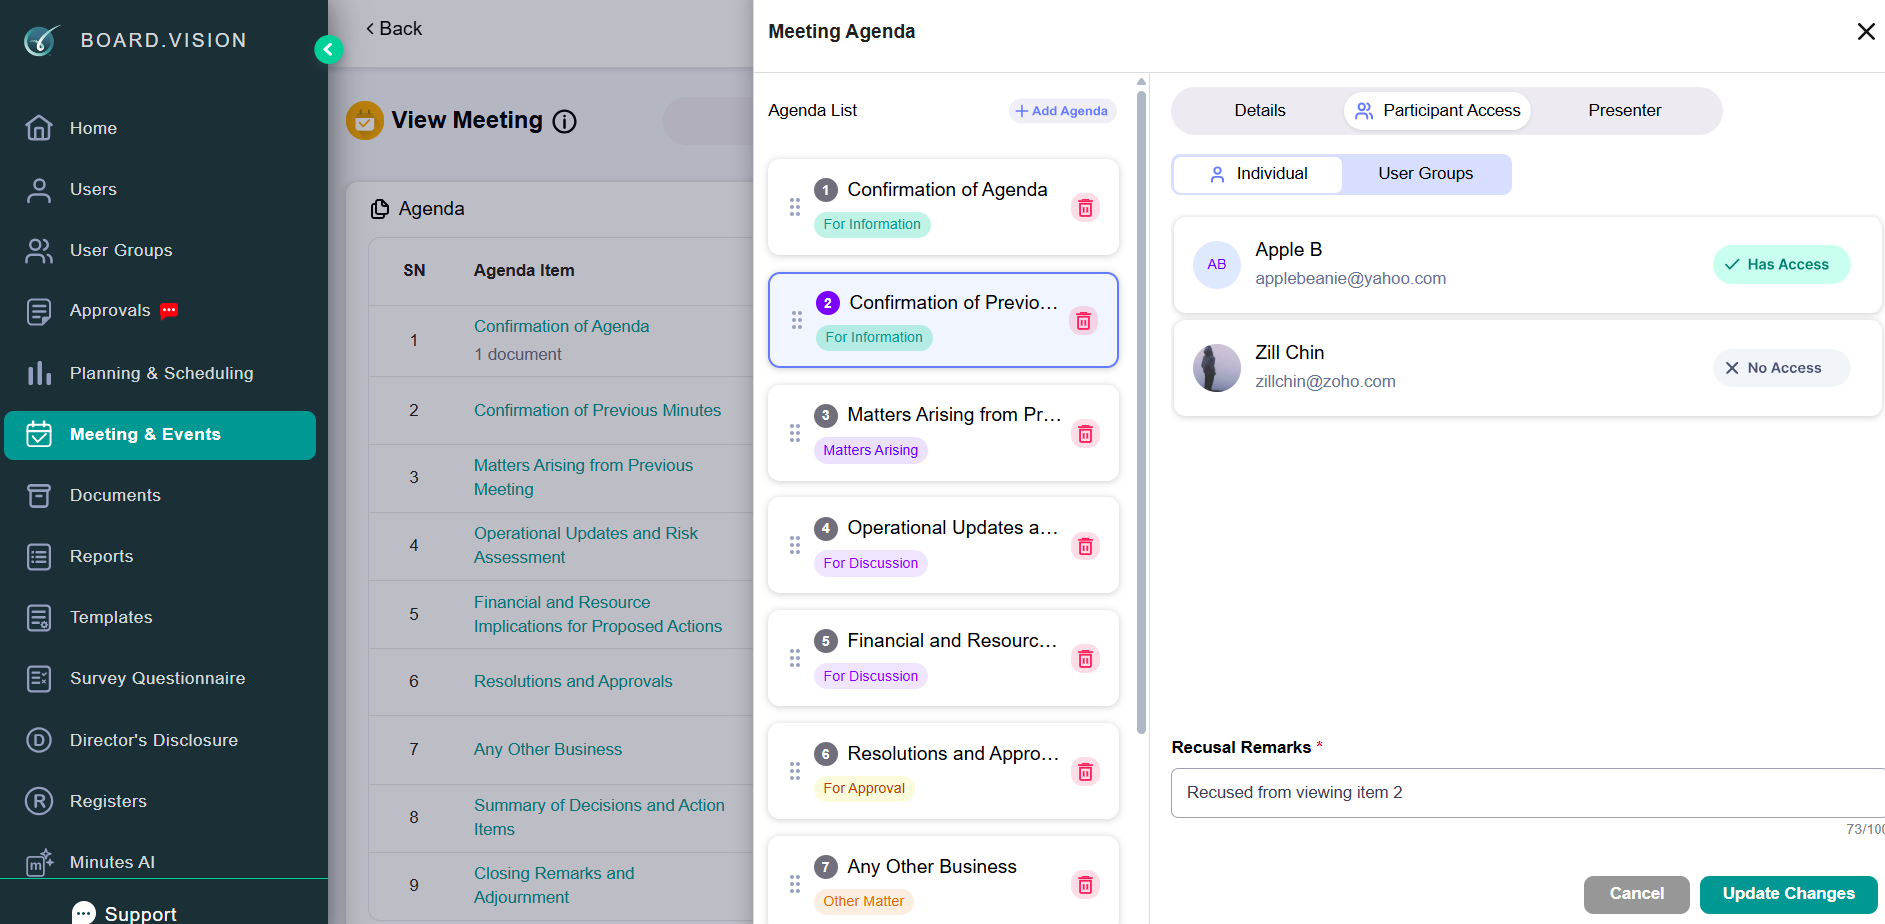
c) Under 'Participant Access', select users who should be recused from viewing the agenda item. You can also edit the Recusal Remarks if necessary.
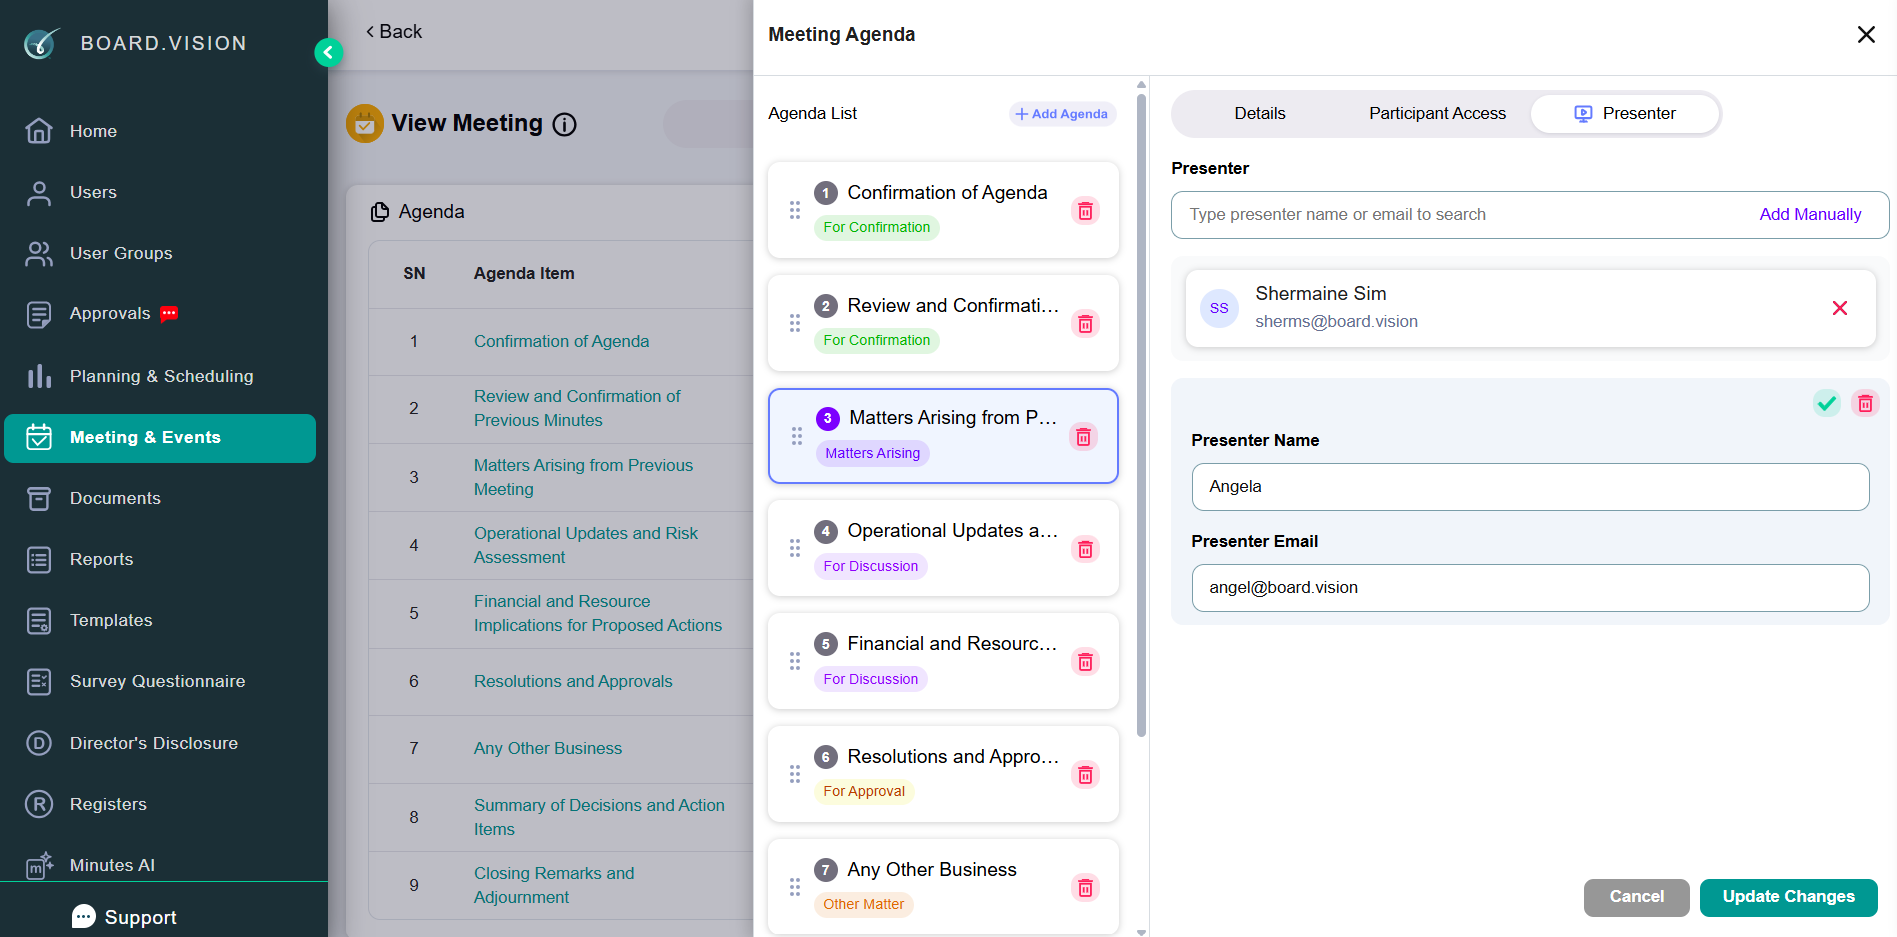
d) Enter the details of one or more presenters.
10) To add documents:
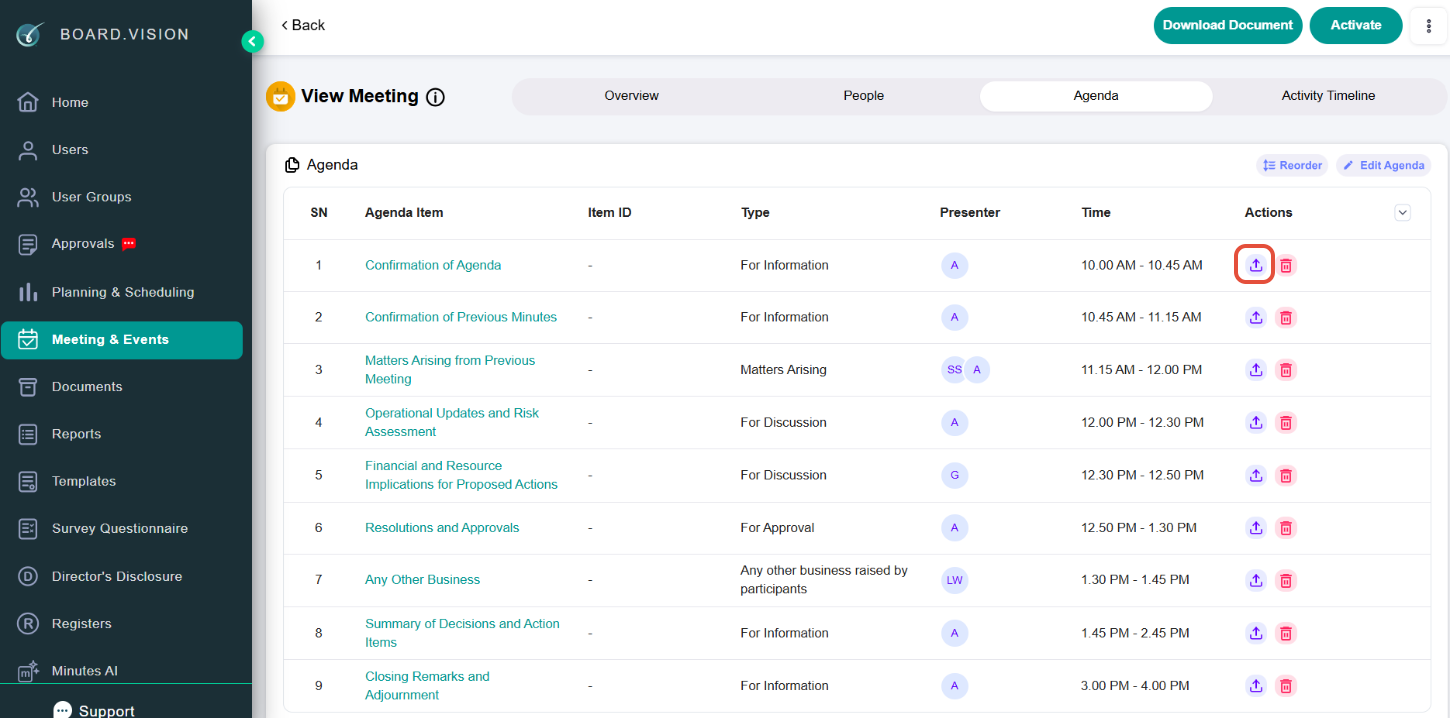
a) From the agenda listing, click the upload icon under the Actions column.
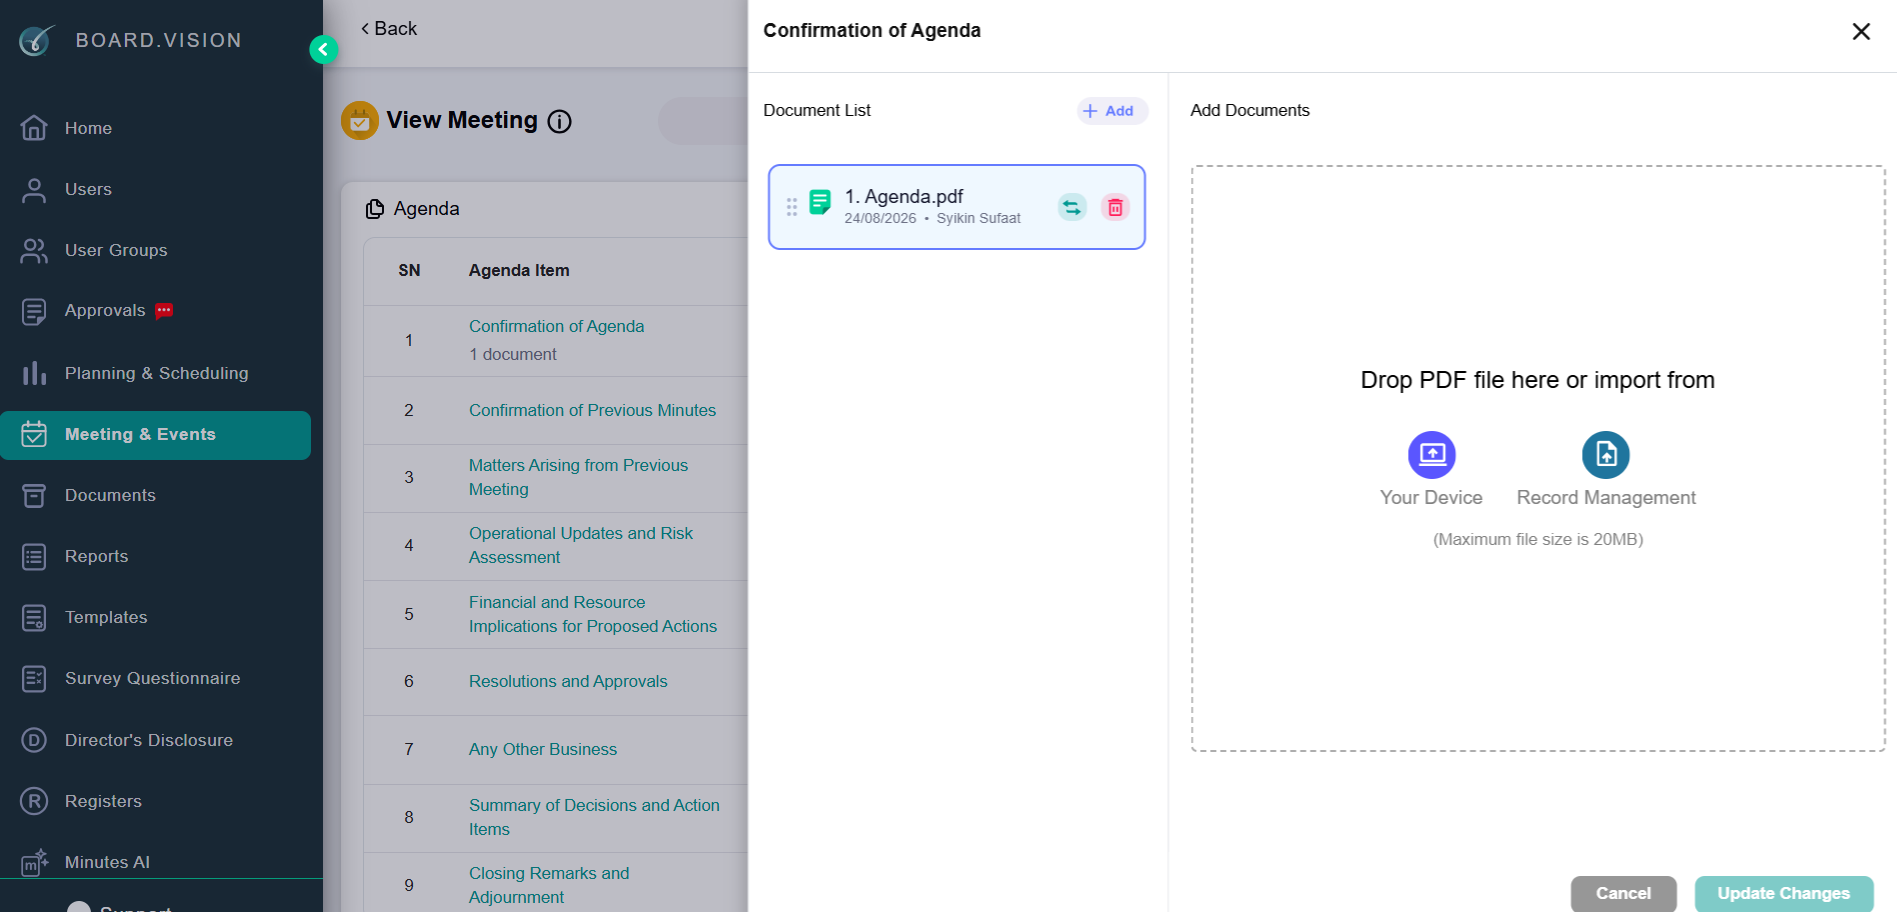
b) Click Your Device or drag/drop the agenda document into the upload area. You may also select a document you have saved in the Record Management System.
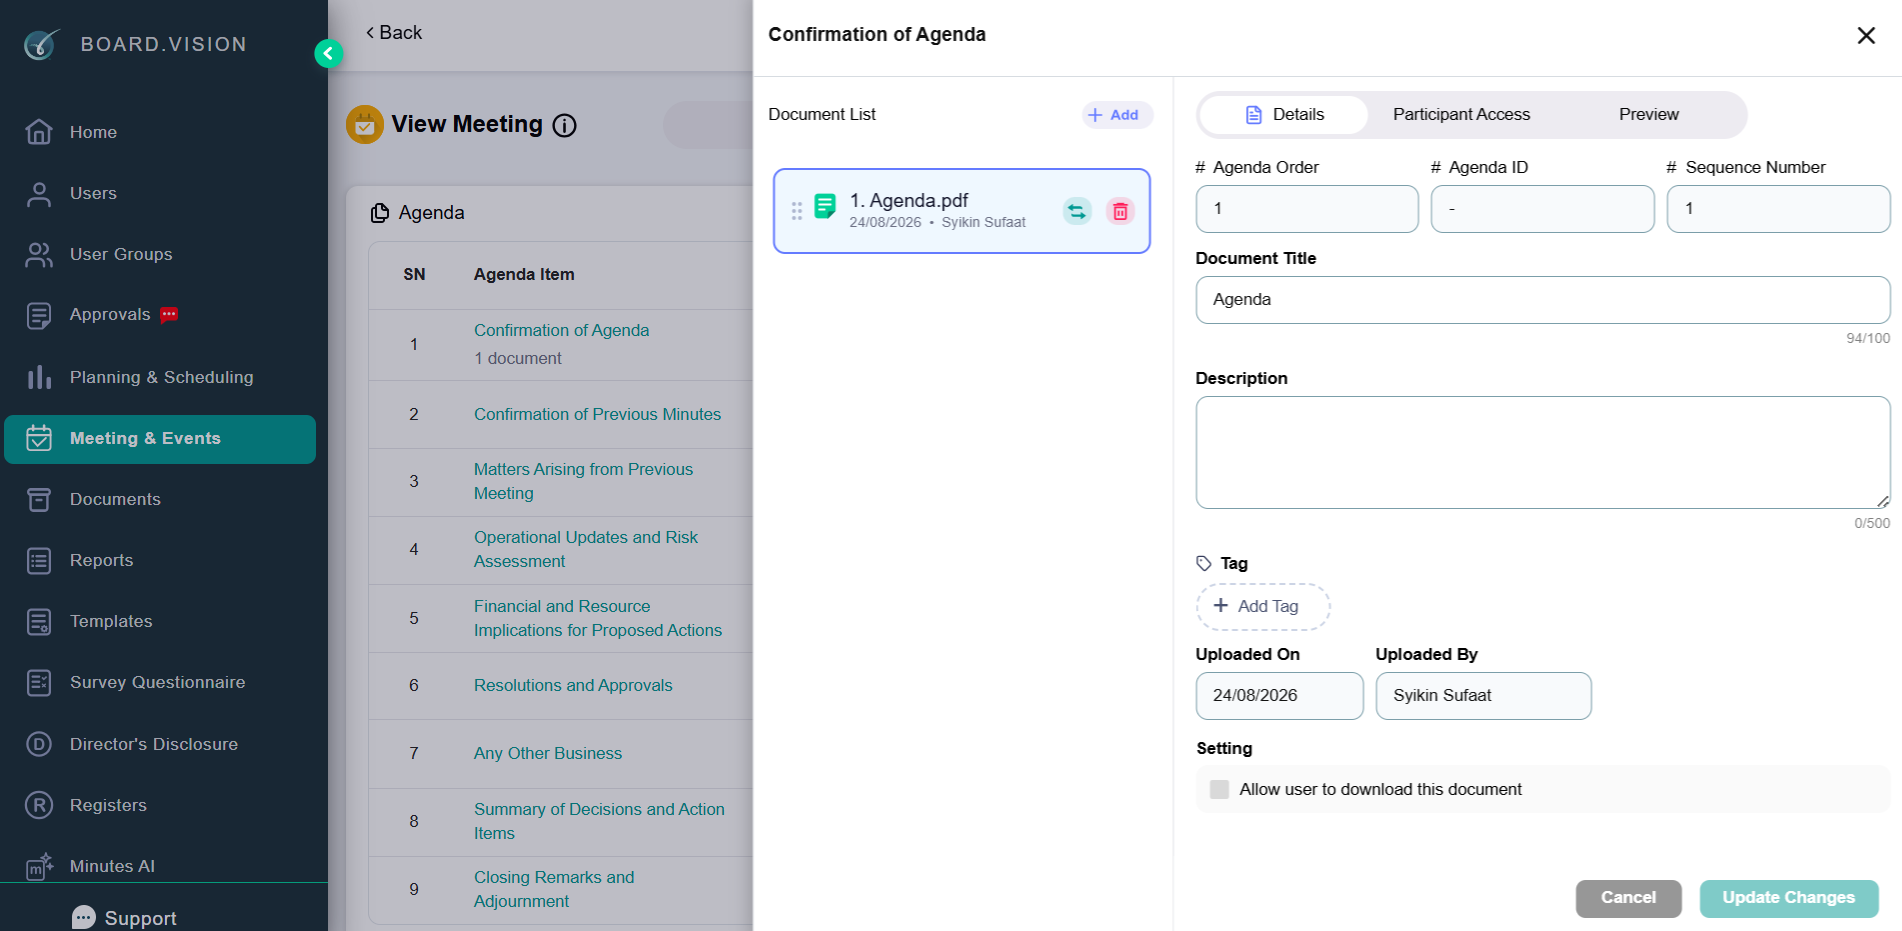
c) Under 'Details', update the document title, description, add tags and configure the settings as required.
d) Under 'Participant Access', select users who should be recused from viewing the agenda document and update the Recusal Remarks if necessary.
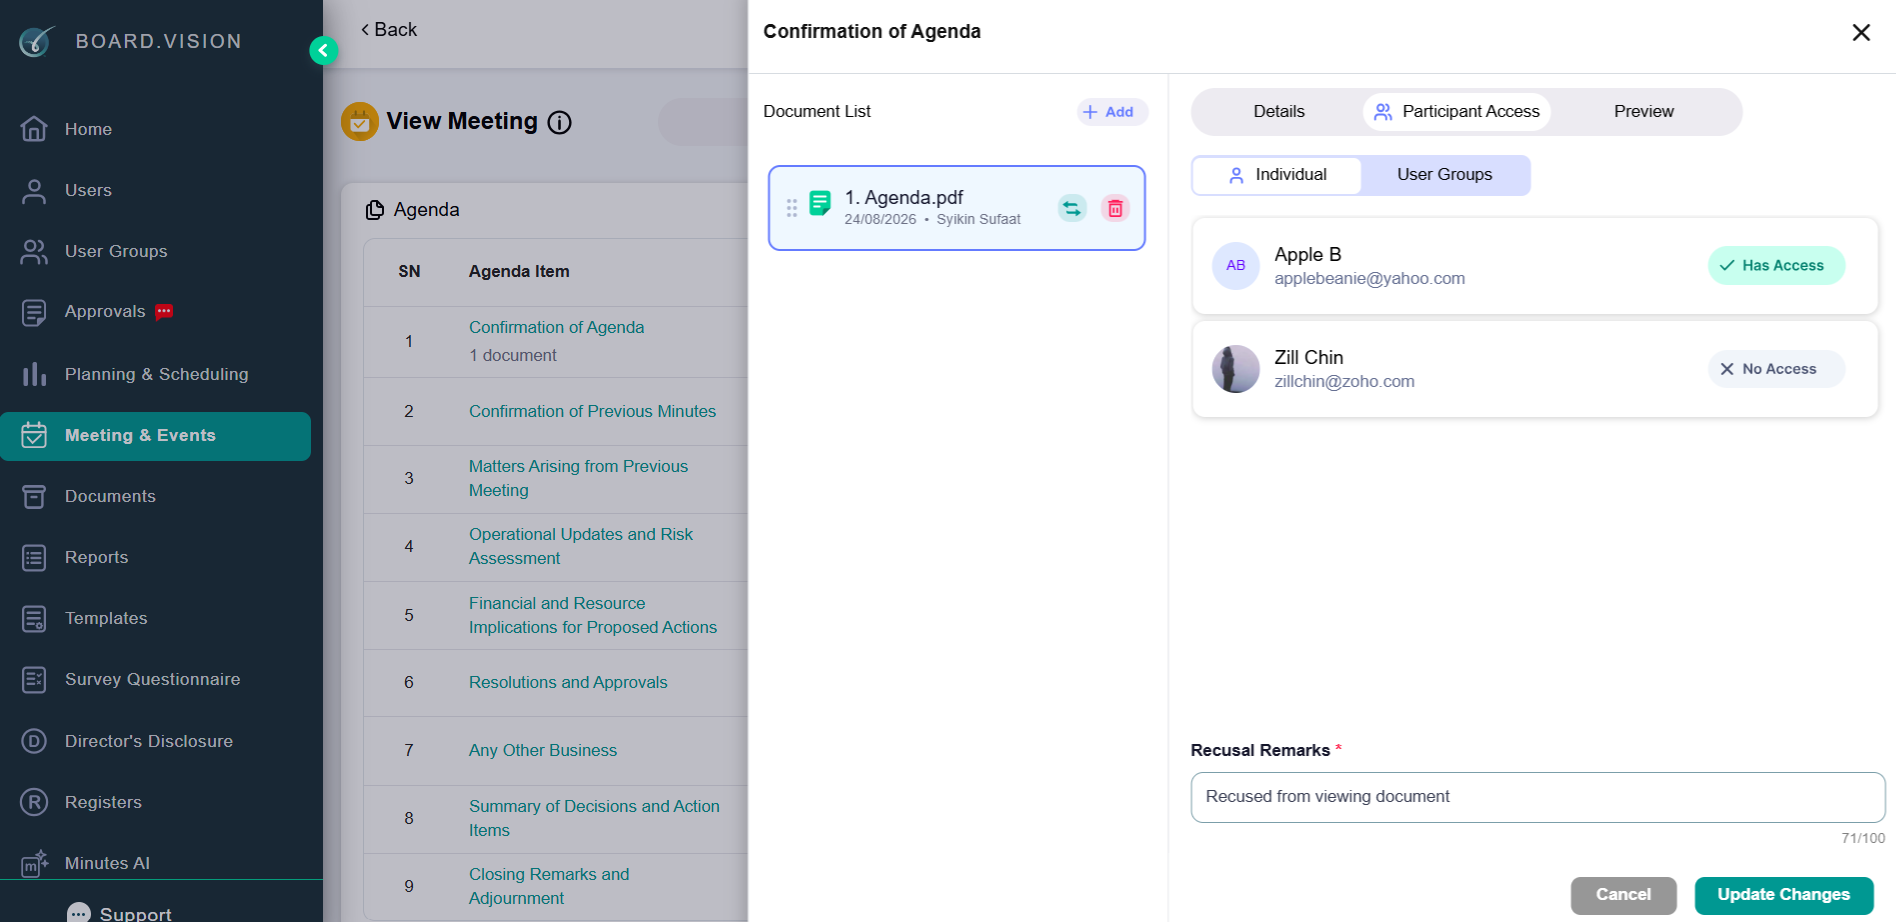
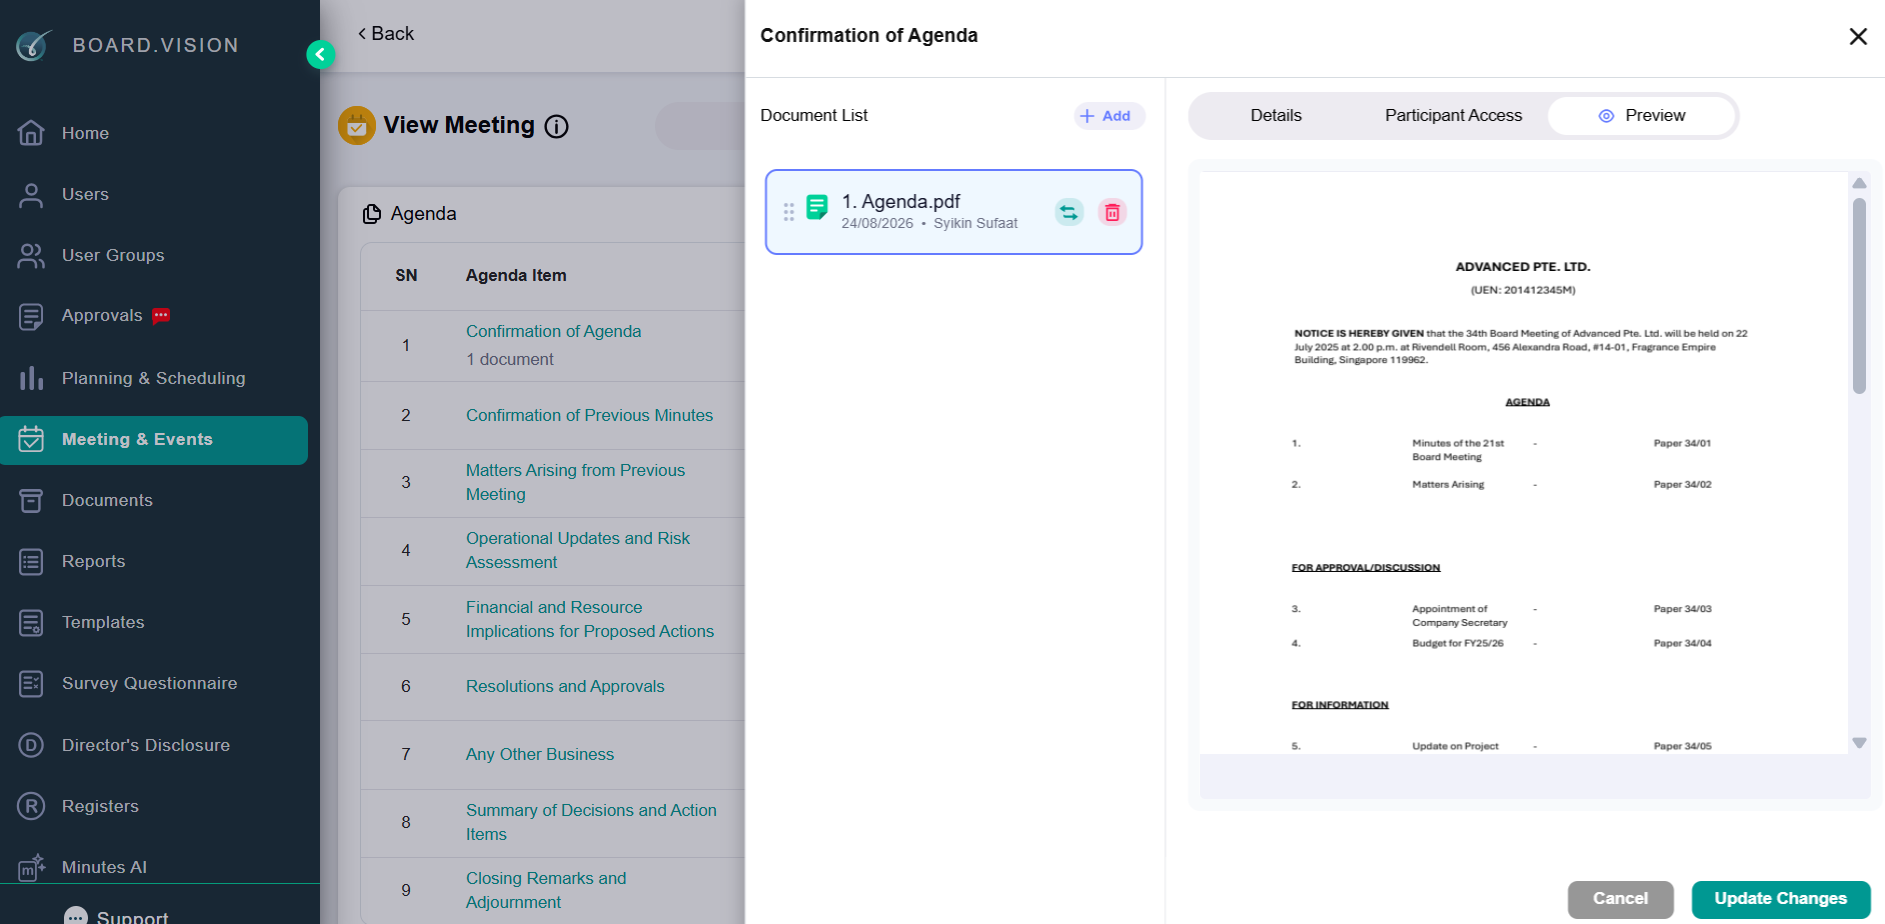
e) You can preview the document to verify that the correct file has been uploaded before confirming.
Activate the Meeting
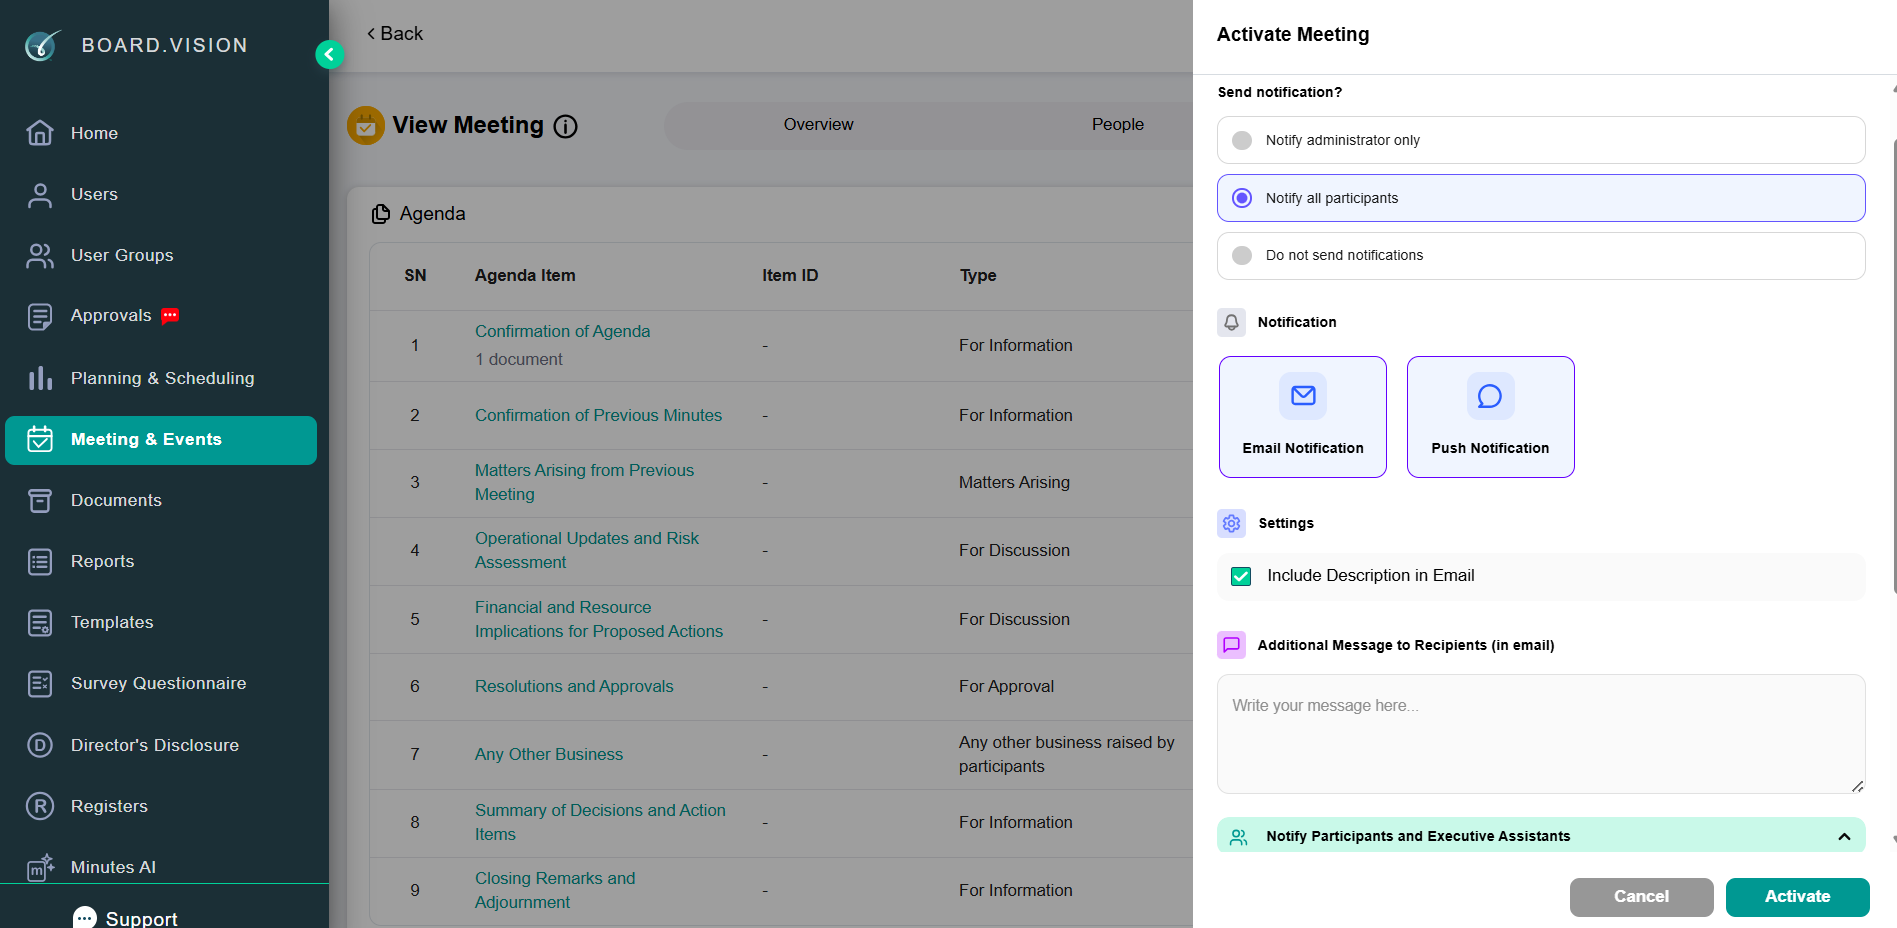
12) On the Activate Meeting pop-up, select how you would like to send notifications:
- Notify administrator only
- Notify all participants
- Do not send notifications
You have completed the tutorial on how to create a meeting manually.
If you face any issues, please reach out to our Board.Vision Customer Success Team at support@board.vision or +65 6909 7100 and we will be happy to help.
Was this article helpful?
That’s Great!
Thank you for your feedback
Sorry! We couldn't be helpful
Thank you for your feedback
Feedback sent
We appreciate your effort and will try to fix the article