Welcome to Board.Vision Tutorials!
In this tutorial, we will walk you through the steps to annotate your personal copy of a document.
Note: This article applies to Board.Vision iPad app version 4.0.0 and requires iPadOS 17.0 or later.
To annotate your personal copy of a document:
1) Log in to your Board.Vision account using your registered email address and password.
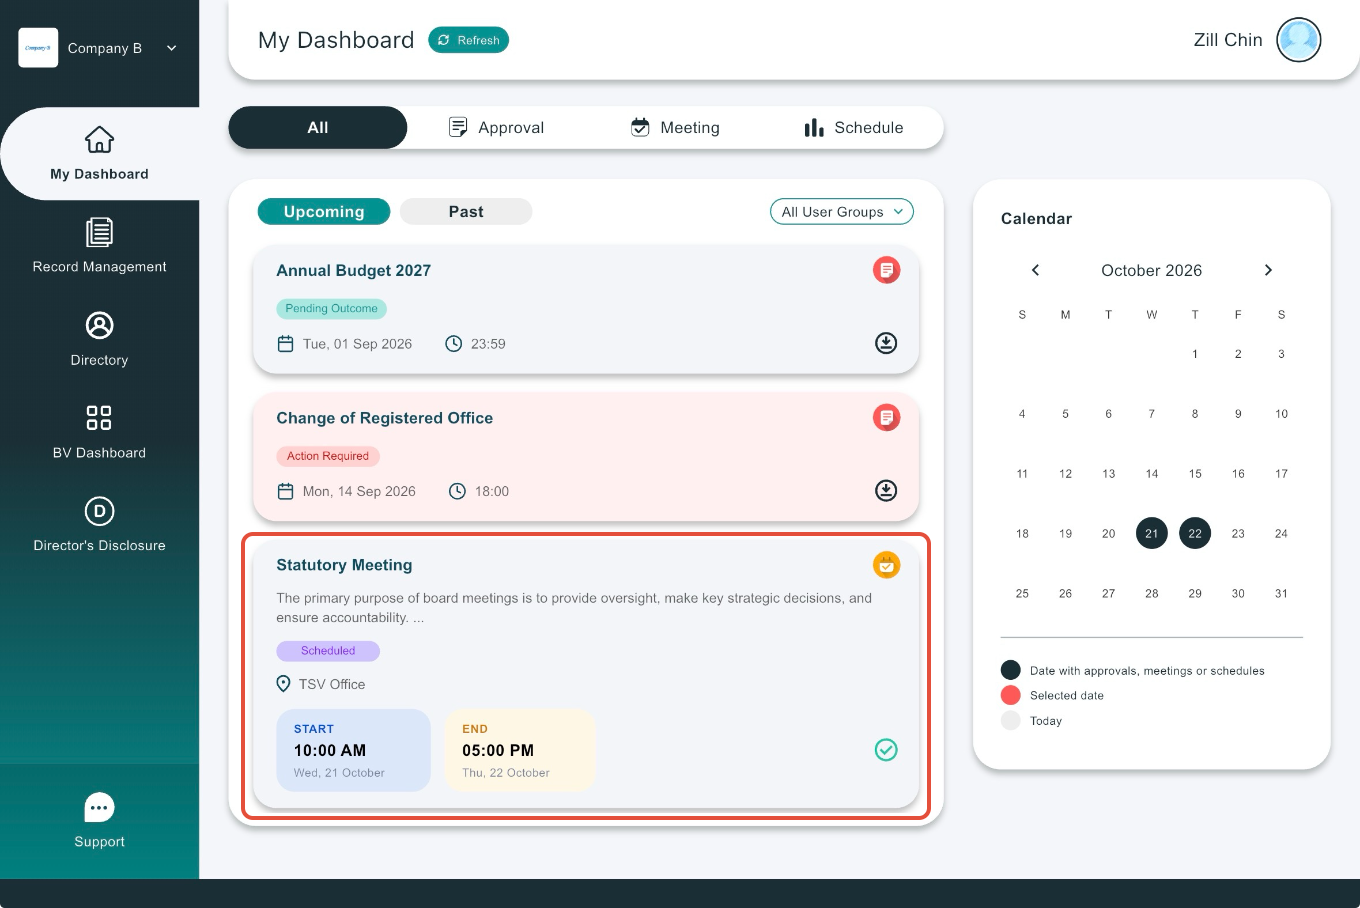
2) Select the meeting on the Dashboard.
3) Open a document.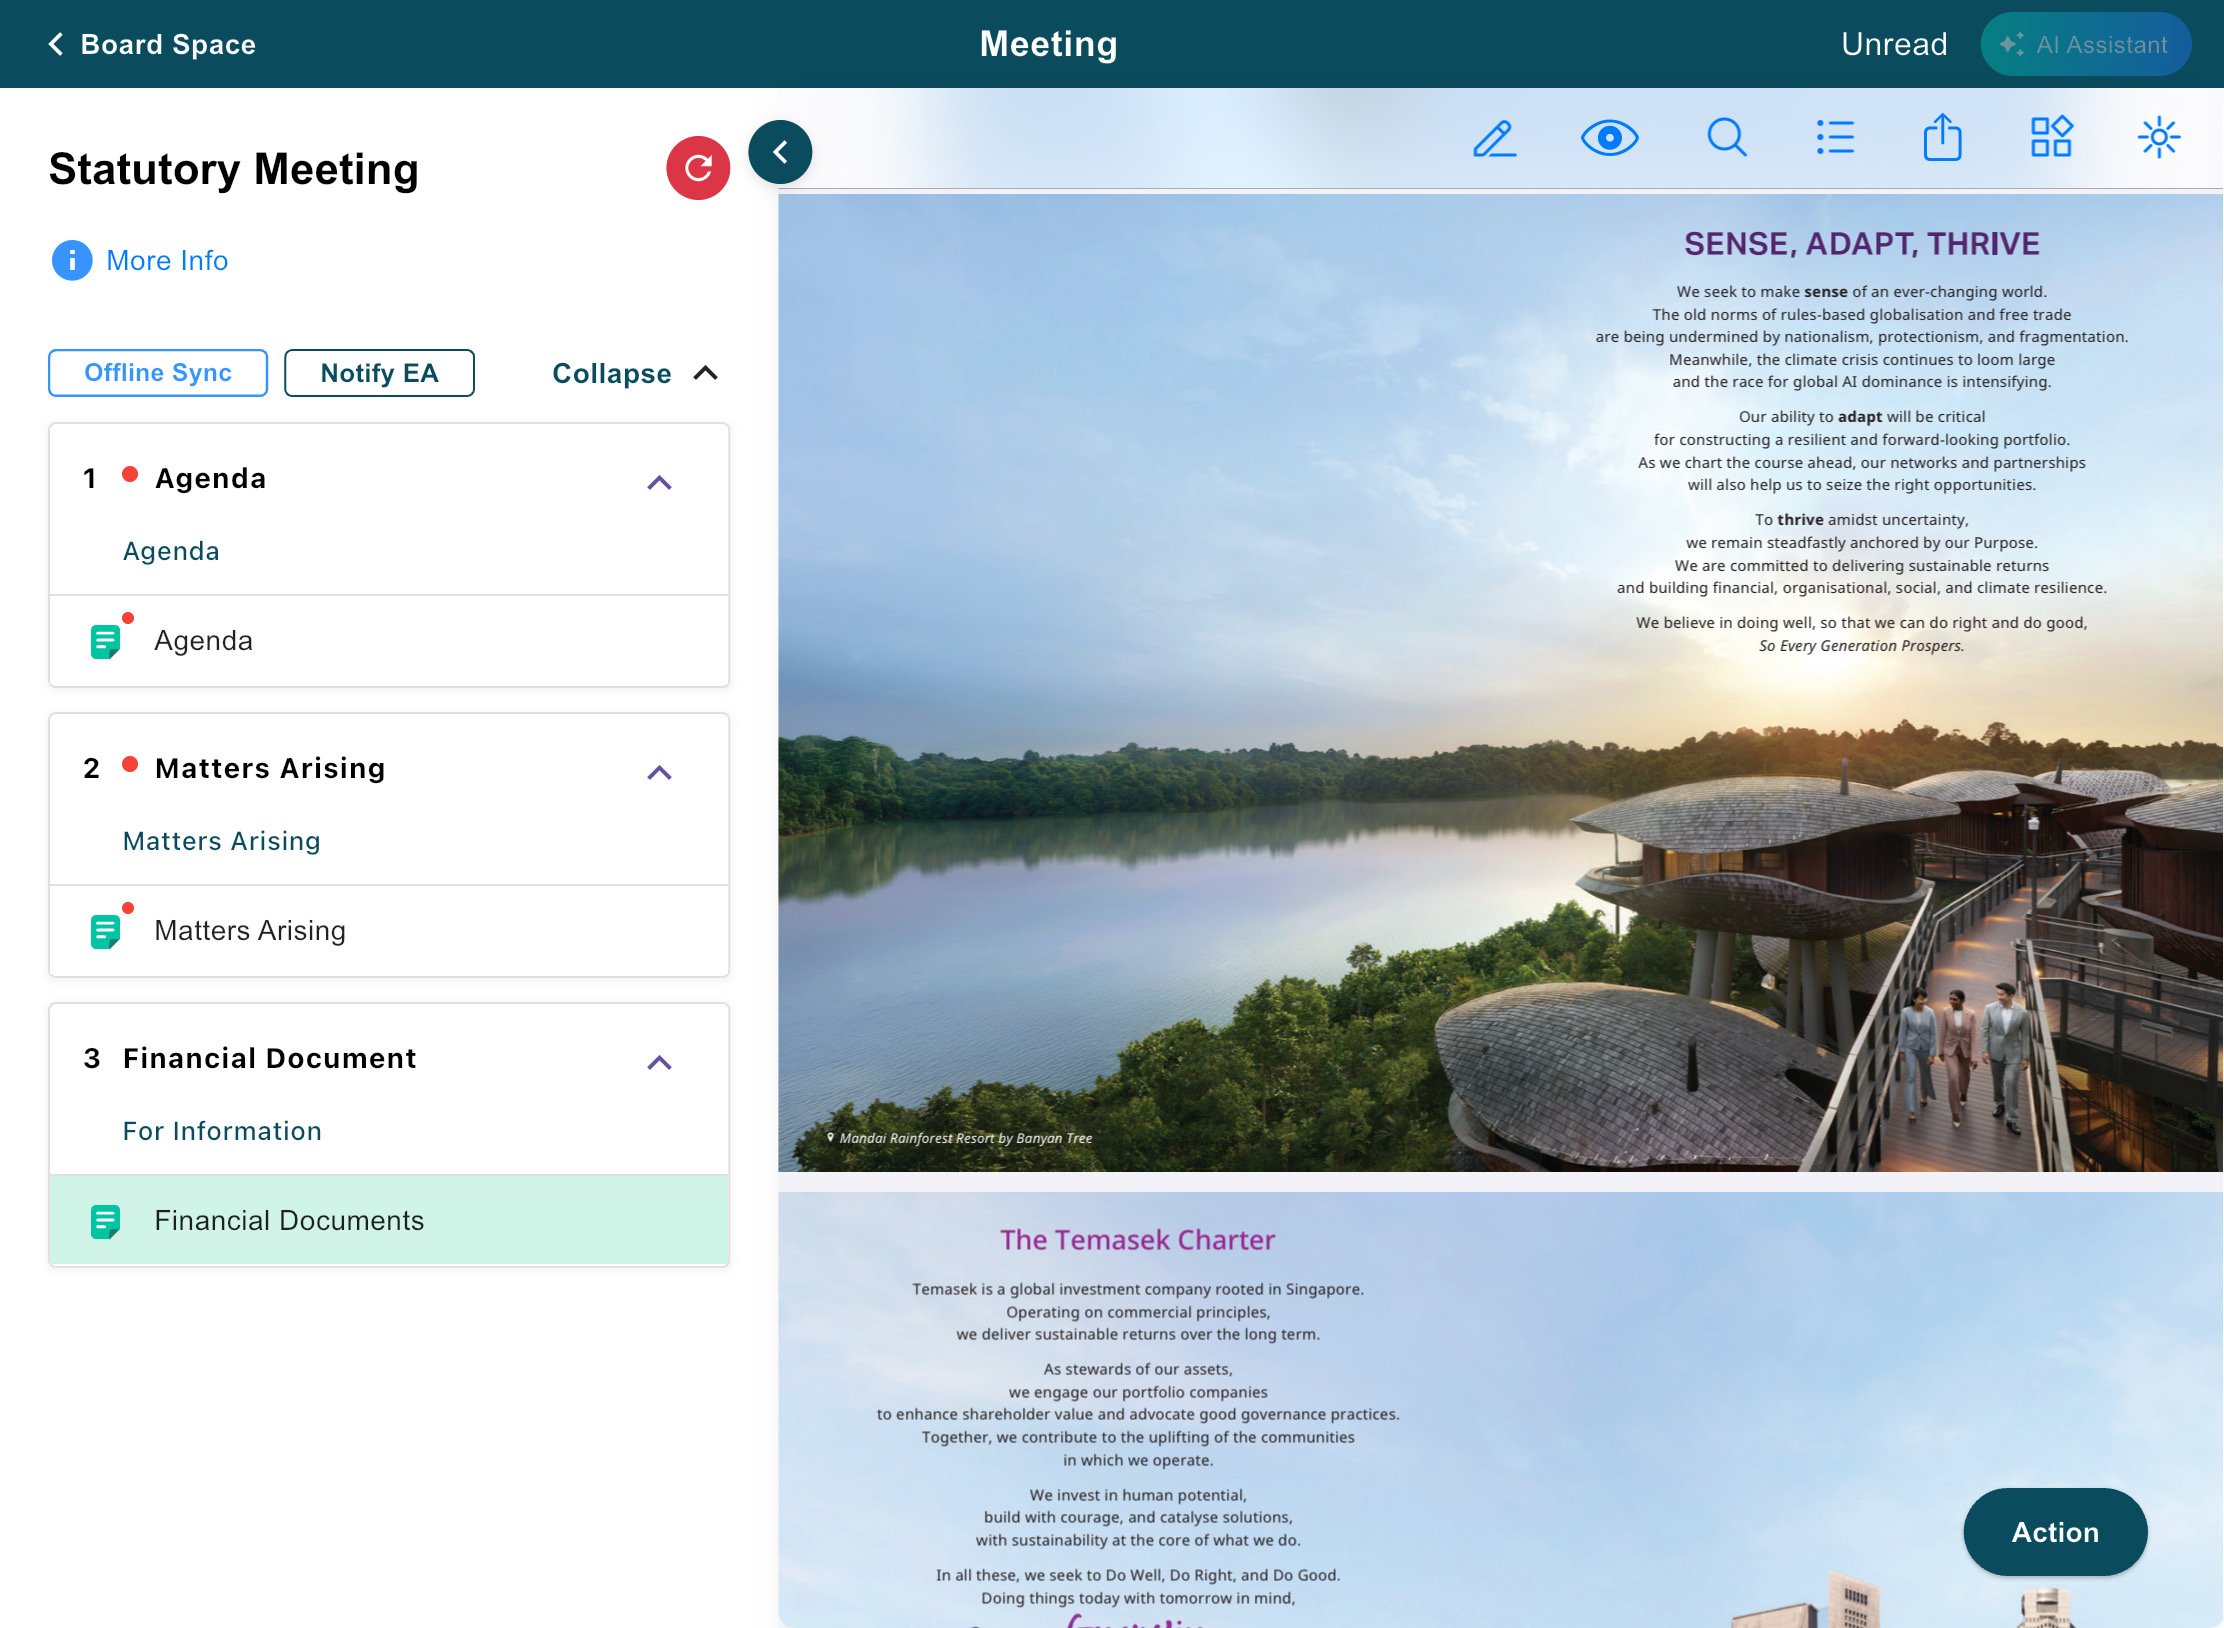
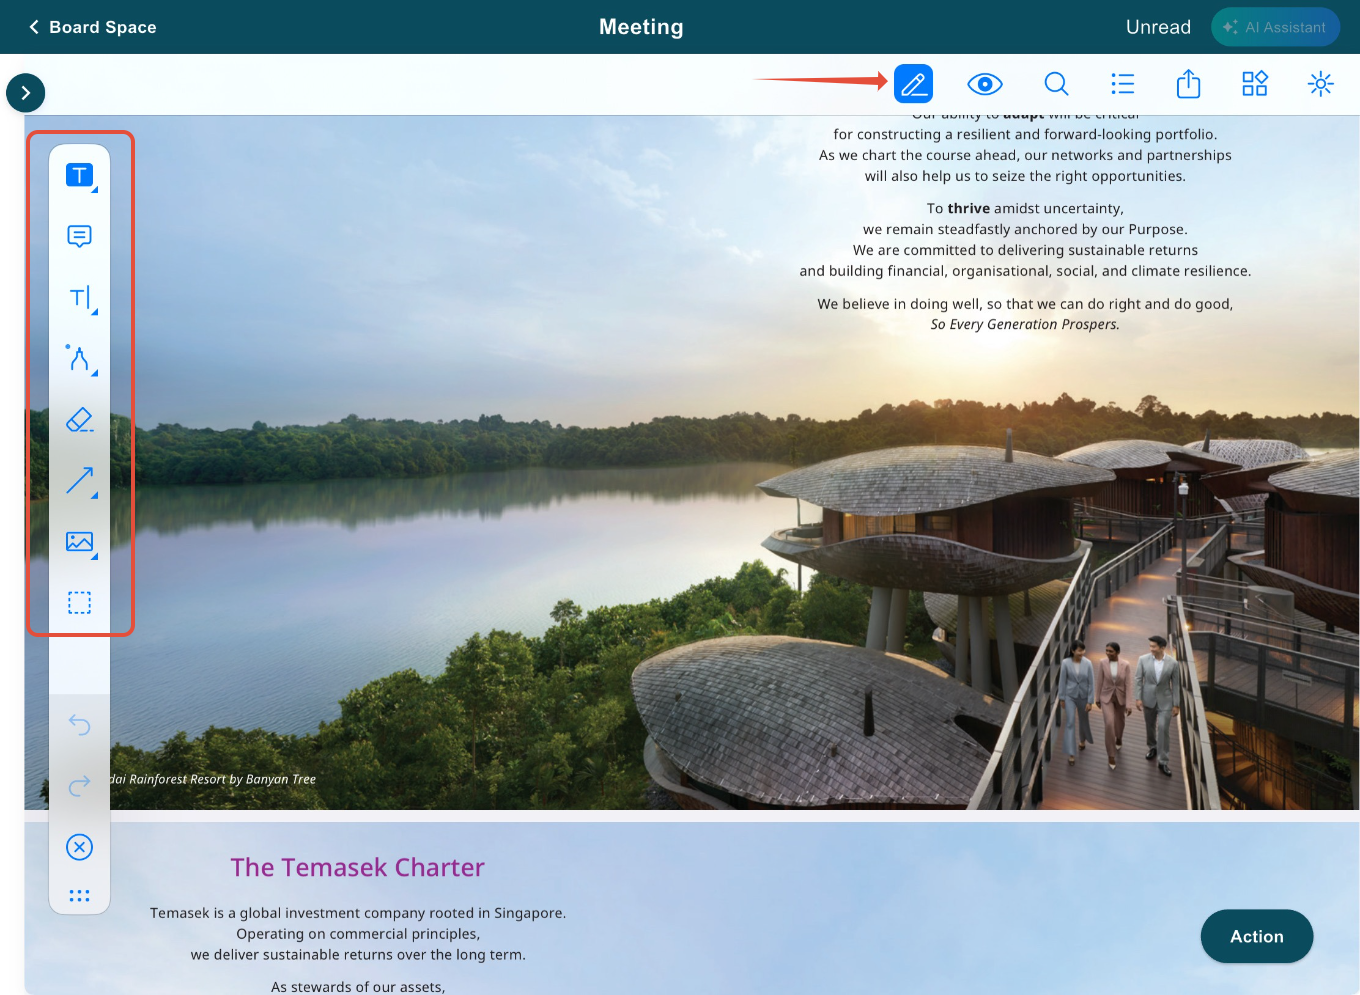
4) To start annotating, tap on the Pen icon located at the top of the screen.
Select from tools such as Highlighter, Notes, Insert Text, Pen, Draw Arrow, or Insert Images.
Note: Your annotations will be auto-saved into your Board.Vision account and will be your copy hence it will not be seen by other Directors.
5) To delete annotation(s),
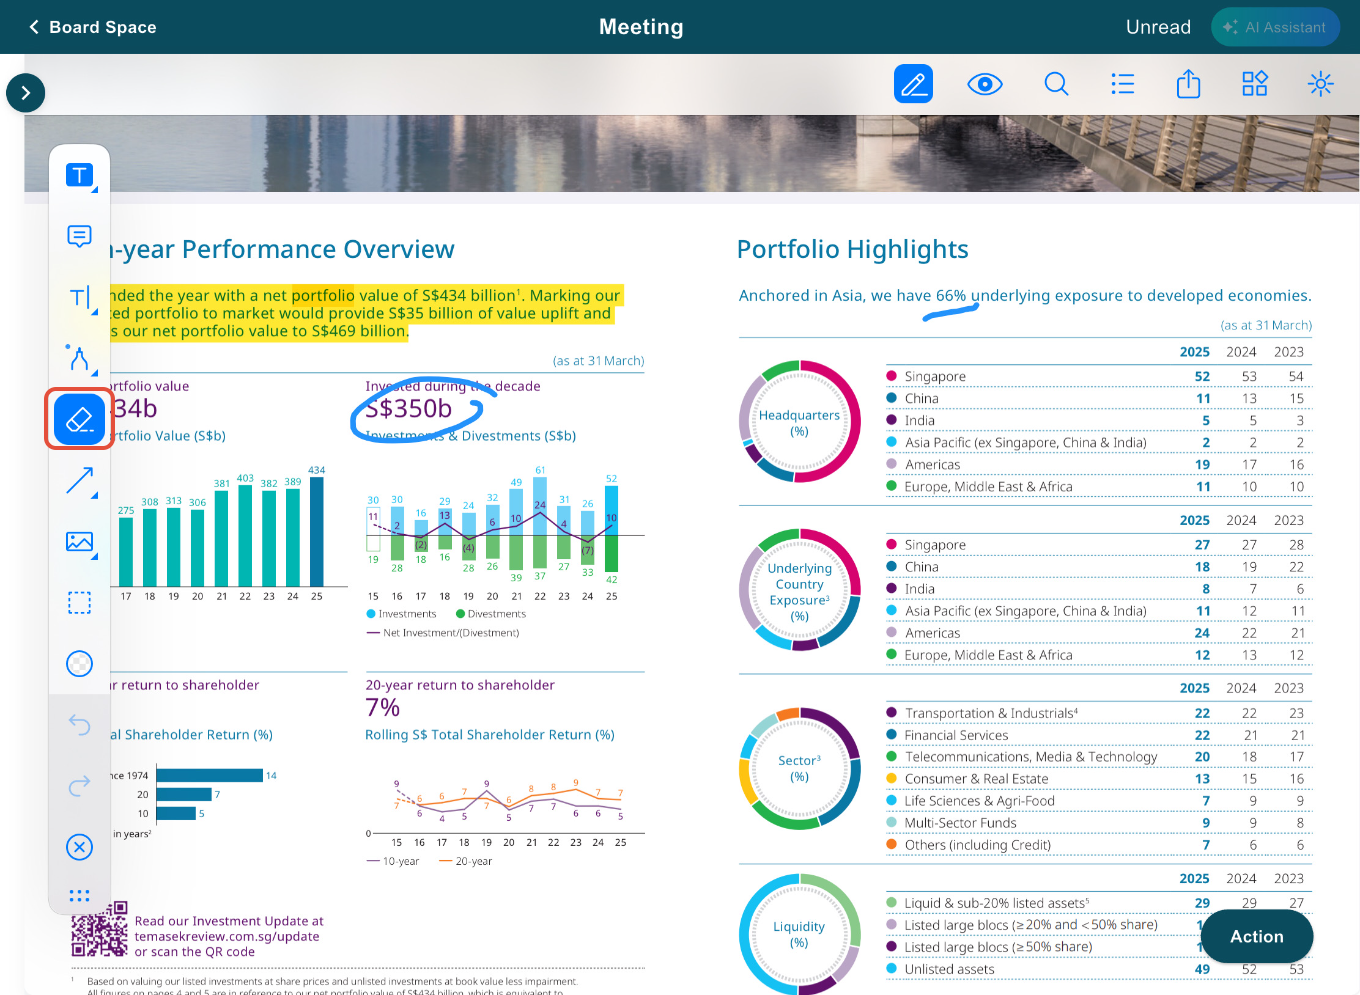
a) Use the Eraser to remove any Pen annotations.
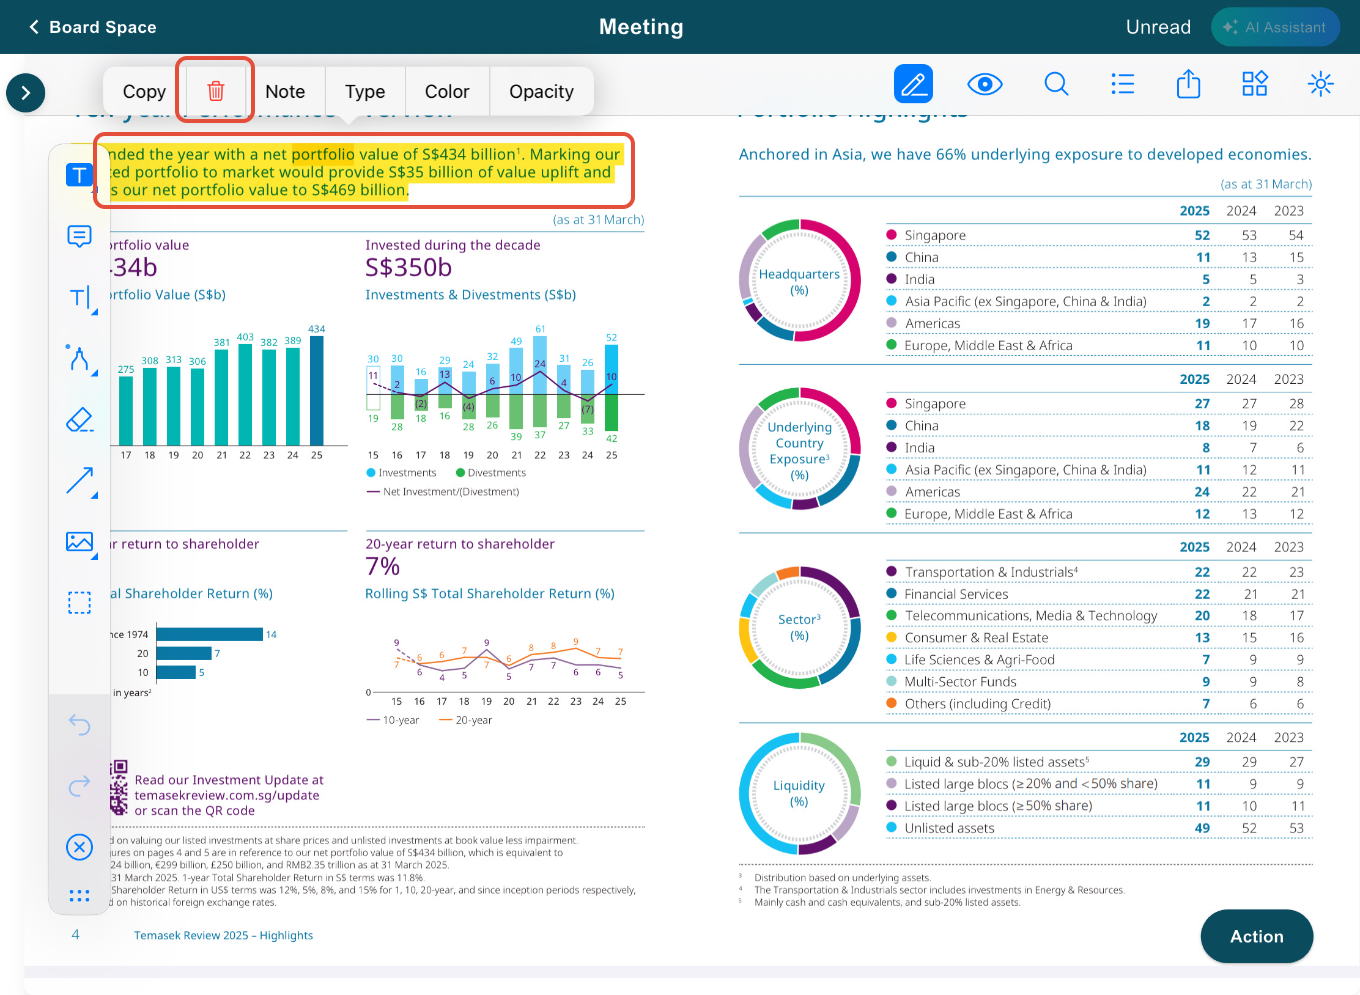
b) To remove Highlights, Texts, Notes, Arrows or Image annotations, start by deselecting any annotation icons from the side annotation toolbar.
Next, choose the specific annotation you want to delete and tap on the Trash icon.
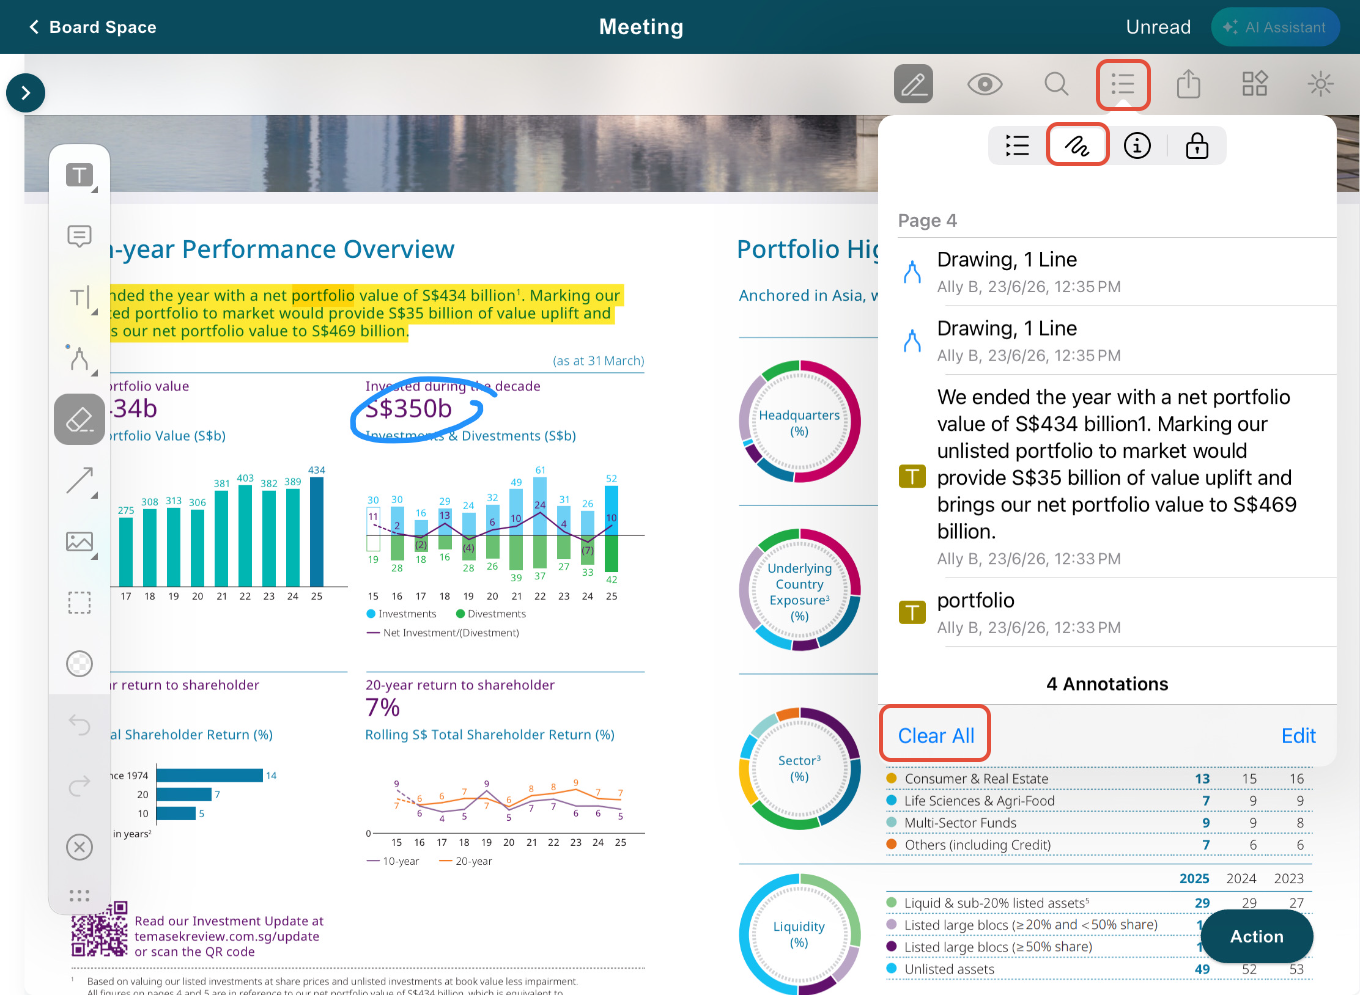
c) To delete all the annotations at once, tap on the Documents icon at the top of the screen. Then, select Annotations and tap on Clear All.
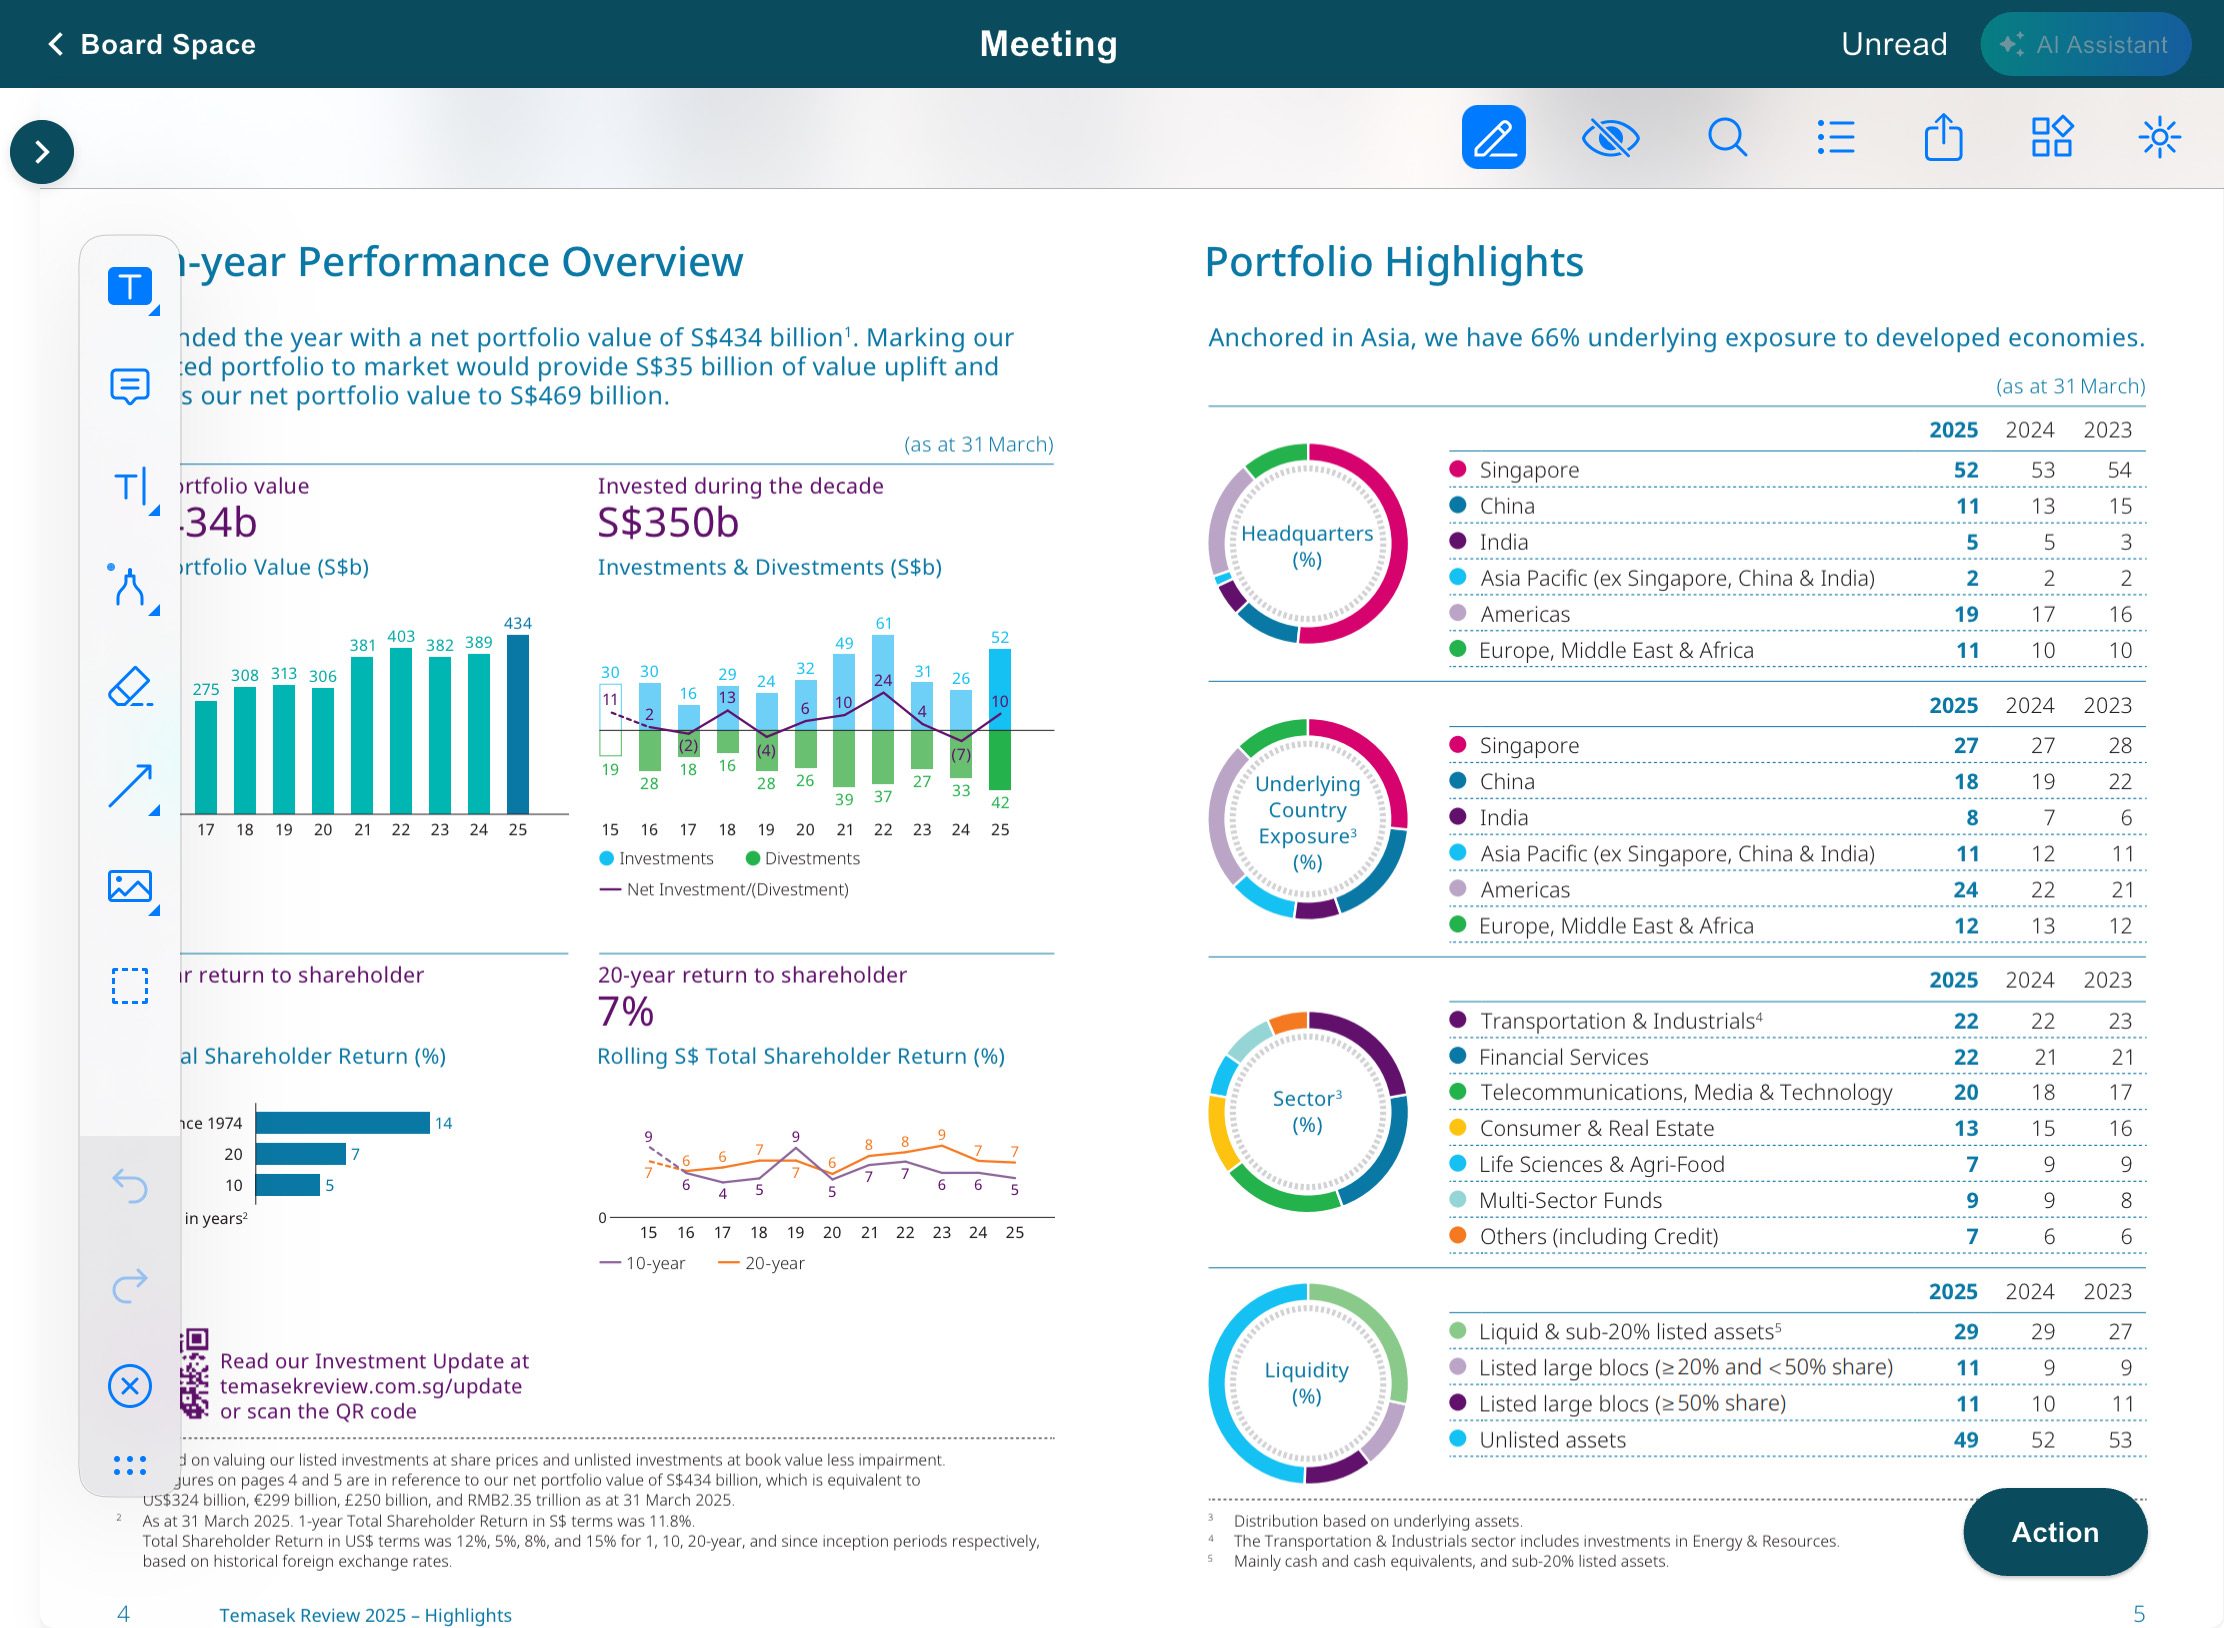
6) When the eye icon is displayed with a slash, it indicates that you are viewing the original version of the document without any annotations.
You have completed the tutorial on how to annotate your personal copy of a document.
To find out more about how to annotate a shared copy of a document (collaboration), click here.
Was this article helpful?
That’s Great!
Thank you for your feedback
Sorry! We couldn't be helpful
Thank you for your feedback
Feedback sent
We appreciate your effort and will try to fix the article