In this article, we will walk you through the steps on how to activate your Board.Vision account and access it on a desktop & laptop.
Once you have been added to Board.Vision as a user, you can access it via Google Chrome (version 65.0 and later) and Microsoft Edge (version 87.0 and later) from https://app.board.vision.
You can also download the "Board.Vision" application from the respective mobile store (App Store and Google Play Store).
1. Activating Your Account
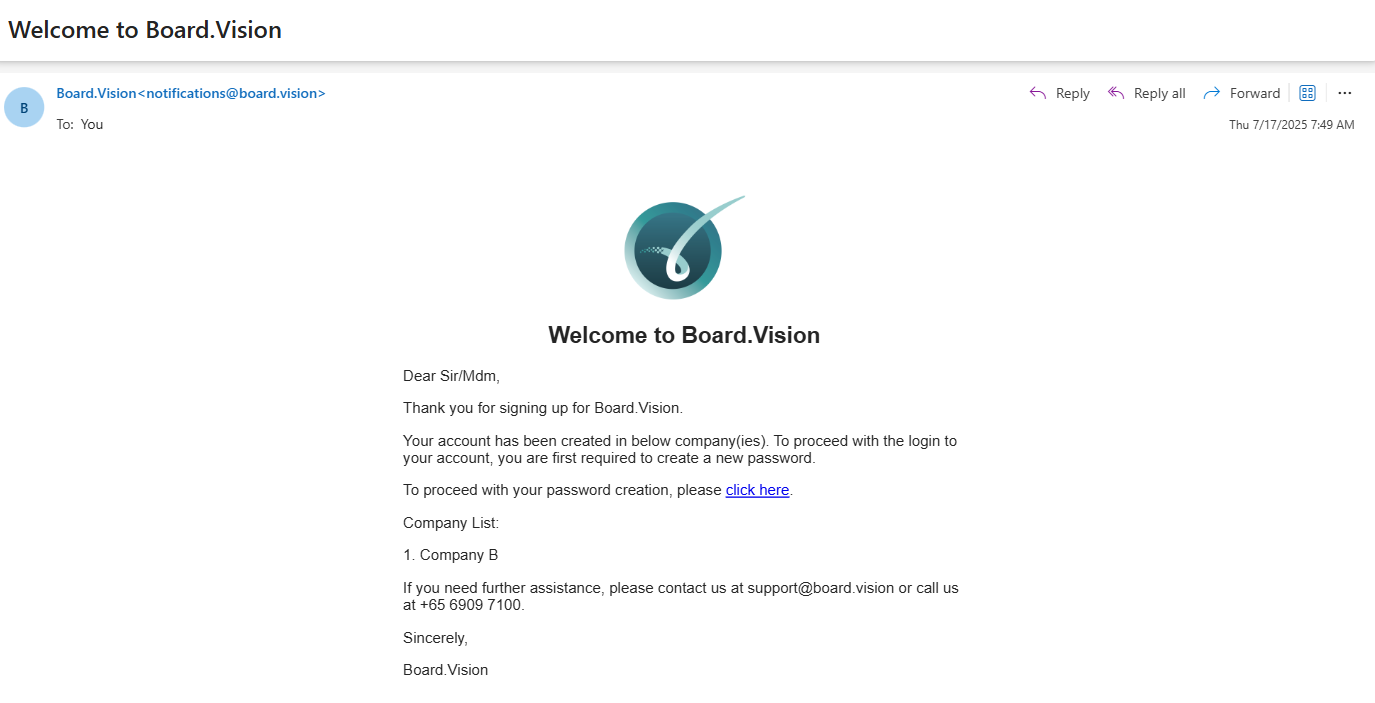
- Open the welcome email from Board.Vision <notifications@board.vision> and click the activation link.
- Set up your password by following the on-screen requirements.
- Proceed to accept the Terms of Use.
- Select the company you wish to access if your account is linked to multiple companies.
- Enter One-Time Password (OTP).
For detailed instructions on activating your Board.Vision account using a desktop or laptop, please click the links below:
- For Normal users: Activating your Board.Vision Account via Desktop or Laptop
- For Single Sign-On (SSO) users: Activating your Board.Vision Account via Desktop or Laptop (For Single-Sign On Users)
2. Logging In
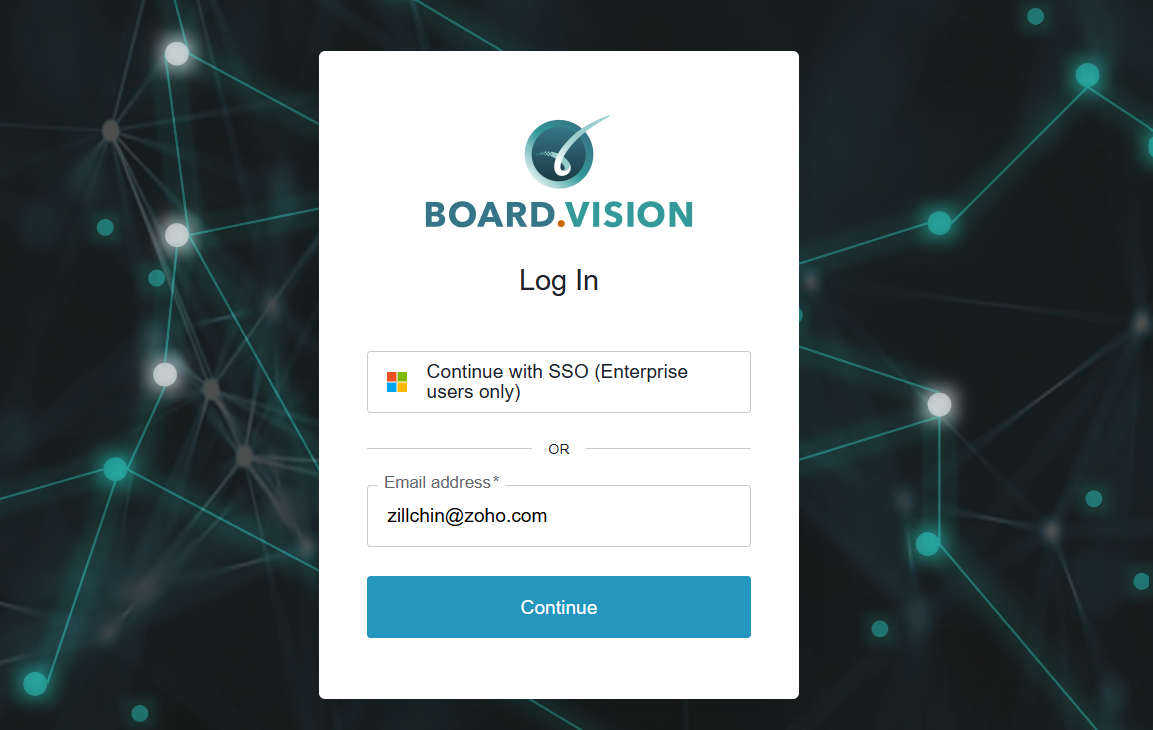
Once you open Board.Vision, you will be presented with the login screen.
To log in, you'll enter your email address and then select Continue.
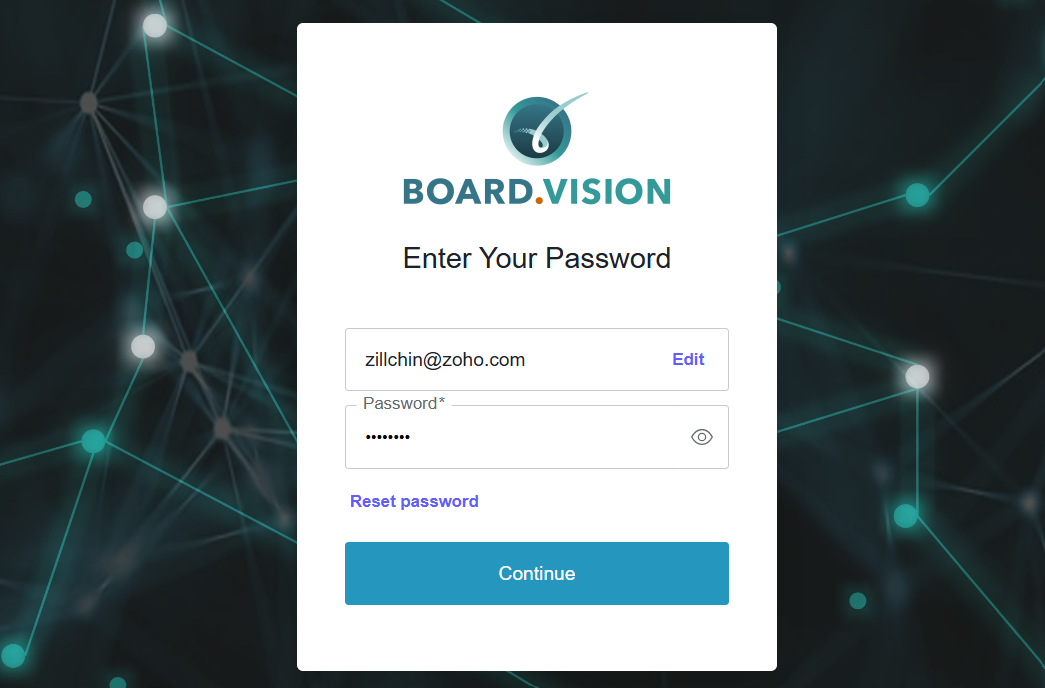
On the following screen, enter your password and select Continue. If your organisation utilises single sign-on (SSO), you are only required to enter your email address.
3. Switching Companies
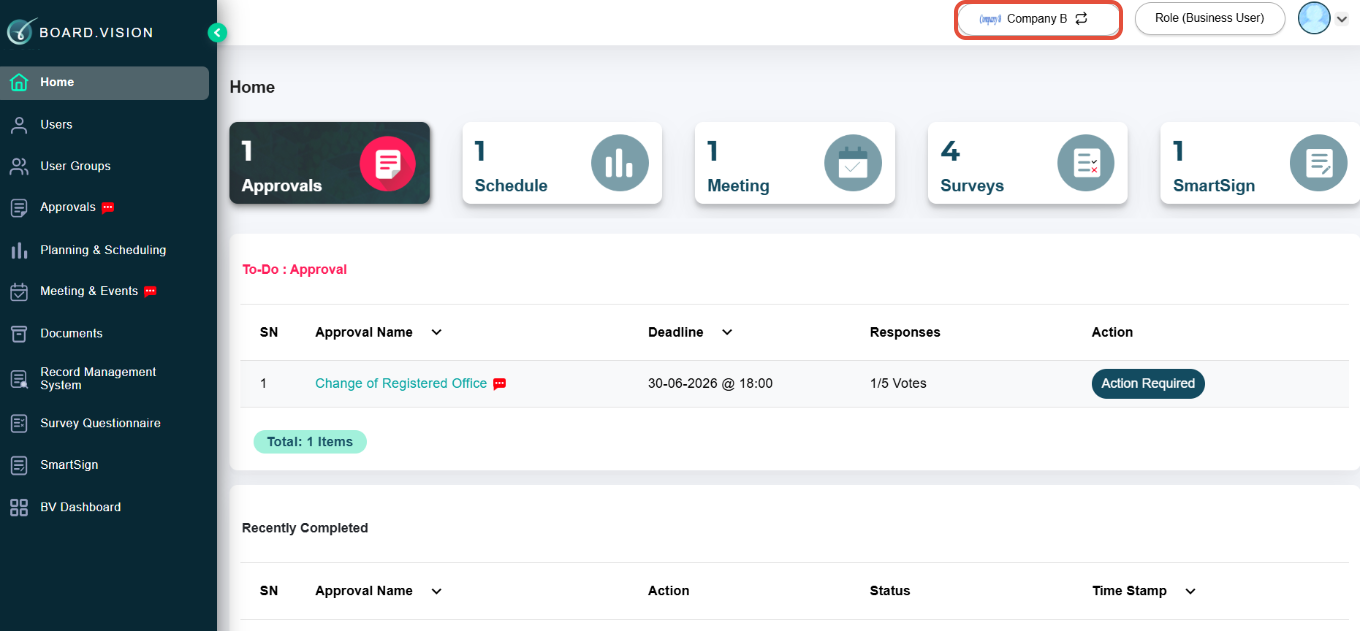
If you have access to multiple companies, open the company selection screen or company-switching option.
Select the company you wish to access and verify that you are viewing the correct company before opening its meetings, documents, or approvals.
3.1 Save Signature for E-Signing of Approvals
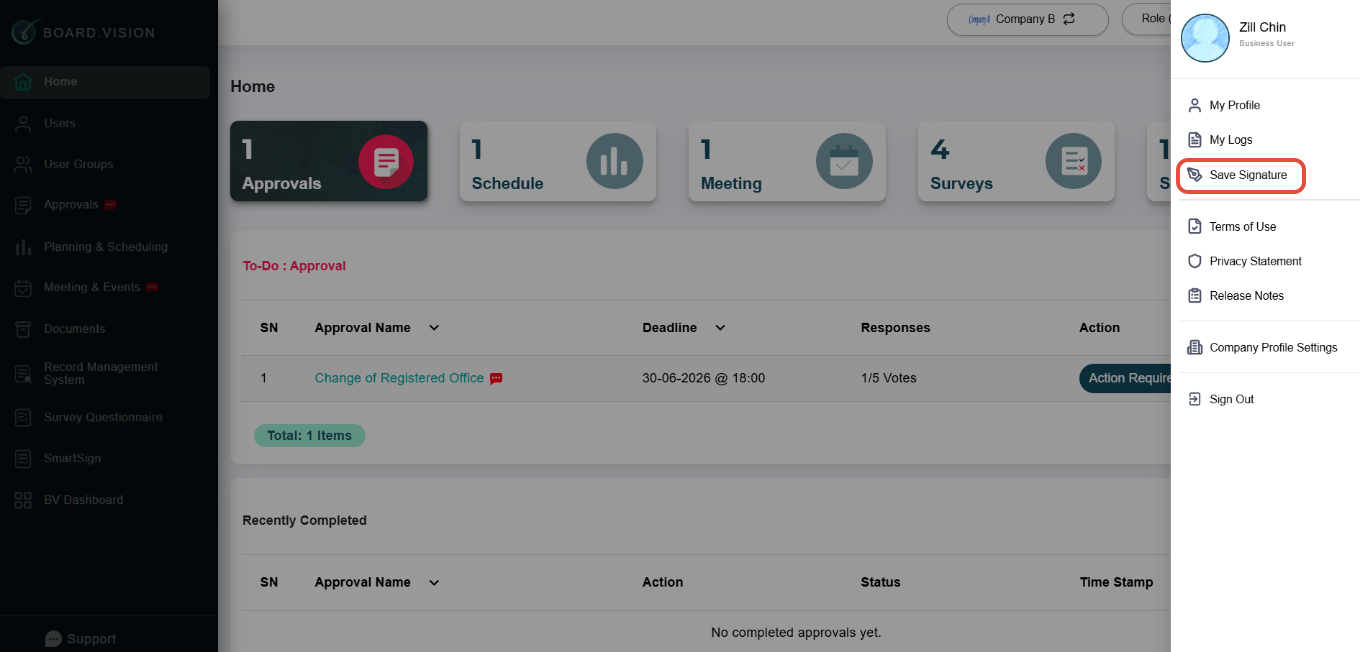
Click on Your Profile Picture at the top right of your screen and select Save Signature from the menu.
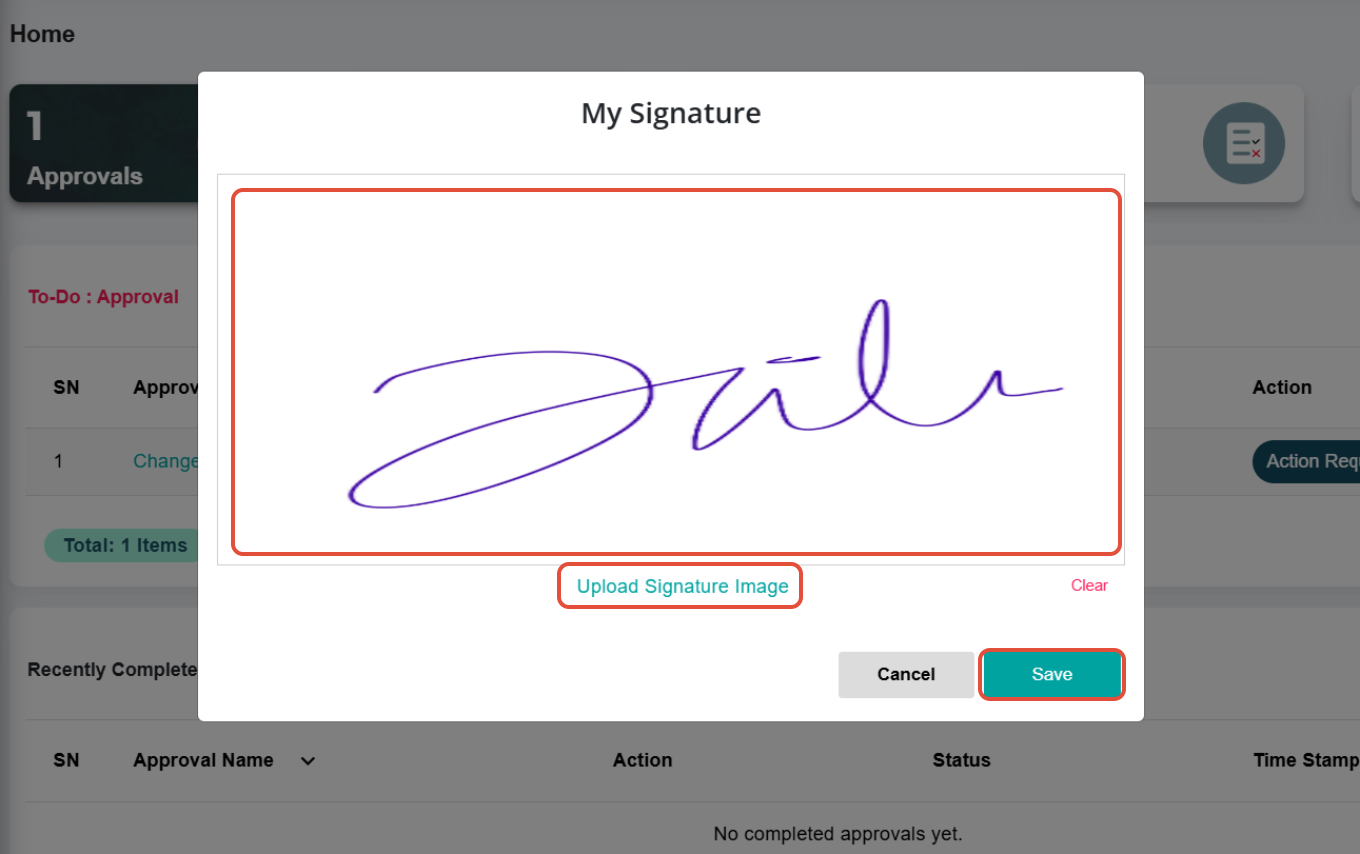
You may choose to upload a signature image that you have saved on your desktop/laptop, or sign within the white box.
Then, click on Save.
4. View Meetings, Read Papers and Add Annotations
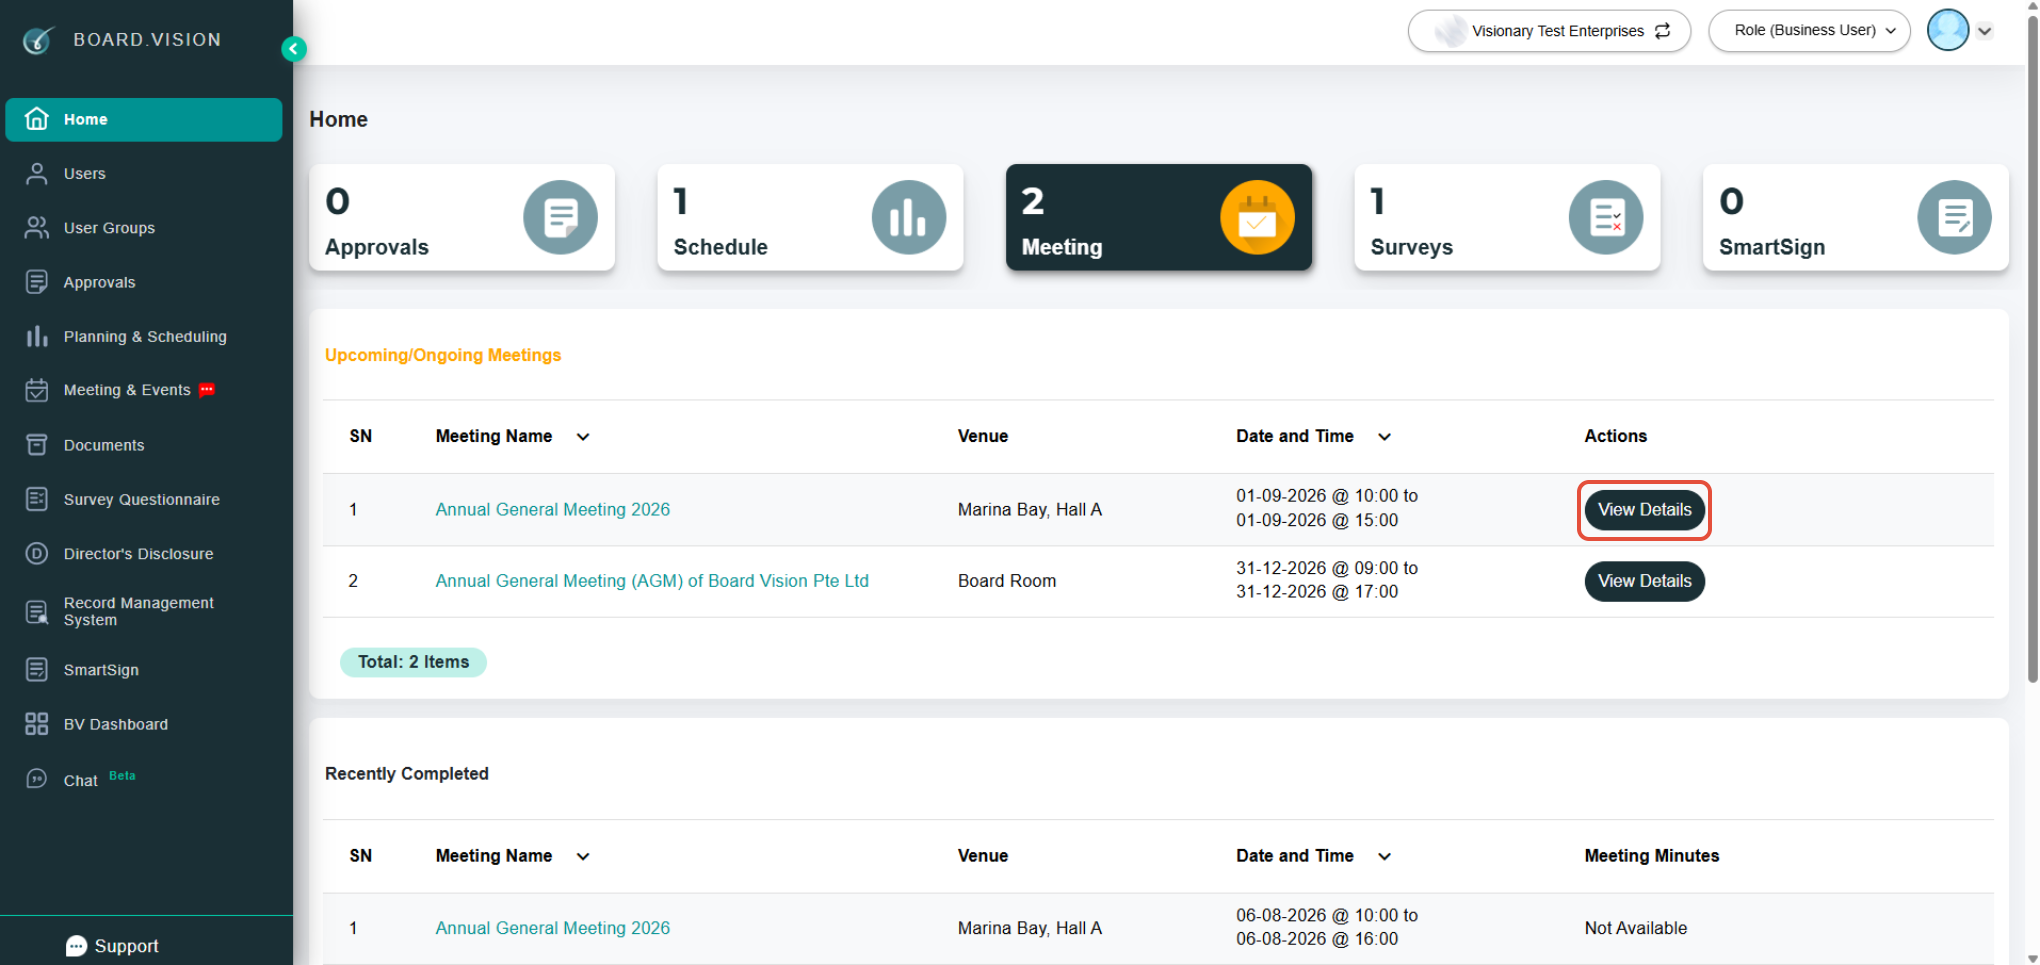
From the home screen, click on the Meetings section and locate the relevant meeting.
Go to View Details for more information.
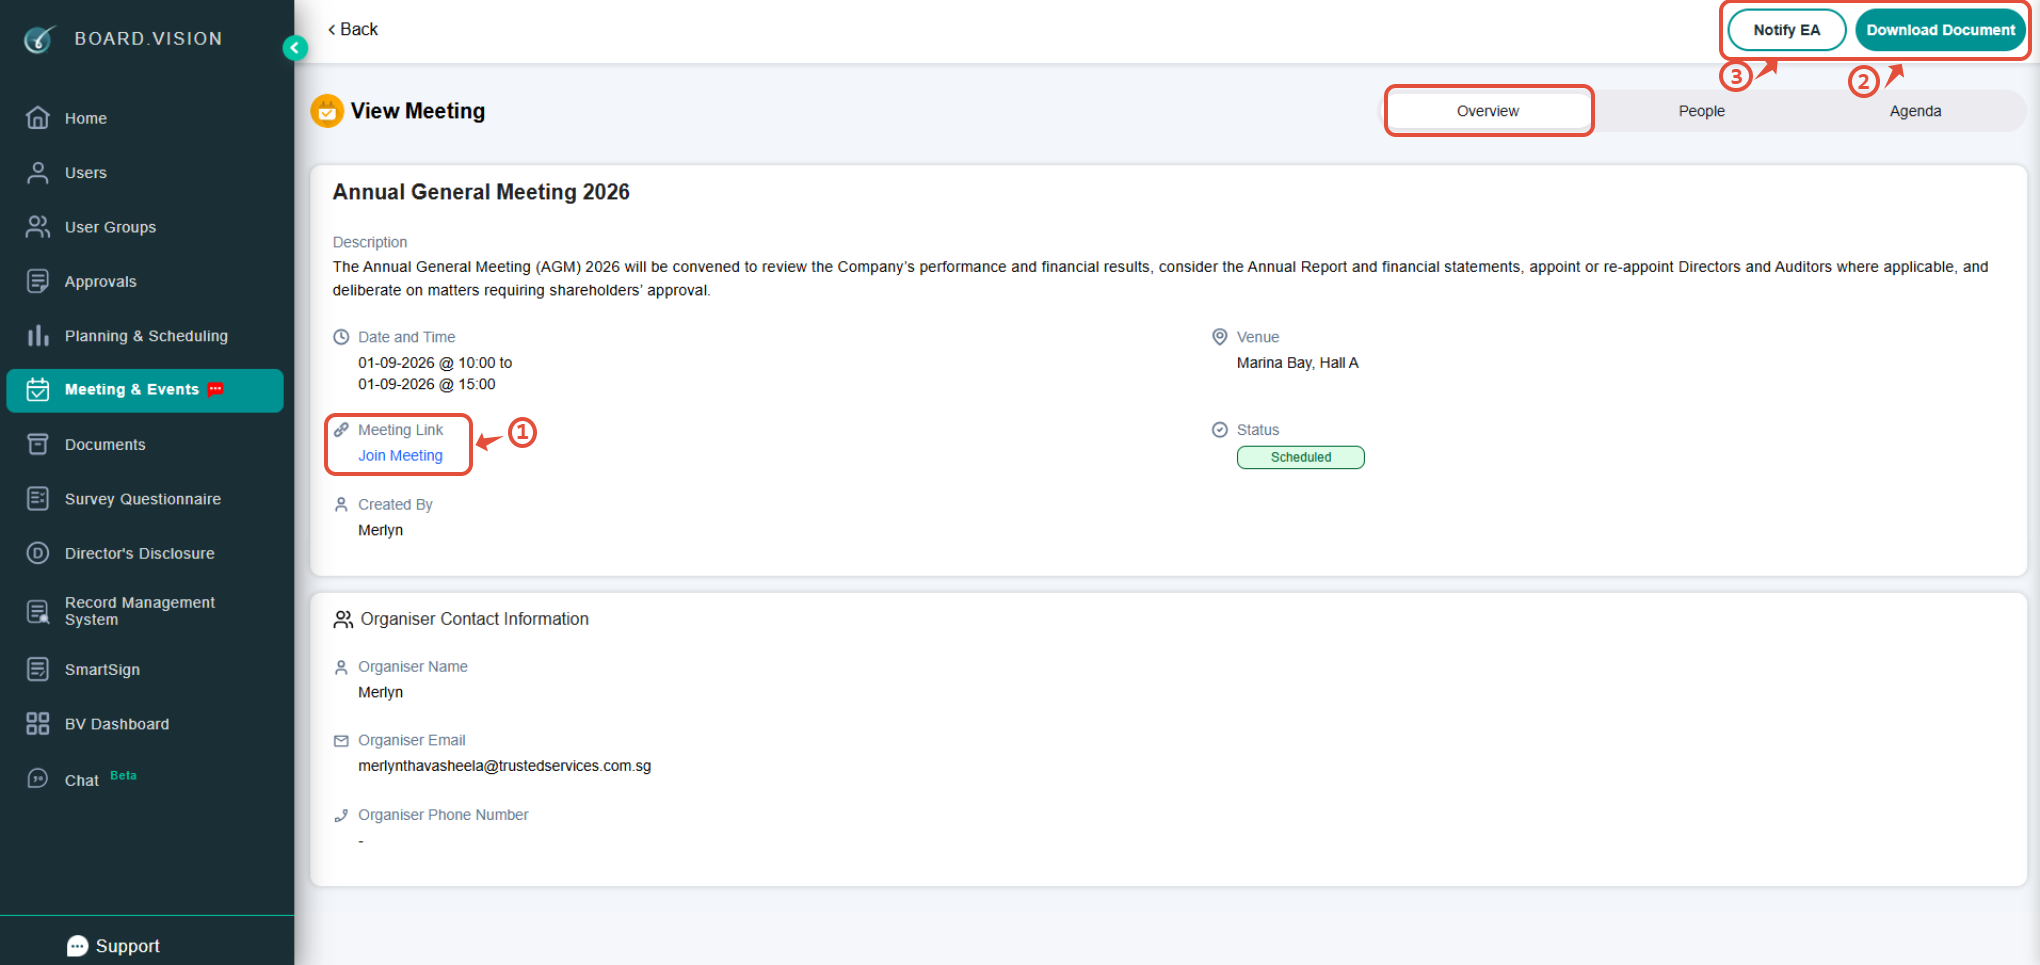
The Overview section includes the meeting date, time, venue, and other relevant information.
Depending on the setup, you can also use the following features:
- Join Meeting: Appears if the Administrator provided a video conference link.
- Download Documents: Allows desktop users to download the complete meeting board pack where downloading is permitted
- Notify Executive Assistant: Appears if you have an assigned Personal Assistant (PA) in the system.
4.2 Viewing Meeting Agenda Documents
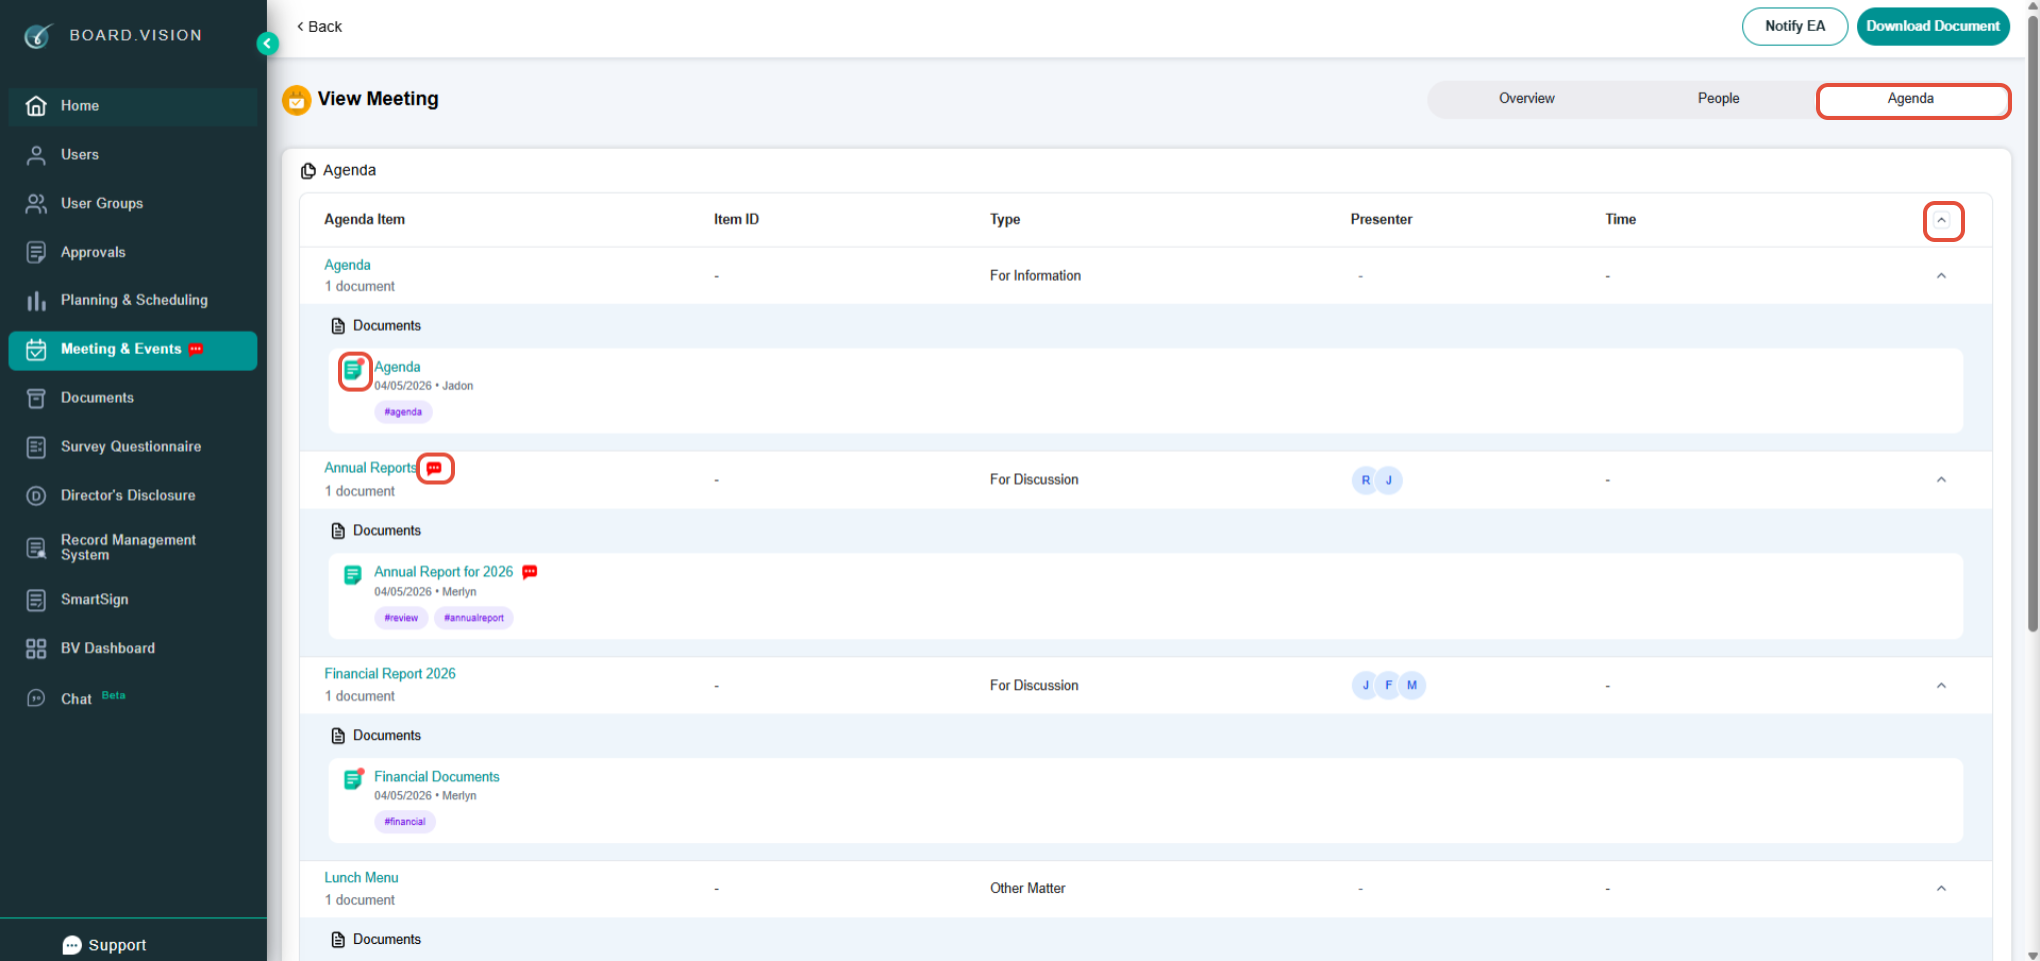
Click Agenda to review the agenda items and select on the expand icon to view its associated documents.
Open the relevant document to read the meeting papers.
4.3 Adding Personal and Shared Annotations
Personal annotations allow you to mark up your own copy of a document without sharing your notes with other users.
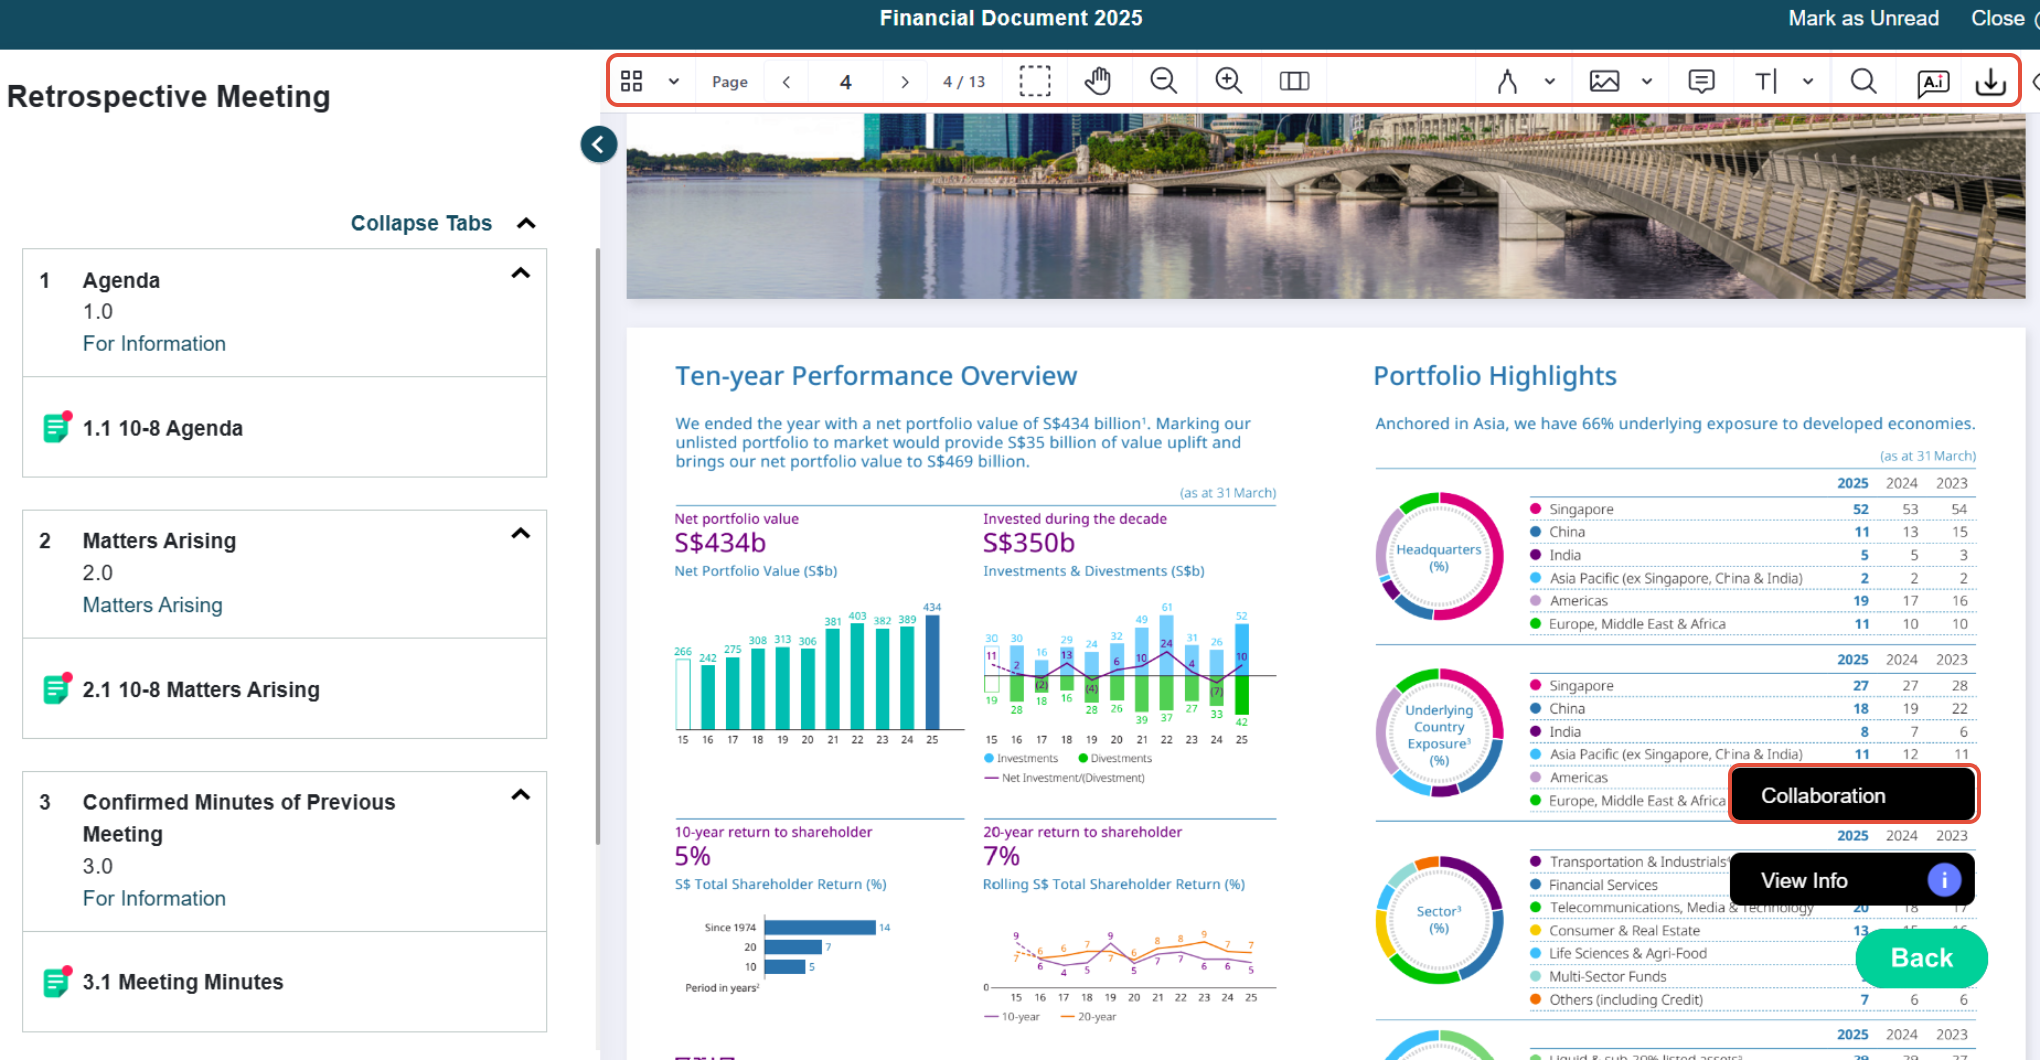
Collaboration annotations allow you to discuss specific sections of a document with other authorised Business Users or administrators.
Open the document and click the Pen icon at the top of the screen to do the annotation on the personal copy.
To delete an annotation, select the mark and click the Trash icon at the top-right corner.
To add shared annotations, click Actions and select Collaboration.
4.4 Tagging Other Users in Comments
On the document or collaboration area, locate the comments section.
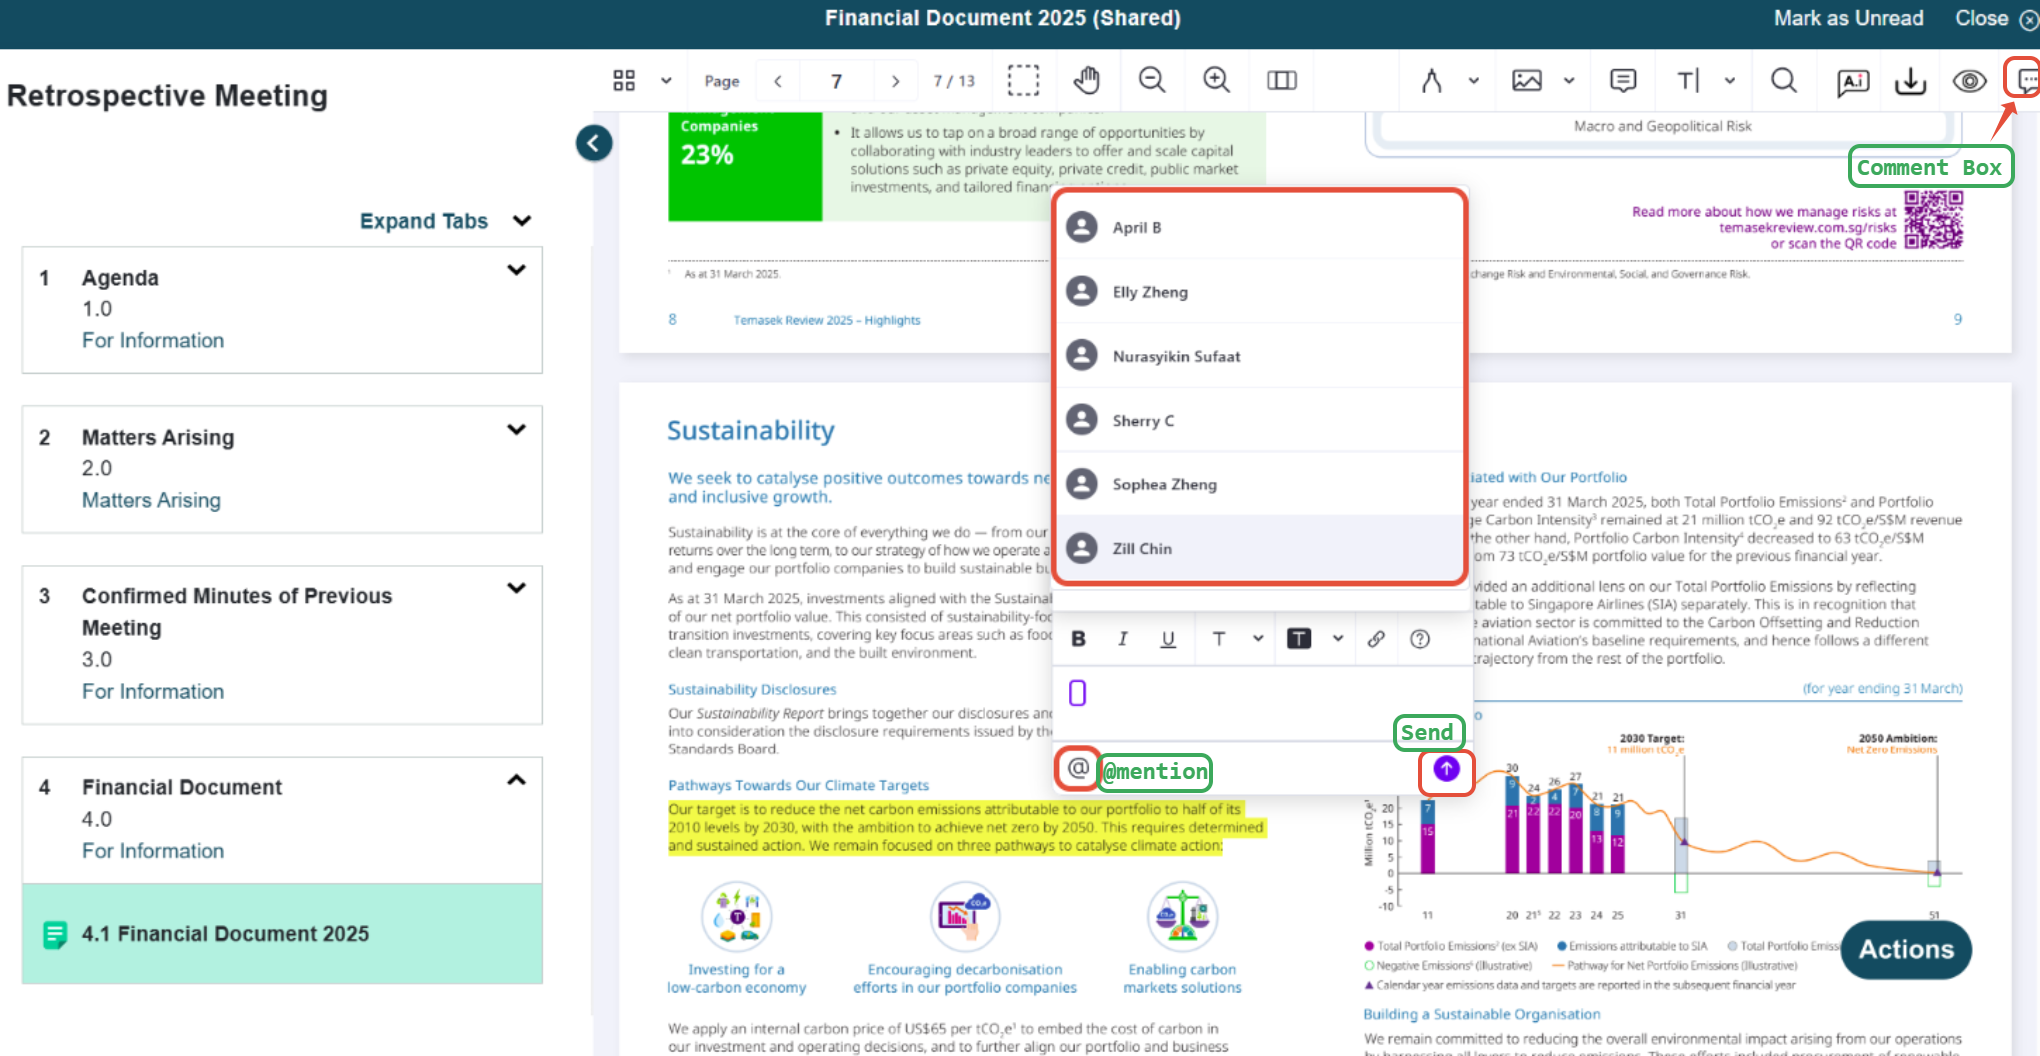
Enter your comment and use the @mention function to tag the relevant Business User or Administrator.
Select the intended person from the available list and submit the comment.
5. Respond to Approvals
5.1 Acting on an Approval
From the home screen, click on the Meetings section and locate the relevant meeting.
Go to View Details for more information.
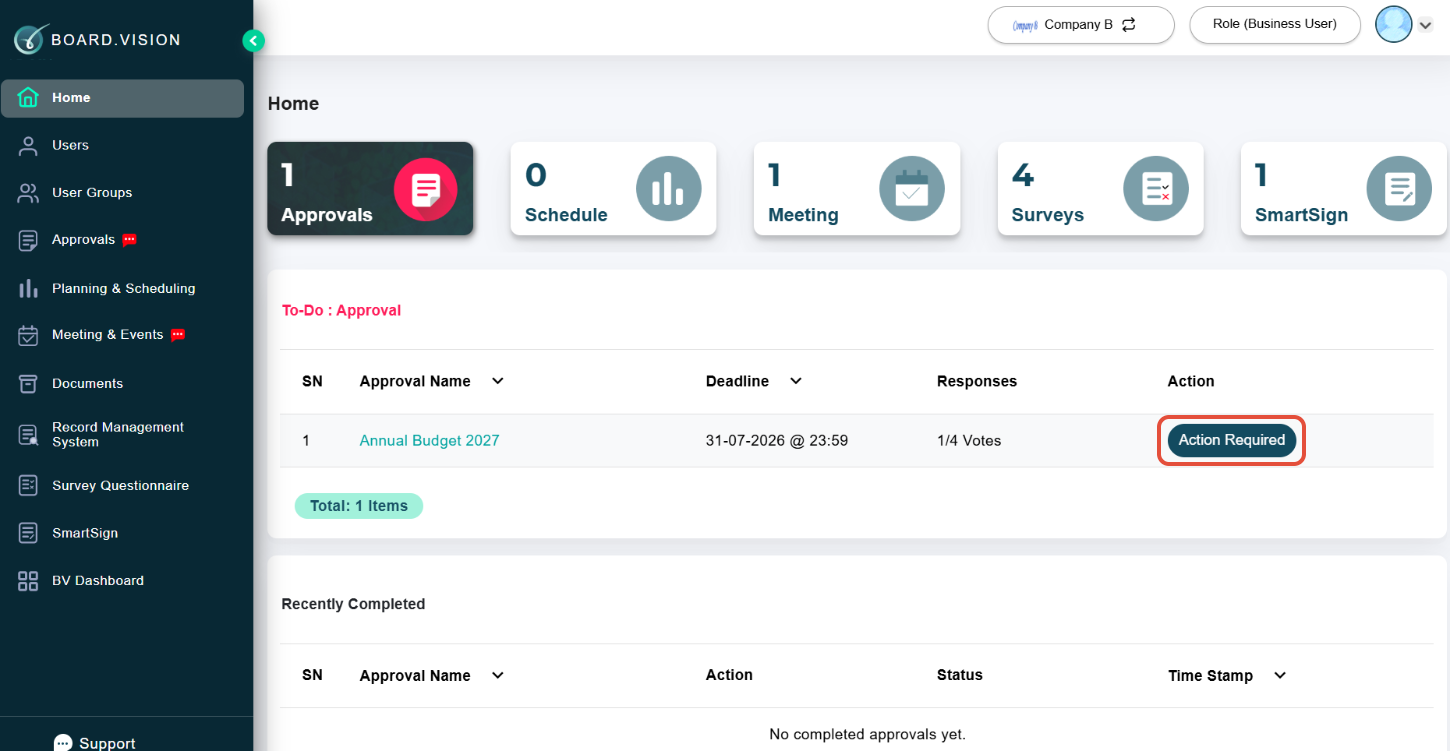
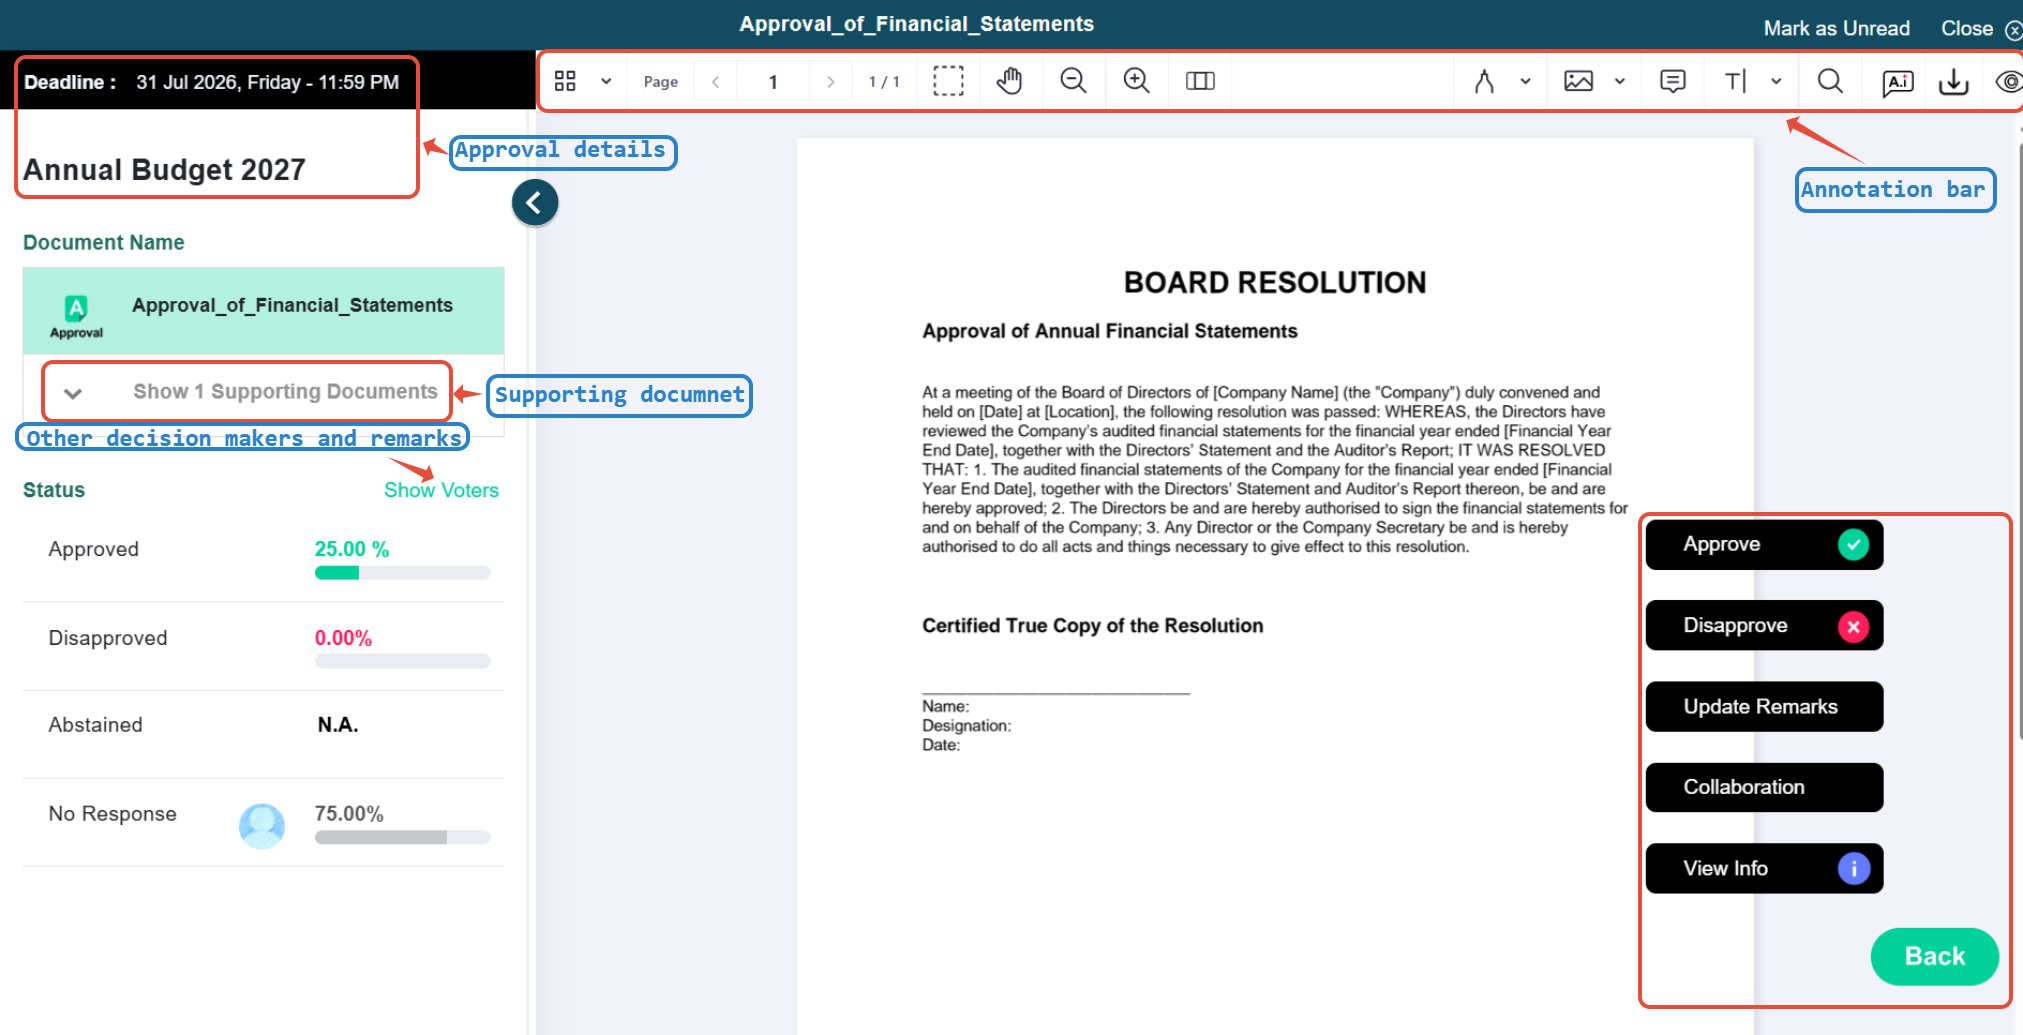
Open the approval to review its details and deadline. Review the resolution, supporting documents, and other decision-makers’ remarks, if available.
Select the appropriate response from the available options: Approve, Disapprove, or Abstain. Add remarks, if enabled.
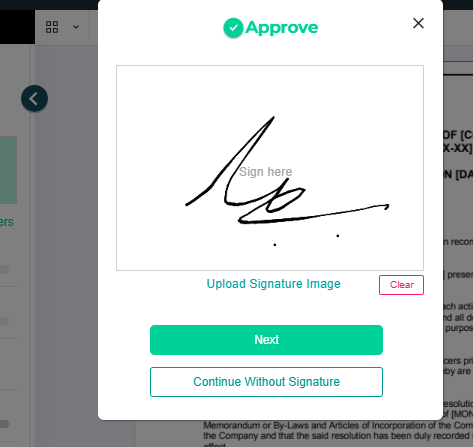
On the signature screen, sign manually or upload a signature image, then select Next. Alternatively, select Continue without Signature.
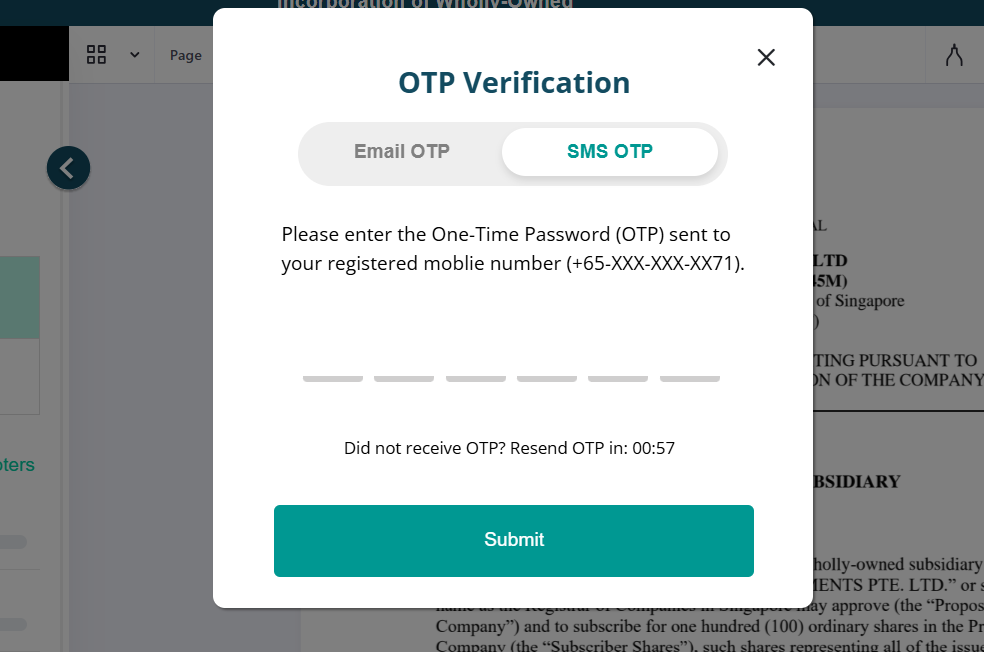
Complete any required confirmation or one-time password (OTP) verification, then submit the response.
Verify the approval status to confirm that the response has been recorded.
6. Planning & Scheduling
6.1 Voting on Proposed Meeting Dates
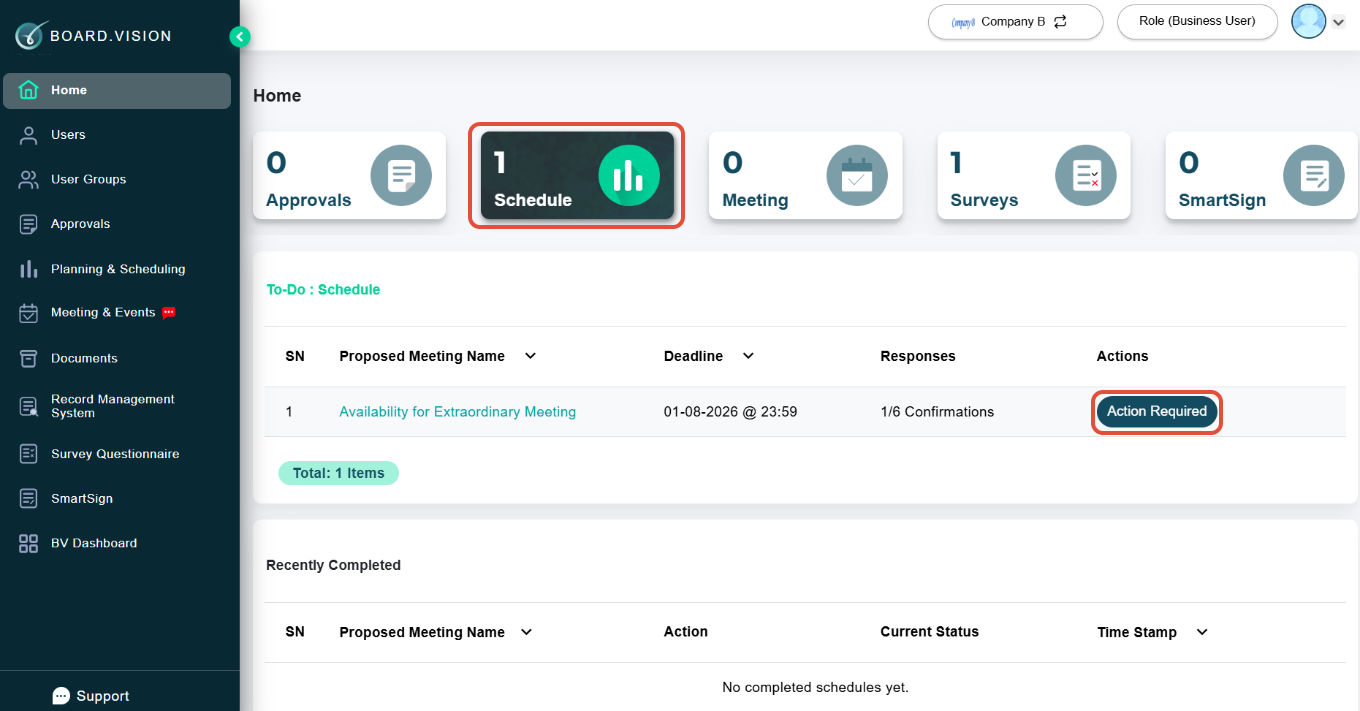
From the home screen, click on the Schedules section and locate the relevant schedules.
Go to Action Required for more information.
On the View Schedule Basic Information page, you can view information such as the deadline and participants.
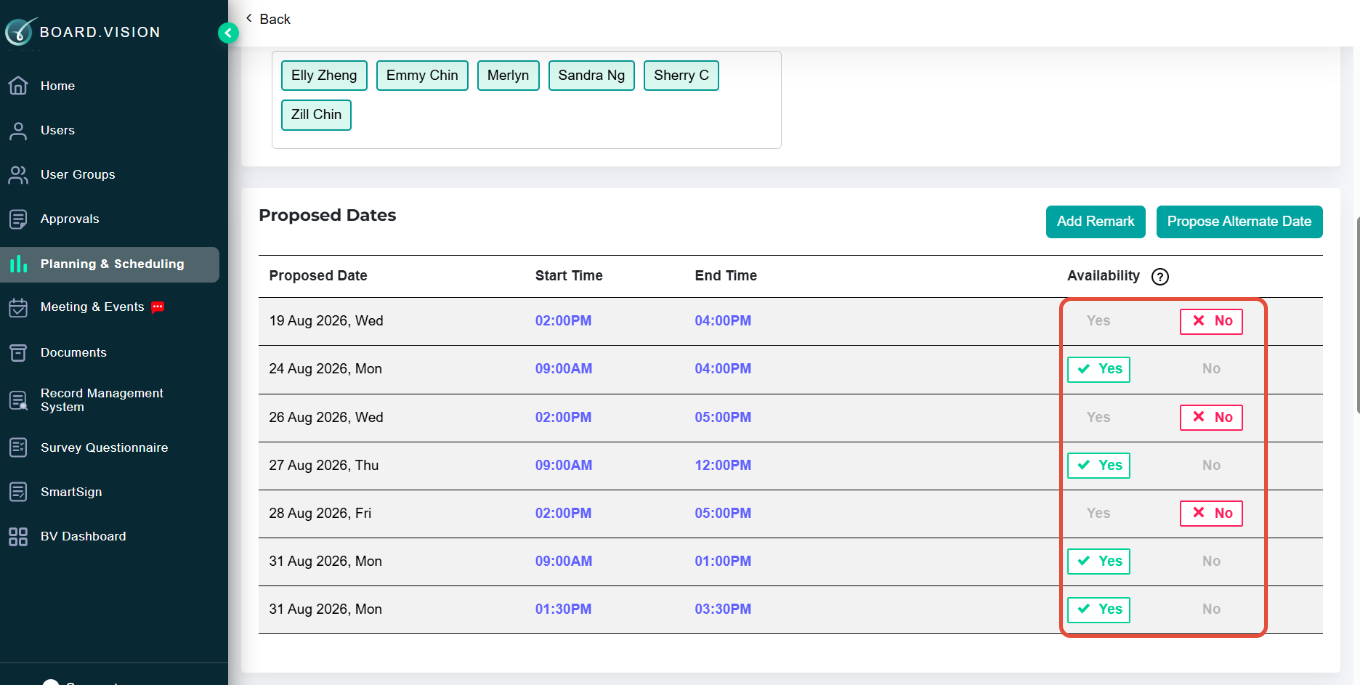
Scroll down to the Proposed Dates section and vote on the dates proposed by the Administrator by selecting 'Yes' or 'No' to indicate your availability.
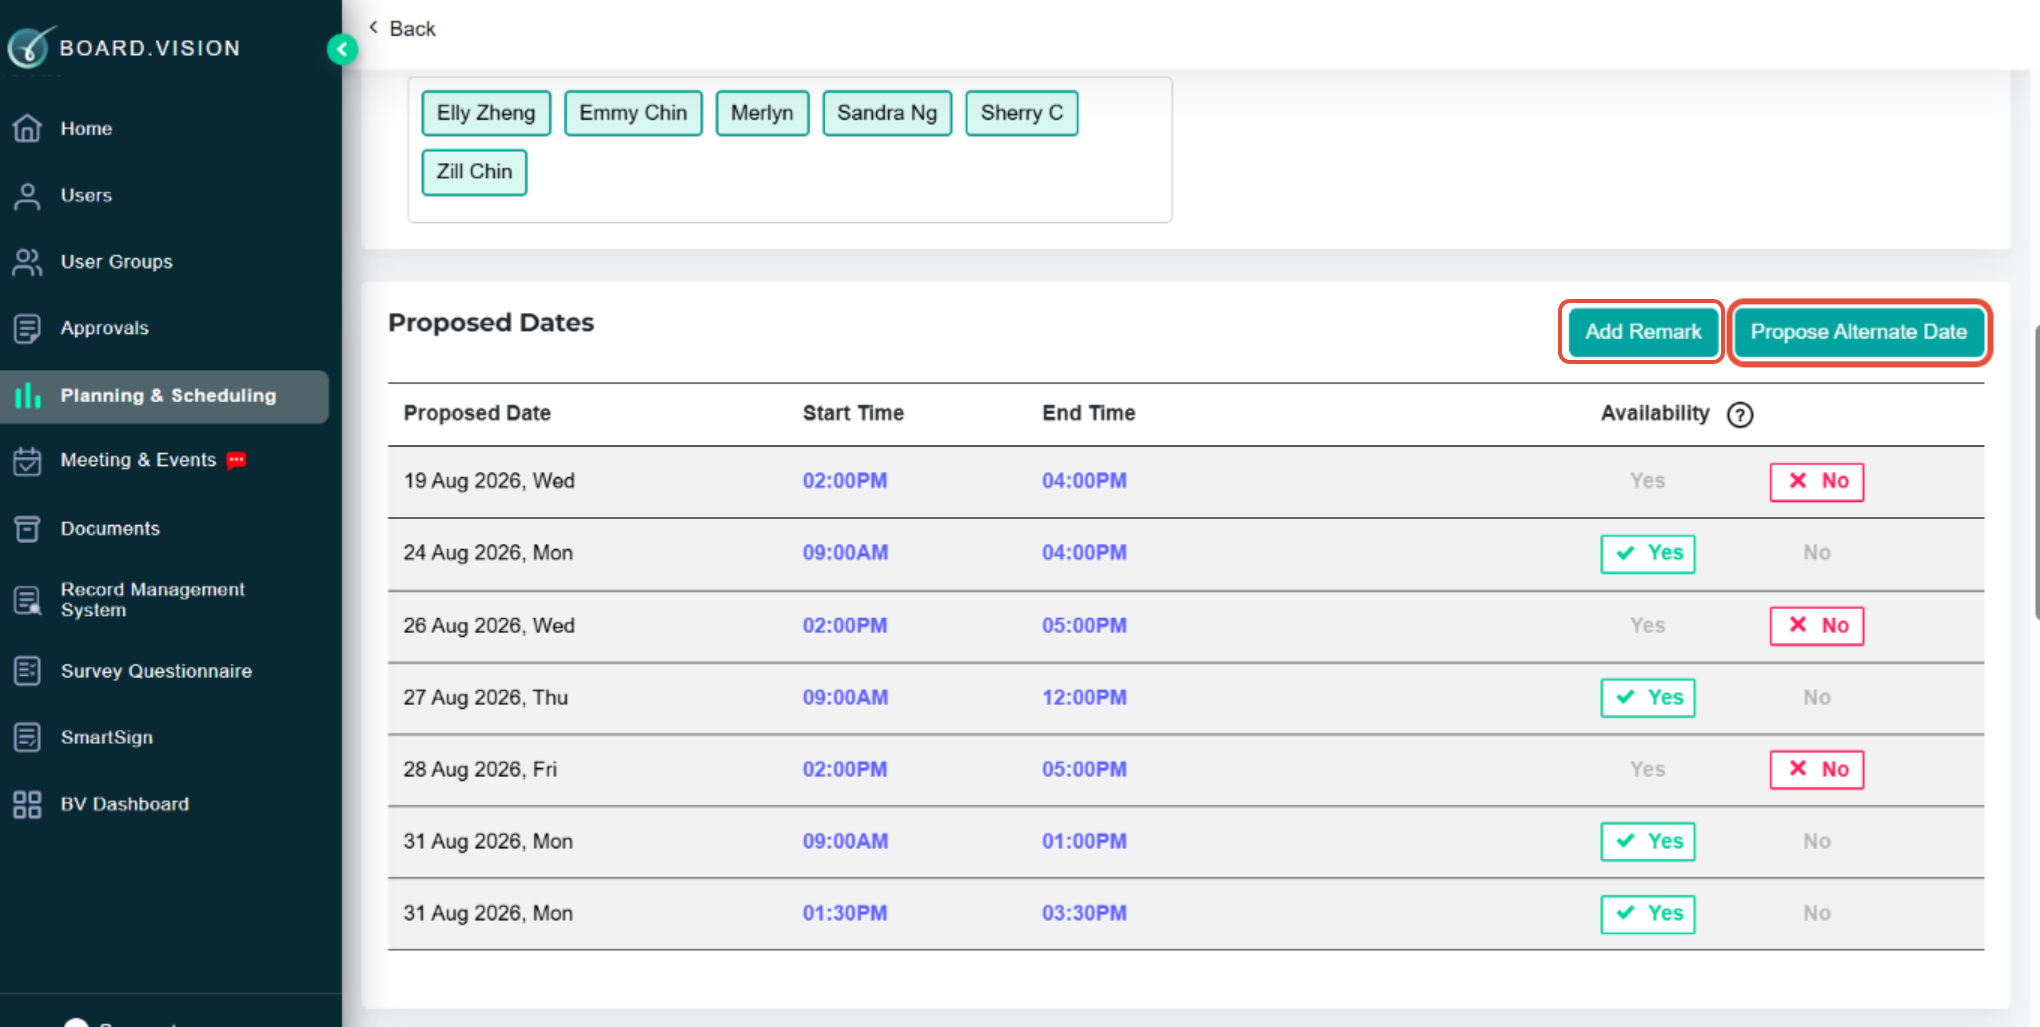
To suggest alternative dates, select Propose Alternate Date. You may propose more than 10 alternative dates. You will also find the Add Remark option if you wish to include any comments or remarks.
 | 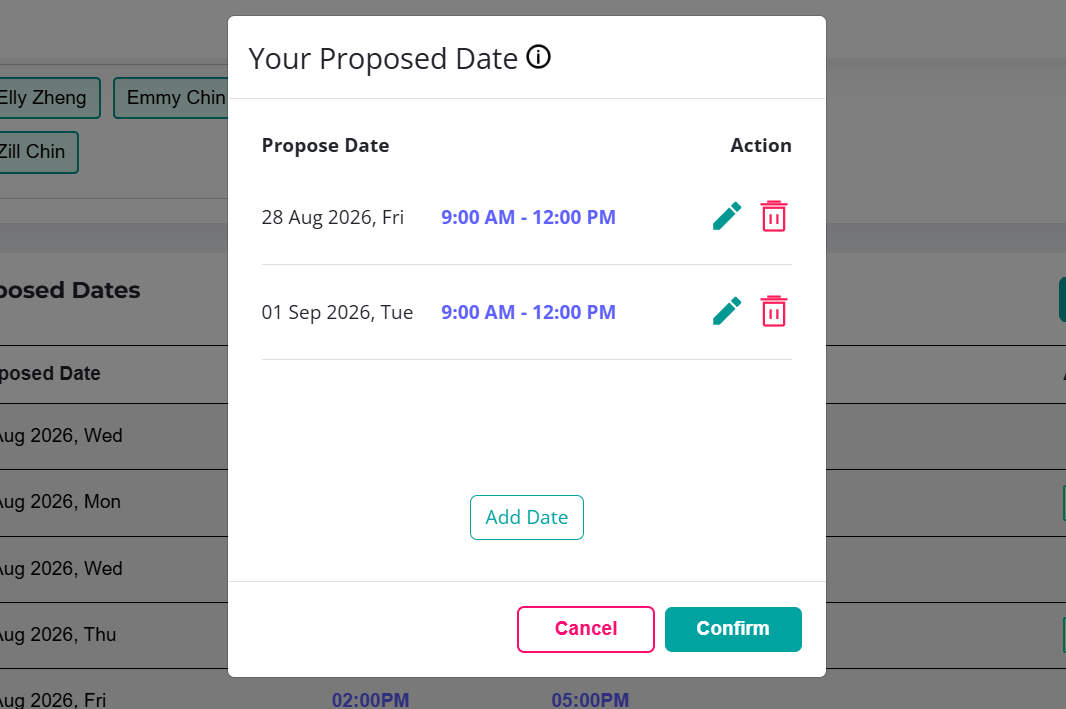 |
You will be able to see the dates you have proposed under the New Proposed Date section.
Note:
- Any dates proposed by other Business Users or added by Administrators will also be displayed in this section.
- Other Business Users will be able to vote on your proposed dates if Administrators enabled the setting.
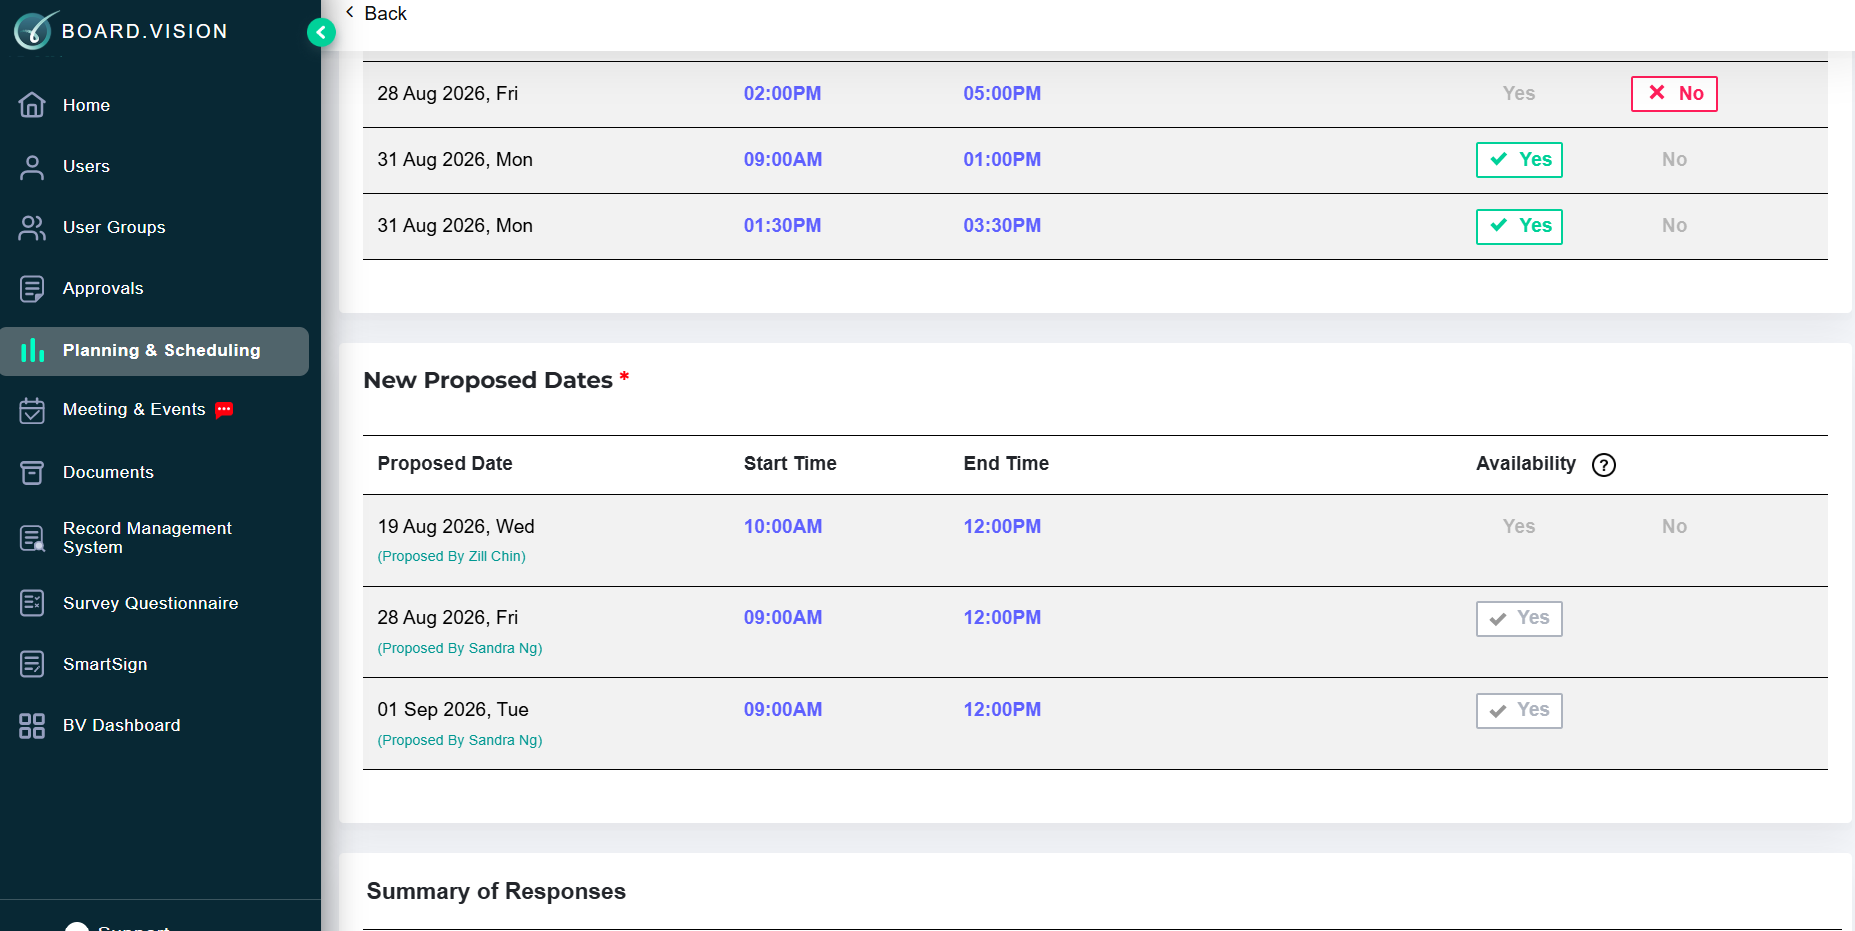
Note: You may amend your votes at any time before the deadline.
7. Viewing Documents
7.1 Searching for Documents in the Record Management System (RMS)
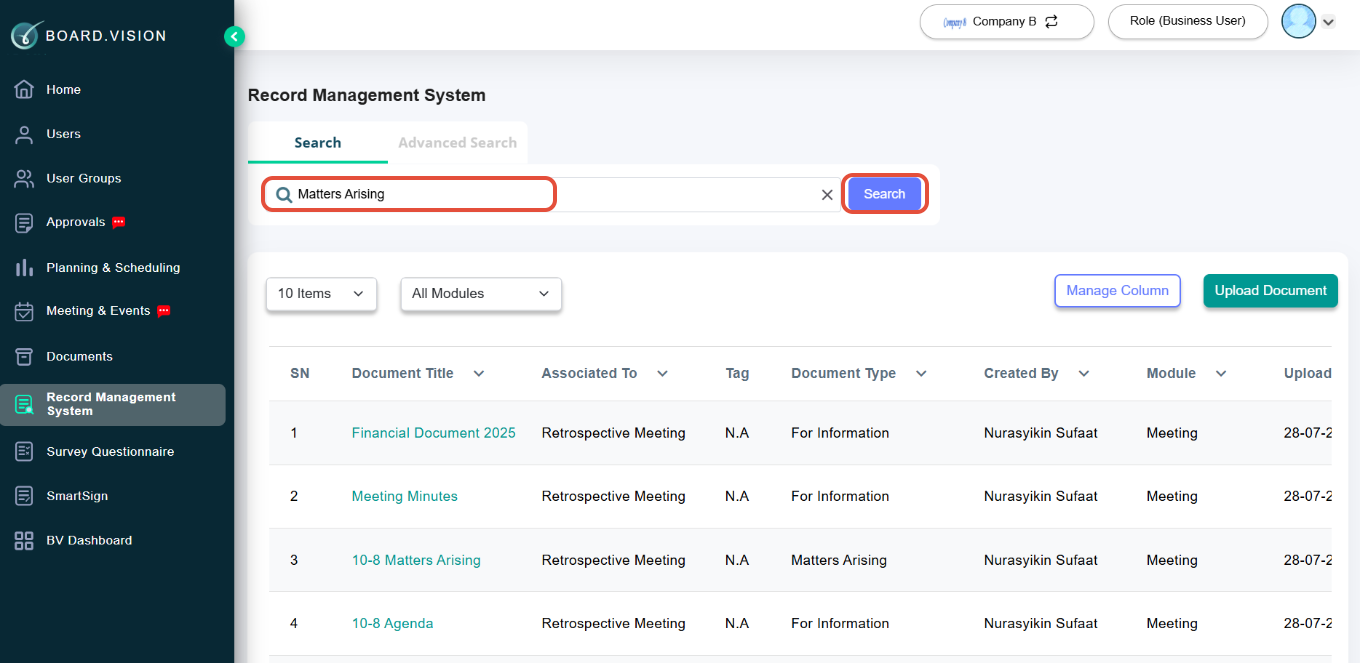
From the left navigation menu, go to Record Management System.
a) Basic Search
Locate the search bar at the top and type in keywords related to the document you are looking for, such as Document Title or "Associated To" and click on "Search".
b) Advanced Search
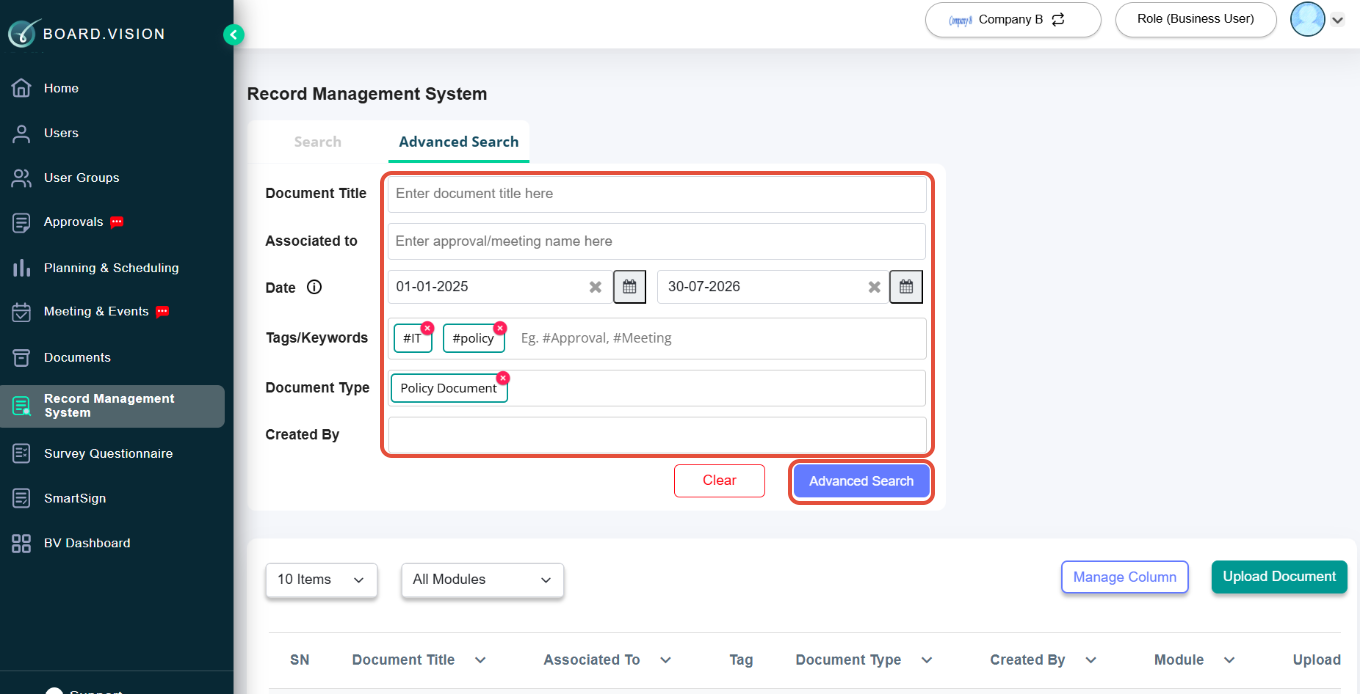
Click on Advanced Search (next to the basic search) enter filters such as:
- Document Title: The name given to the document when it was uploaded.
- Associate To: Indicates which user, user group, meeting, or approval the document belongs to (eg, an approval or meeting name)
- Date: Specify the date range for the documents when they were uploaded to the system.
- Tag: Shows the tags you added when uploading documents via RMS, Approvals, Meetings, or User/User Groups.
- Document Type: Categorises the file, for example: User Document, User Group Document, Approval Document, Meeting Document, Agreements, Financial Statements, etc.
- Created By: Indicates the user who uploaded the document into RMS.
Click the Advanced Search button. The system will display matching documents based on your keywords.
7.2 Upload Documents into the Record Management System (RMS)
Select Single Document or Multiple Documents from the dropdown menu.
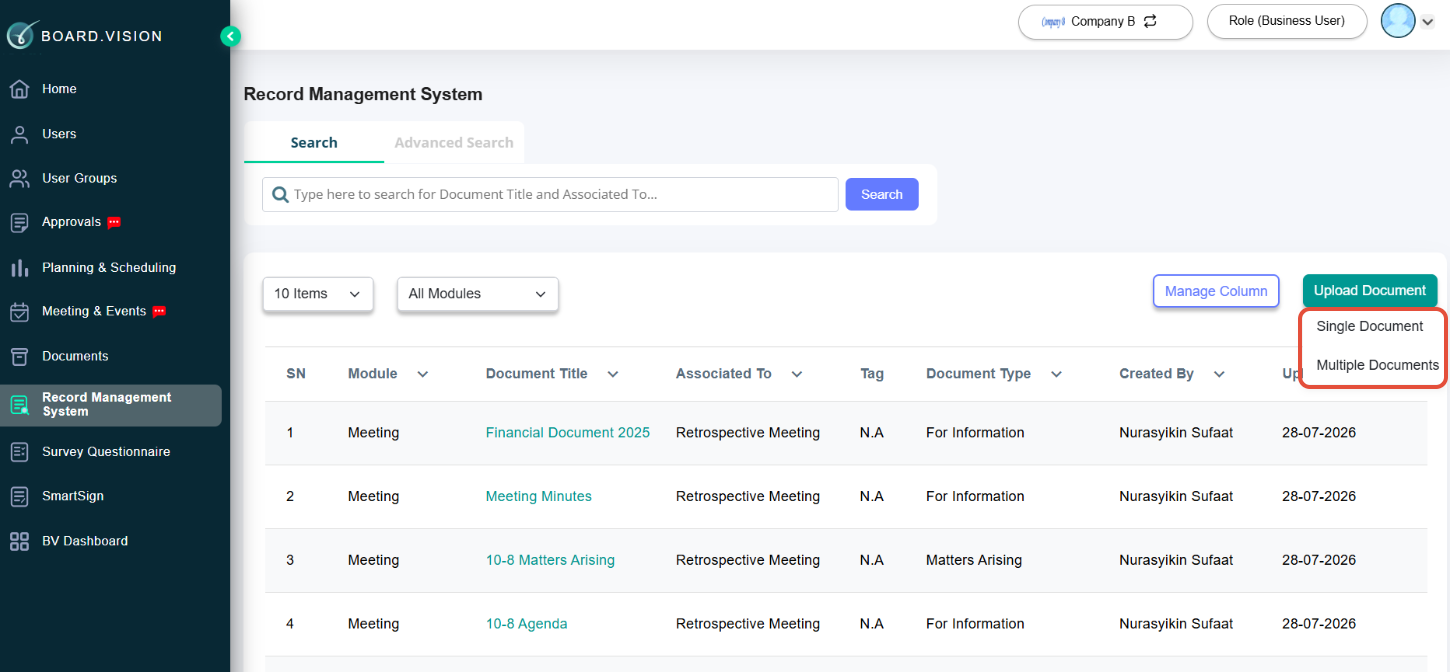
Uploading a "Single Document" or "Multiple Documents"
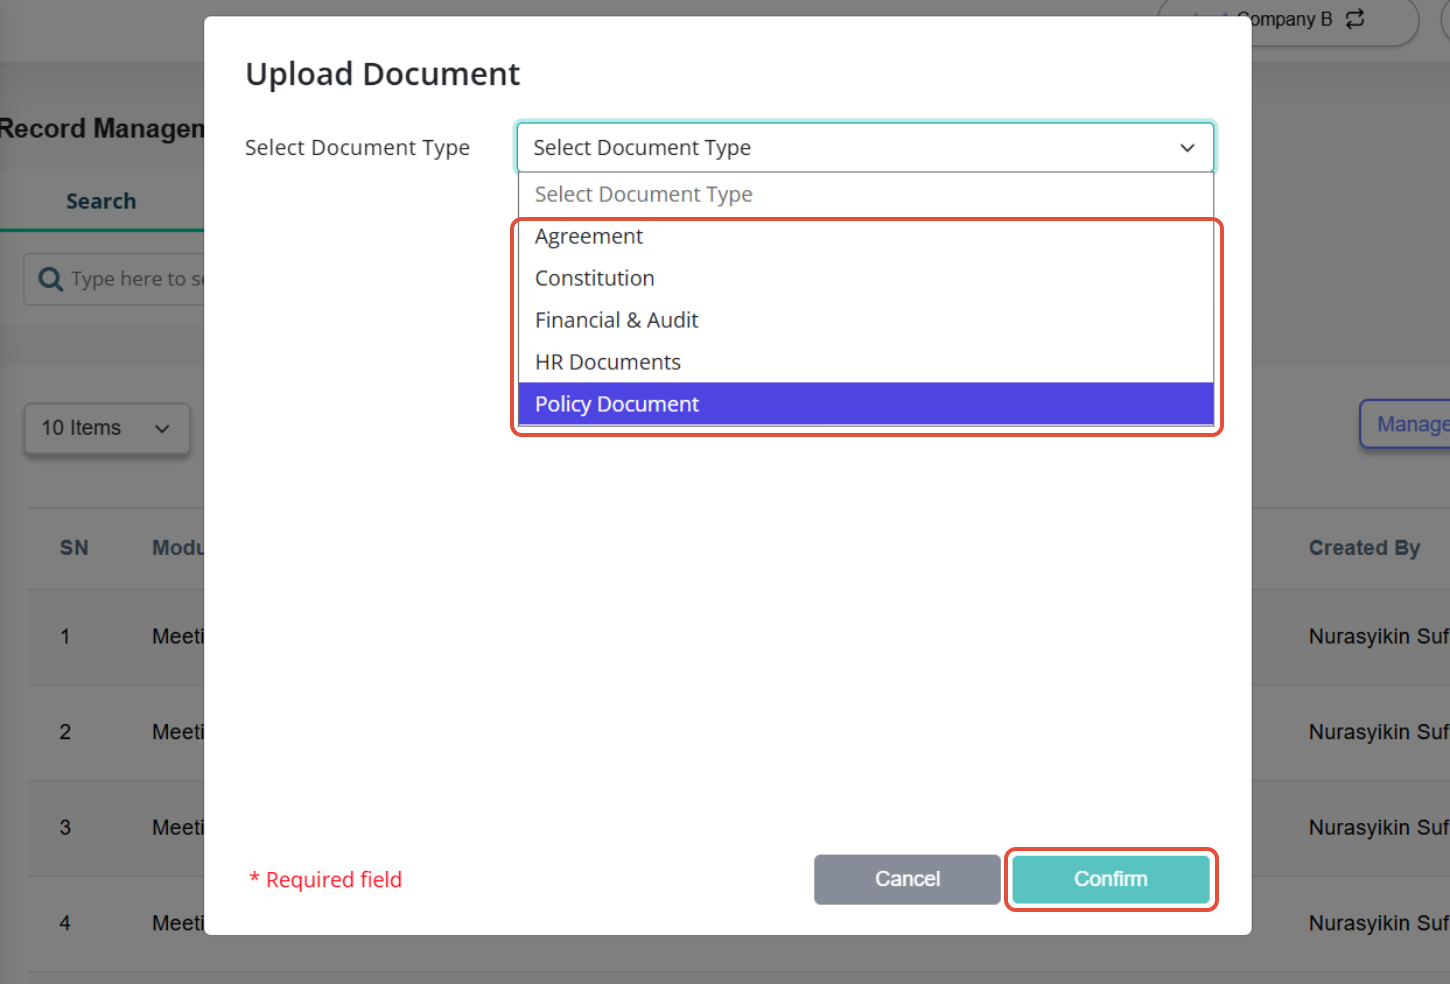
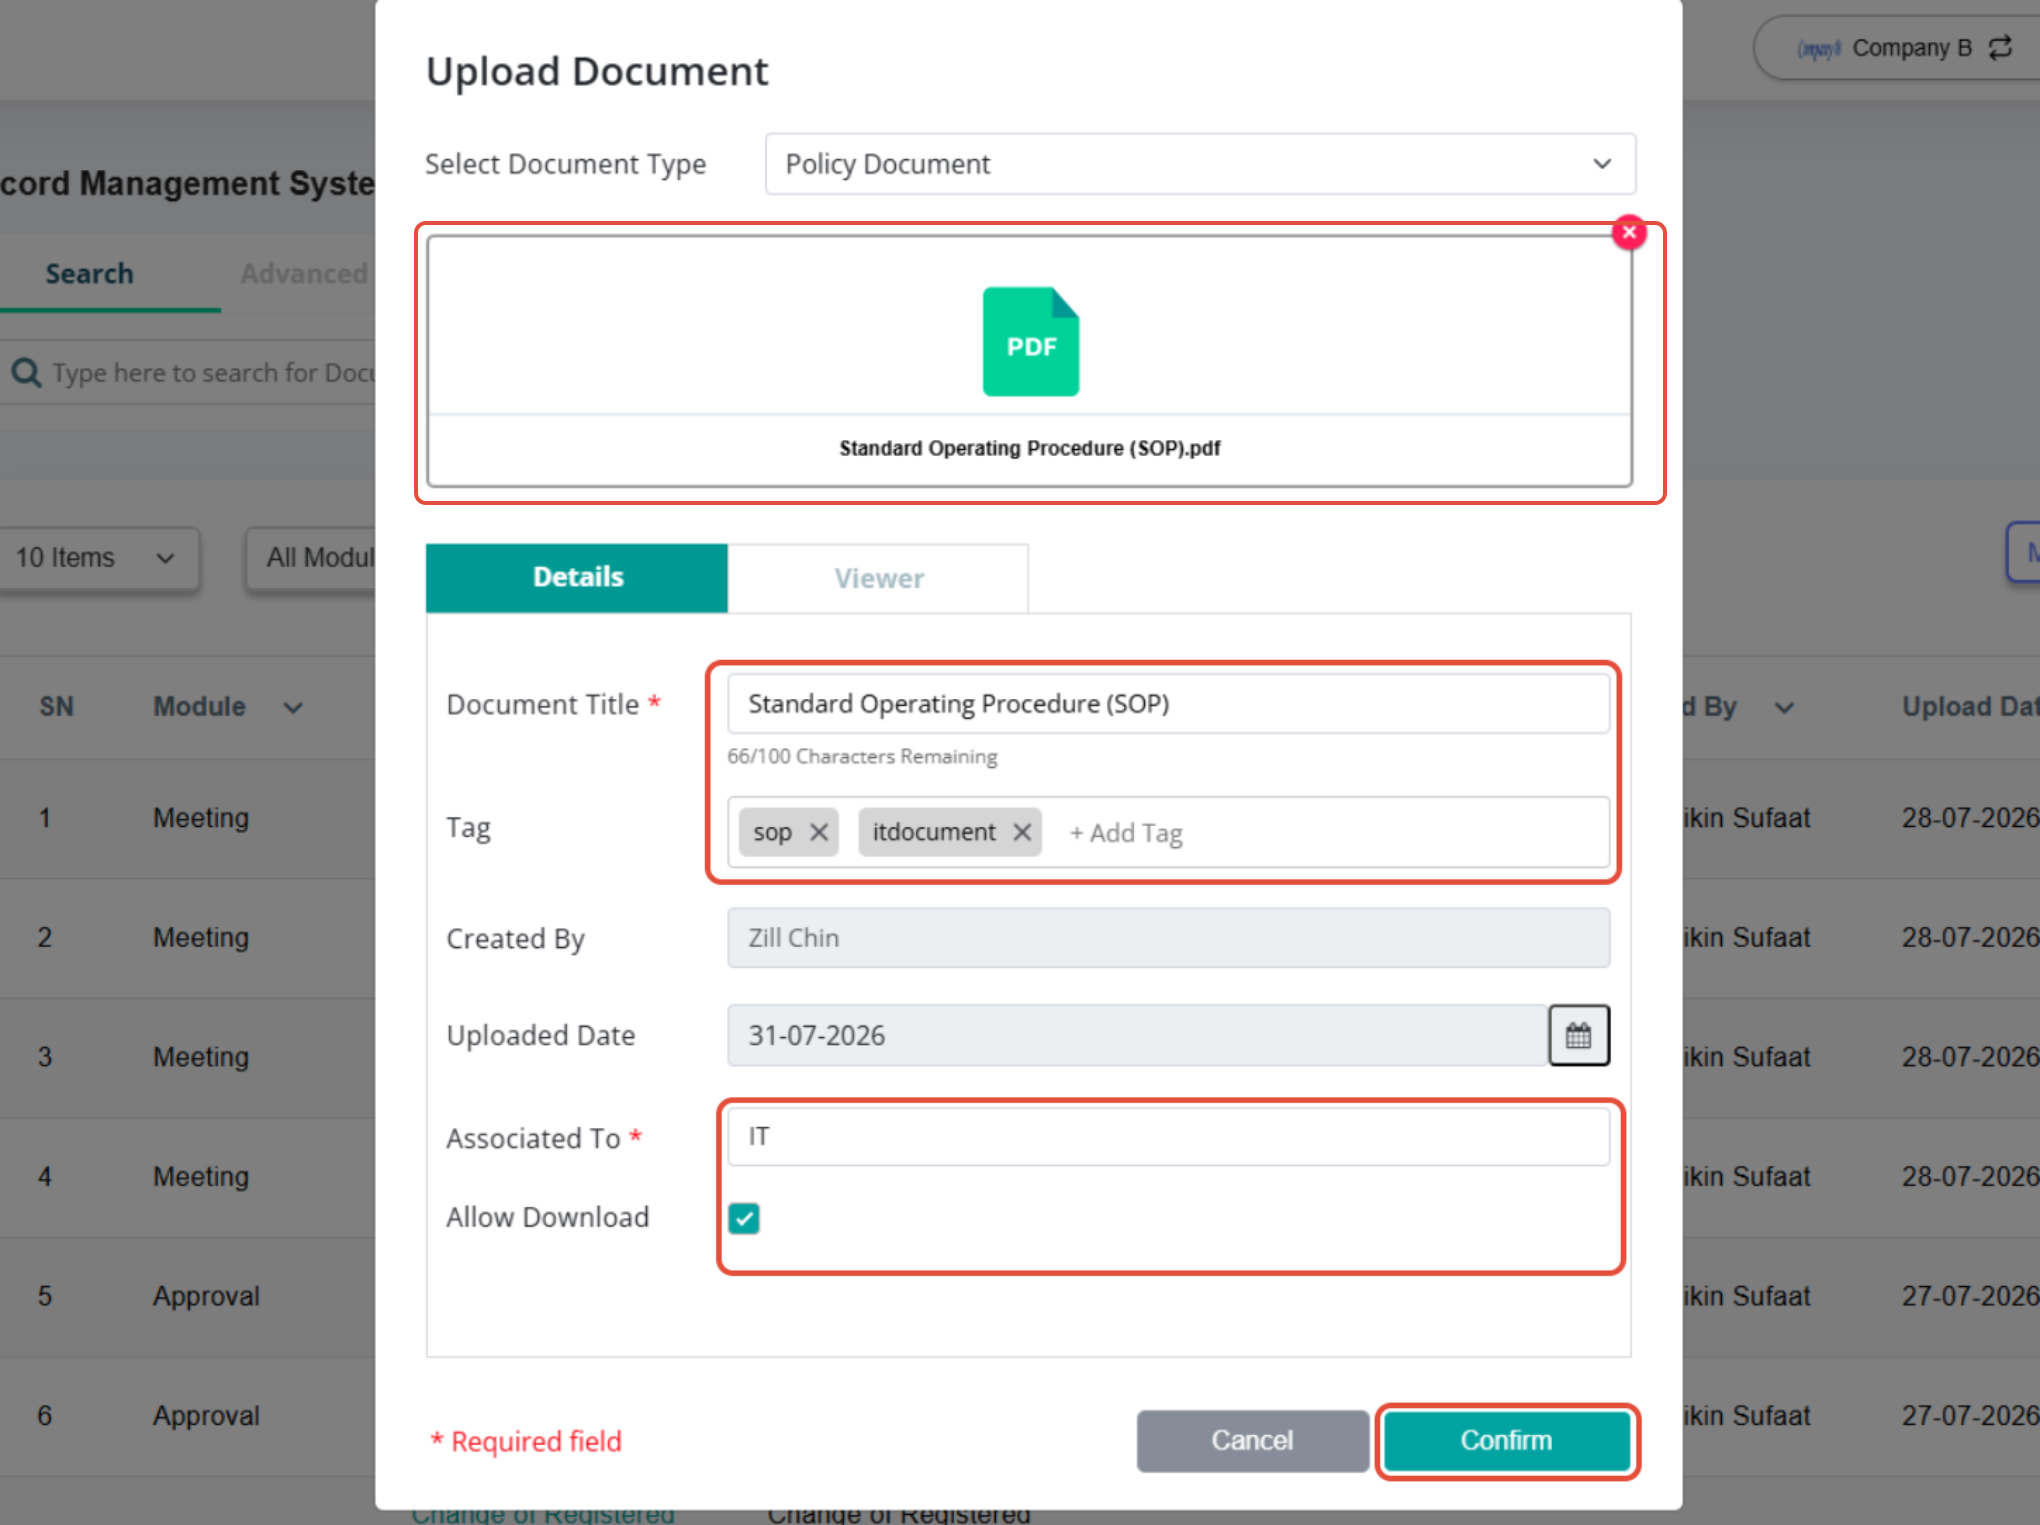
Choose the Document Type from the dropdown and click Confirm.
Drag and drop your file or click Browse to select it.
Update the Title, add Tags, link relevant details under Associated To, and enable the Allow Download option if applicable.
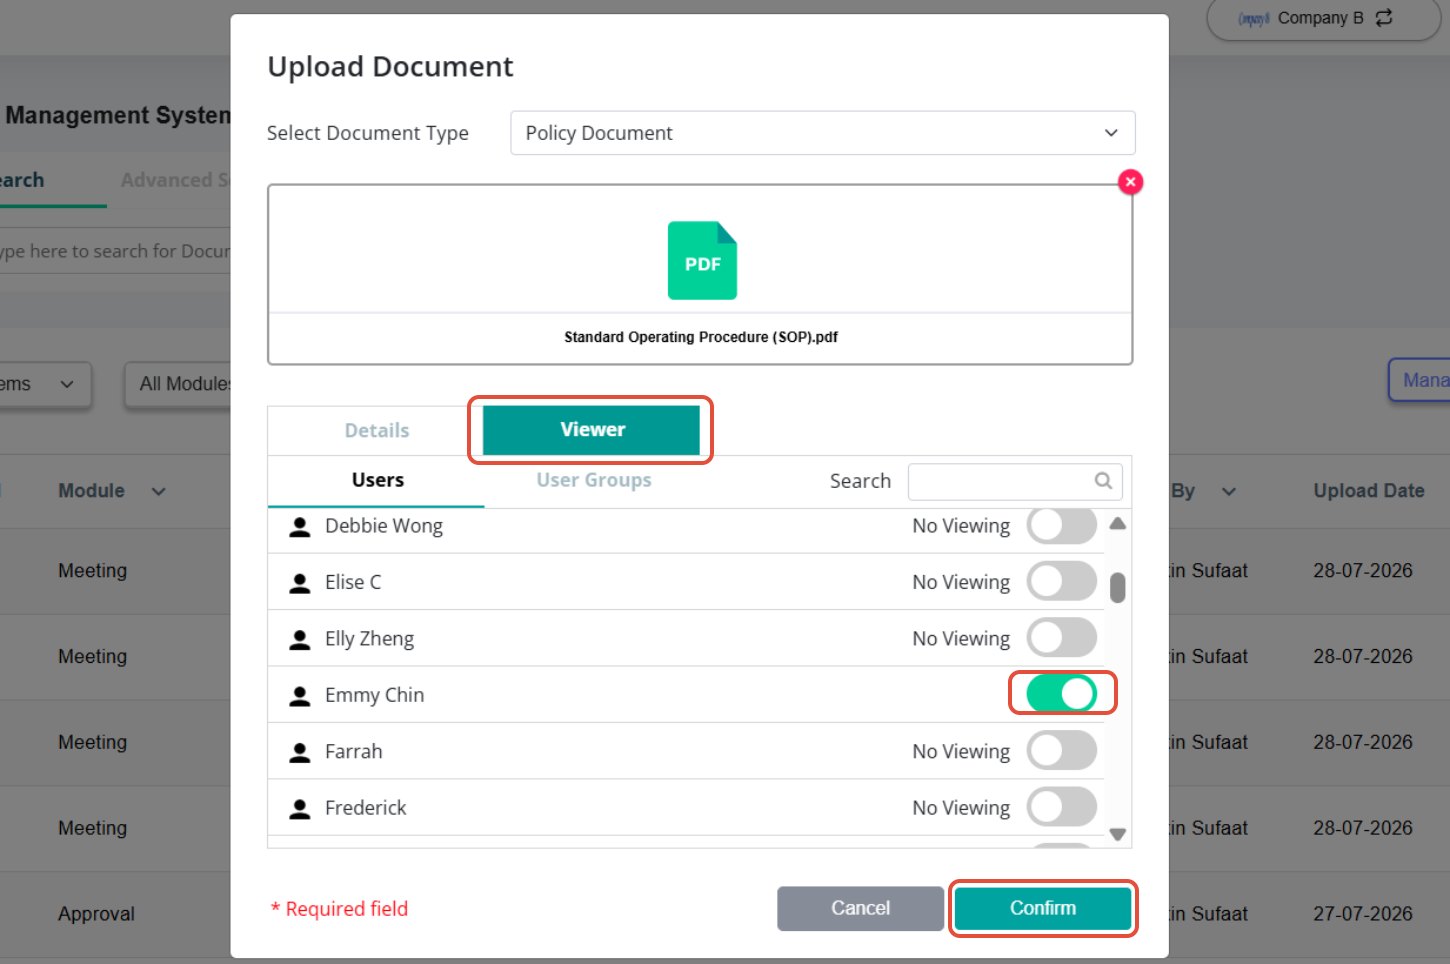
Go to the Viewer tab, select the specific Users or User Groups who should have access, and click Confirm.
Once uploaded, your documents will be searchable within RMS and can be filtered under Others.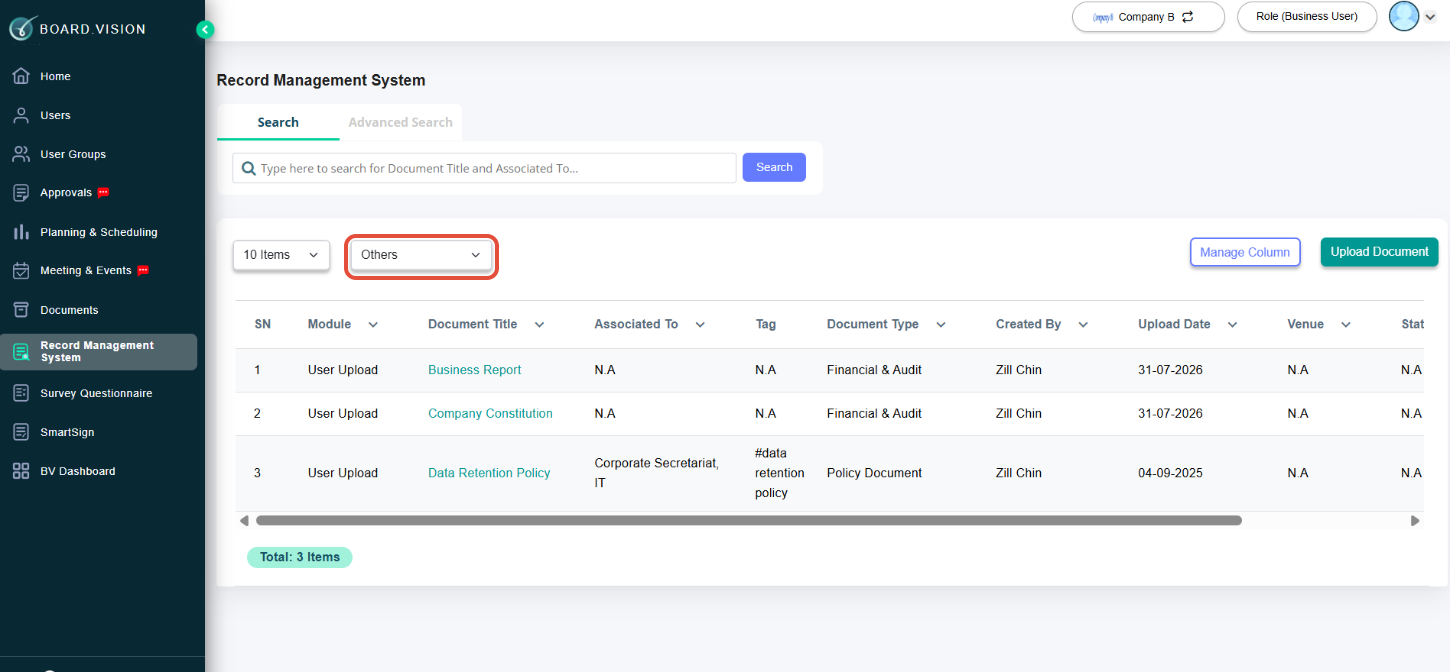
8. Survey Questionnaire
8.1 Respond to a Survey
From your Home screen, select the Surveys filter.
Under To-Do: Survey Questionnaire, click on a survey name.
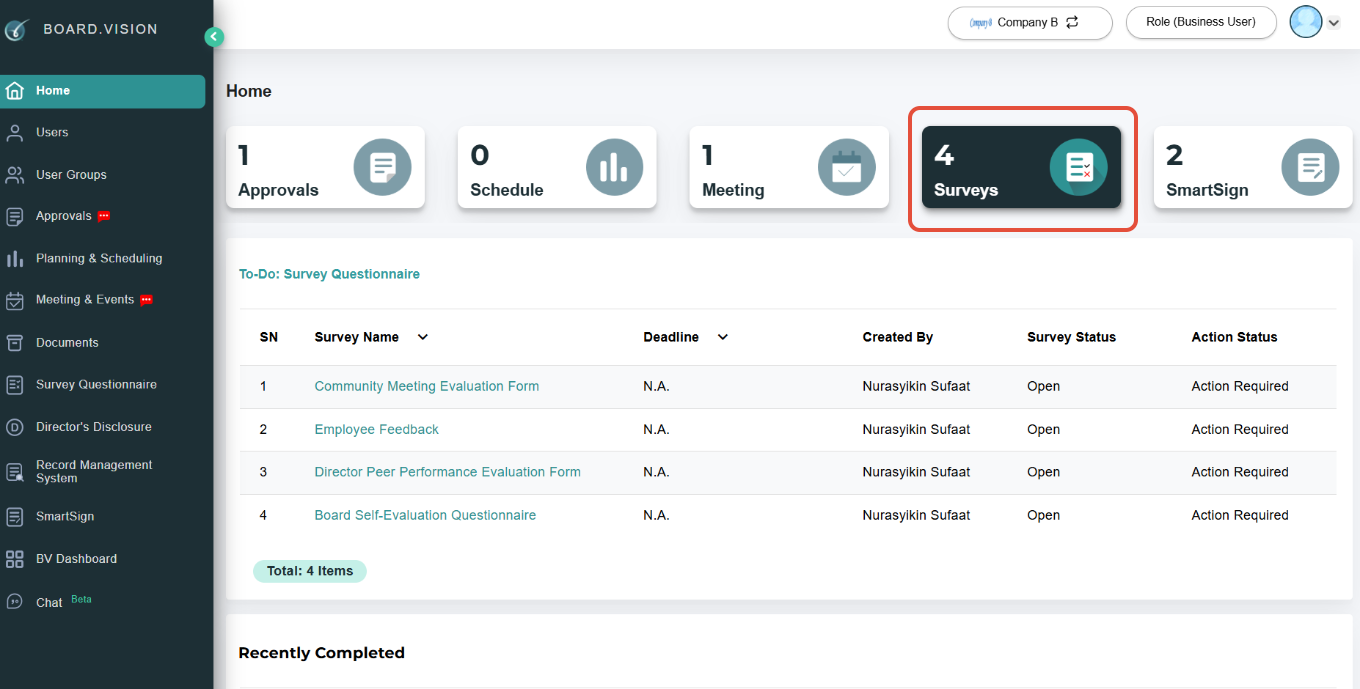
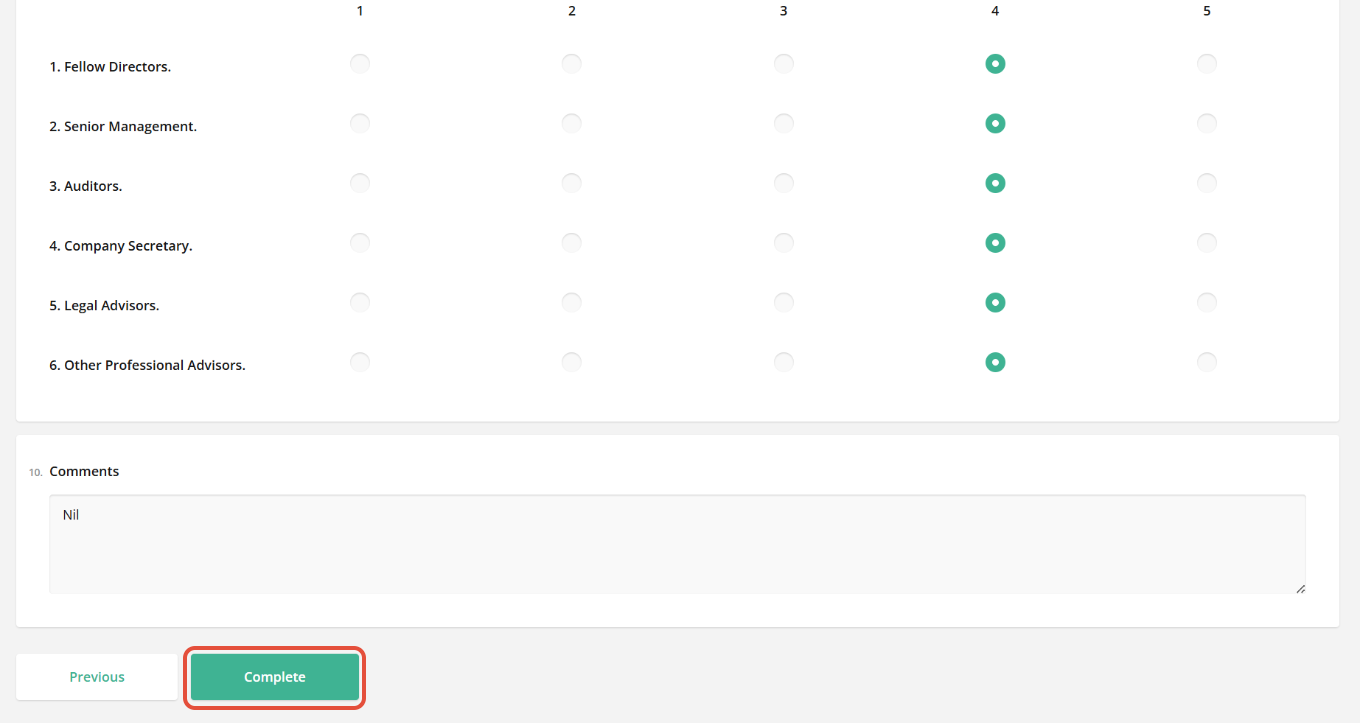
Fill in your answers for the required survey questions and click the Complete button at the bottom of the page to submit your response.
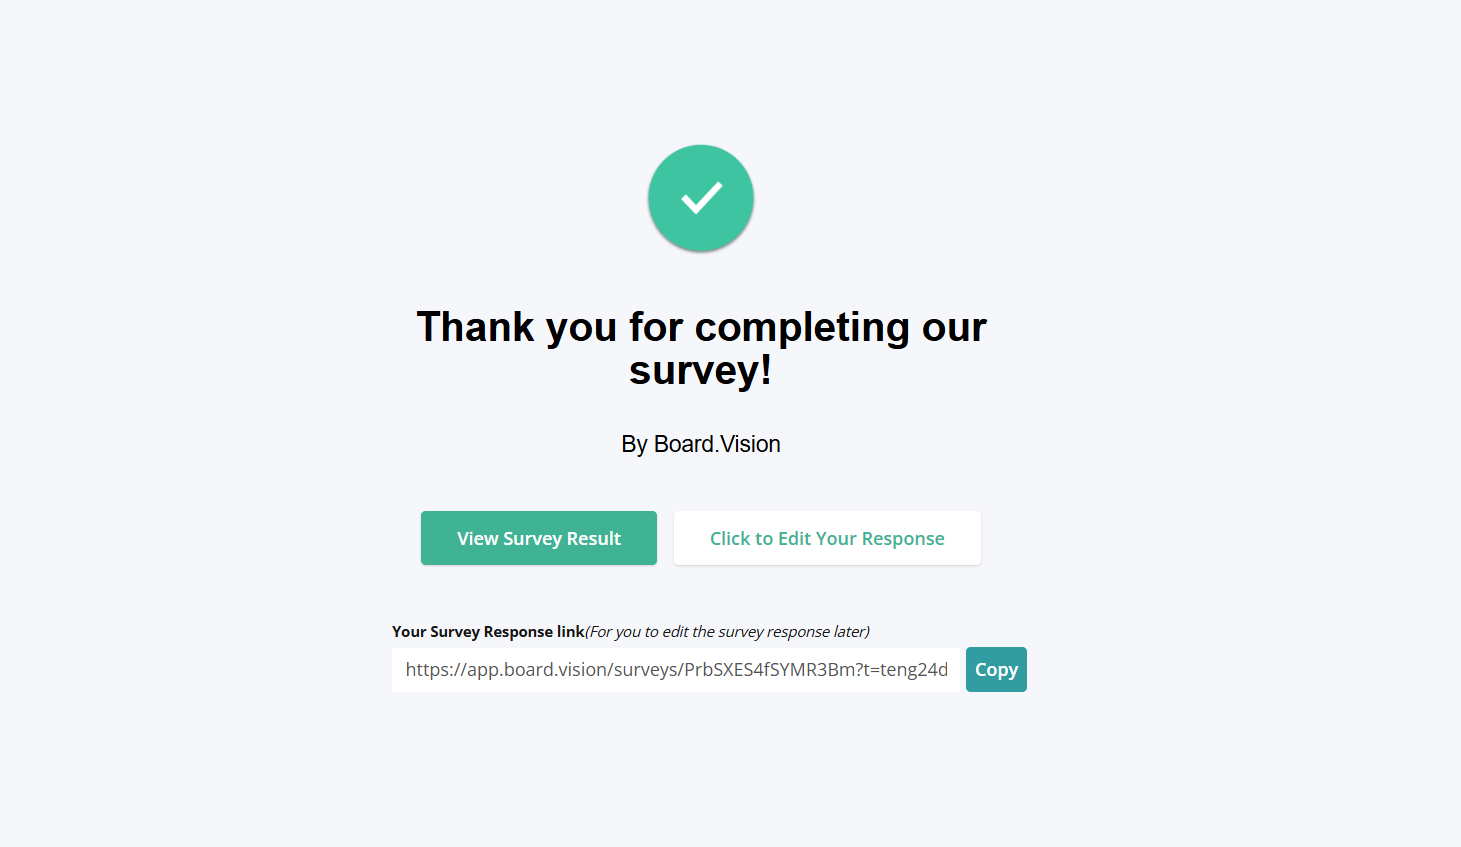
An acknowledgement screen will appear to confirm your submission.
If enabled, you may edit your submitted responses from this screen.
9. SmartSign
9.1 Approve Smart Sign Document
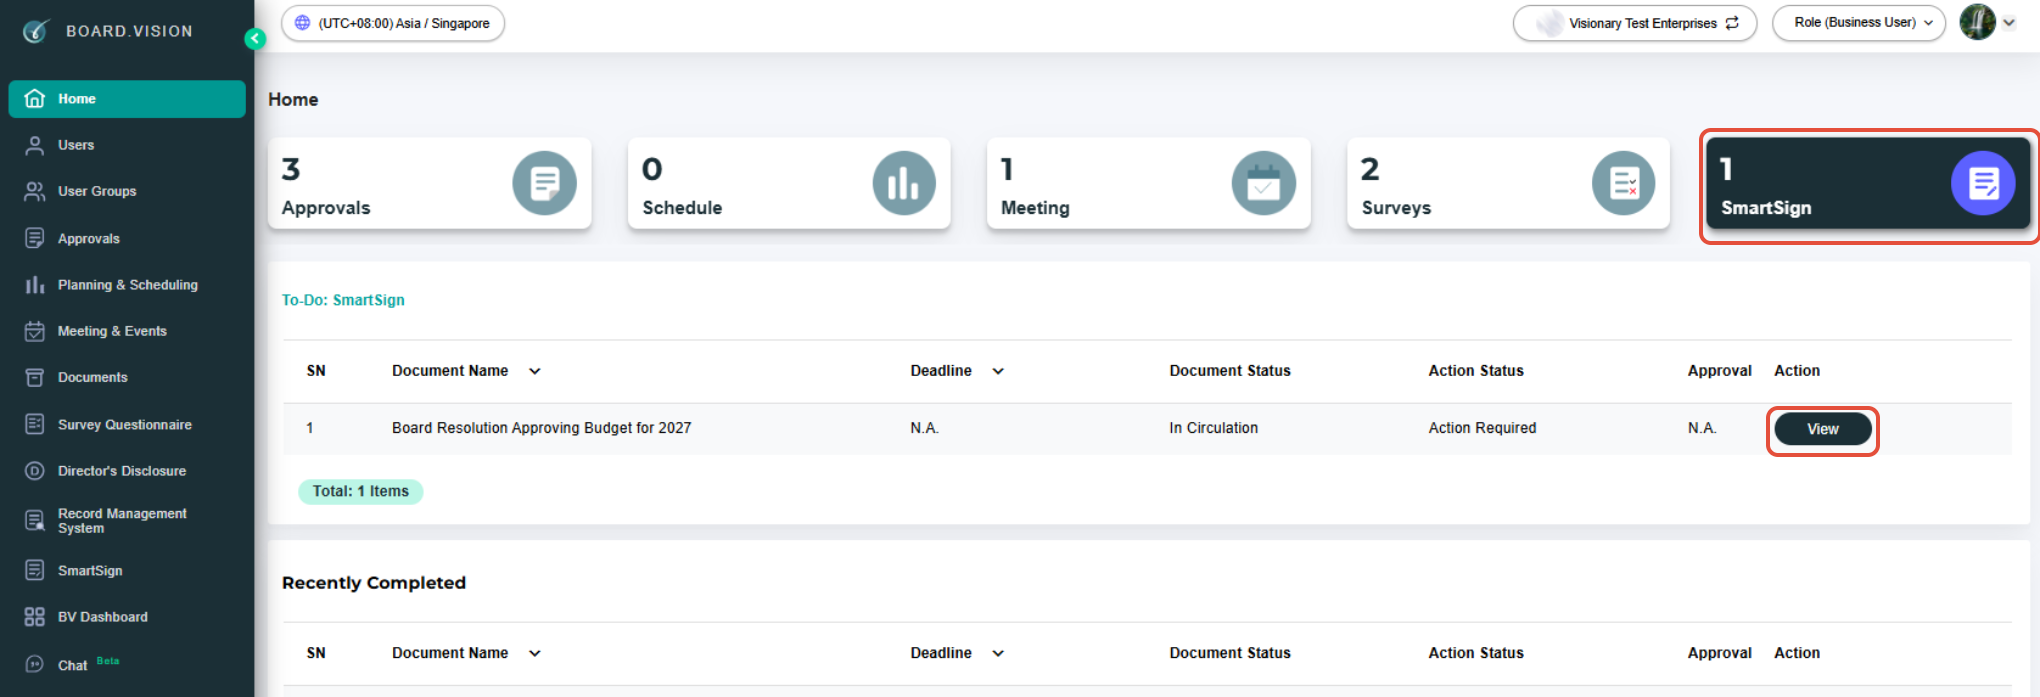
From your Home dashboard, go to SmartSign. Then, under the To-Do: SmartSign section, click View in the Action column.
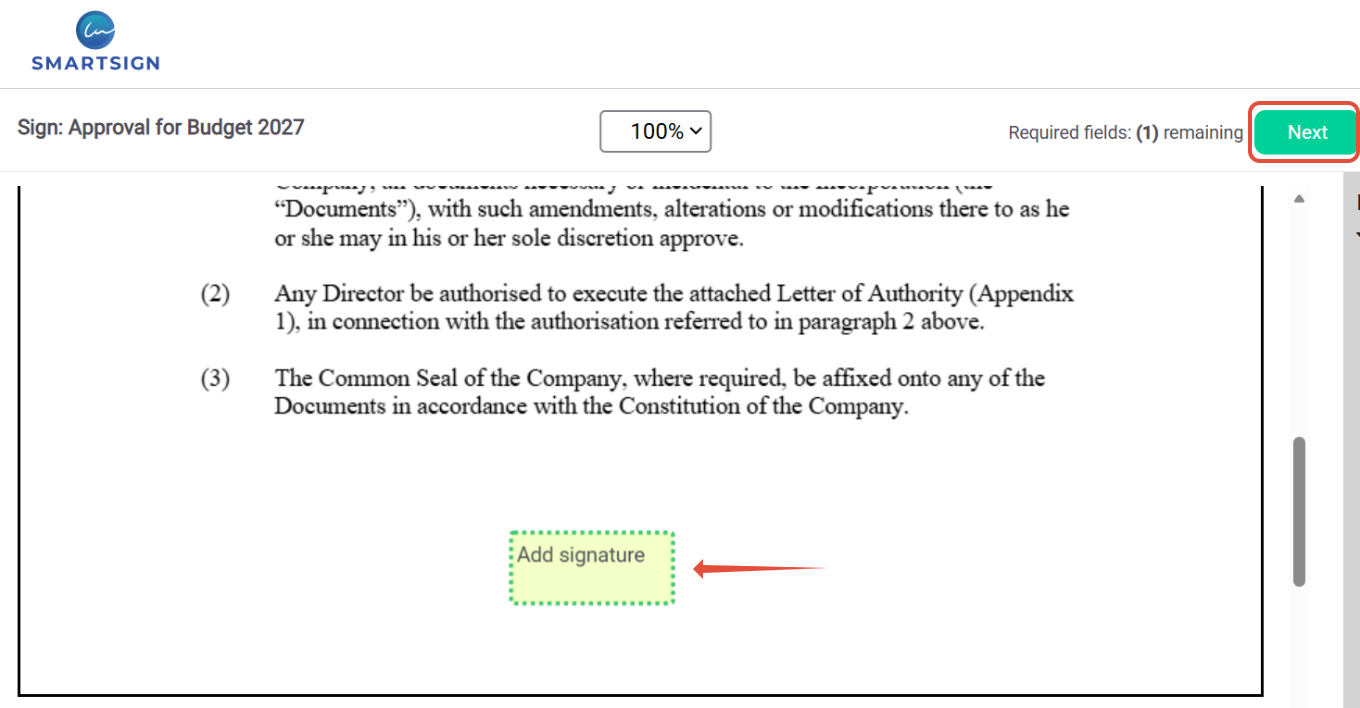
The document will open in a new tab. Click Next, and you will be directed to the field that requires your signature.
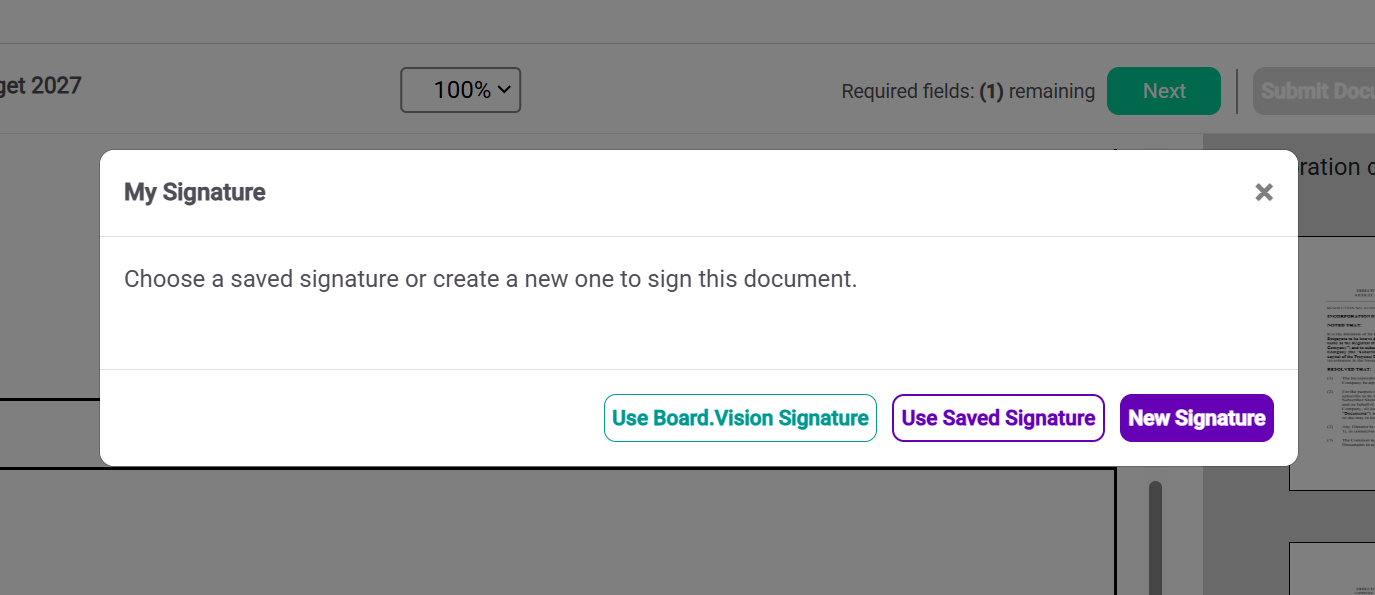
Click Add signature.
Click one of the following options:
- Use Board.Vision Signature – This option will appear if you have saved a signature via Save Signature in your profile settings.
- Use Saved Signature – Allows you to use a previously used signature when signing documents.
- New Signature – Allows you to create and use a new signature.
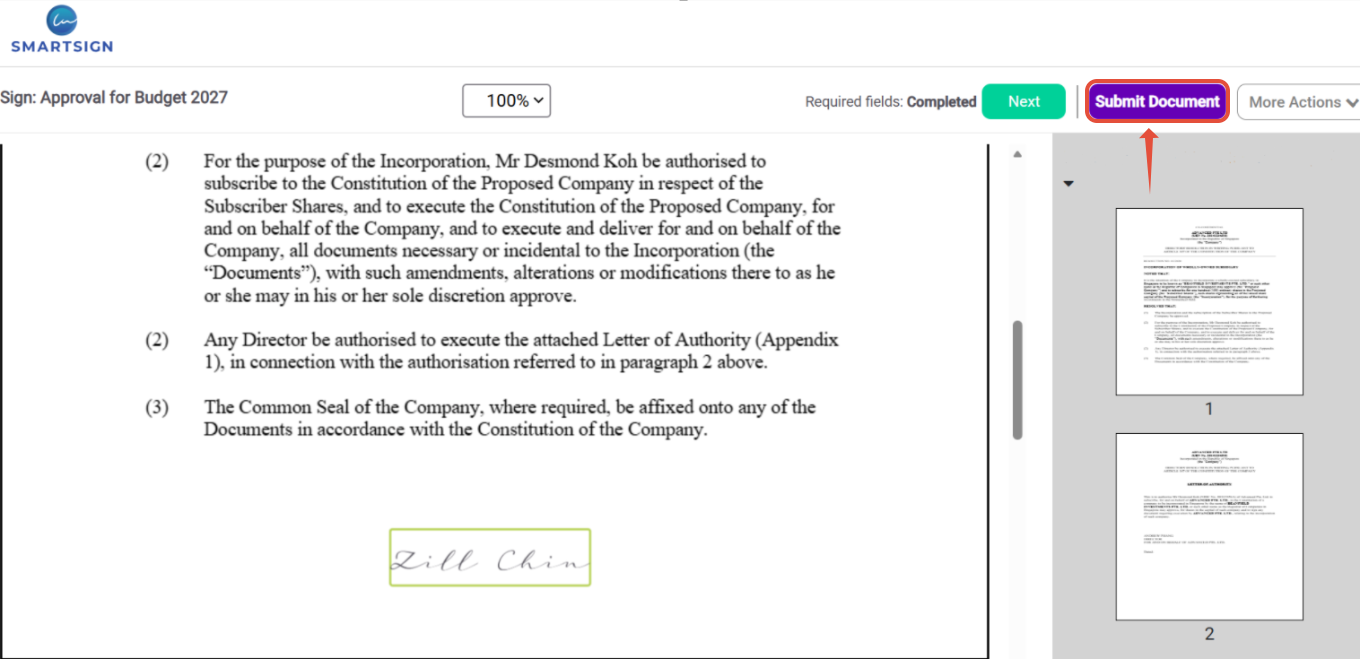
Click on Submit Document.
If you face any issues, please reach out to our Board.Vision Customer Success Team at support@board.vision or +65 6909 7100 and we will be happy to help.
Was this article helpful?
That’s Great!
Thank you for your feedback
Sorry! We couldn't be helpful
Thank you for your feedback
Feedback sent
We appreciate your effort and will try to fix the article